We are often saddened by the poor potato crop. Sometimes your hands give up, you think: why all this, I'd better go to the store and buy what you need. But in the spring, doubts are dispelled, it seems that this year the harvest will certainly please. Try experimenting with growing potatoes from seed. Of course, this process is laborious and lengthy. But the result is worth it.
Content
Is it profitable or not to grow potatoes from seed
Any gardener knows that when growing potatoes, you need to periodically change planting sites. But in small areas this is not possible. As a result, diseases accumulate, harvest volumes decrease from year to year, and after 6 years the variety is almost completely degenerated. And buying new tubers is expensive. What can be done in order to get good yields, but at the same time the cost of seed material could not be affordable? The answer is unexpected for many - grow potatoes from seeds. This method will provide you with an excellent and healthy harvest for at least 5 years.
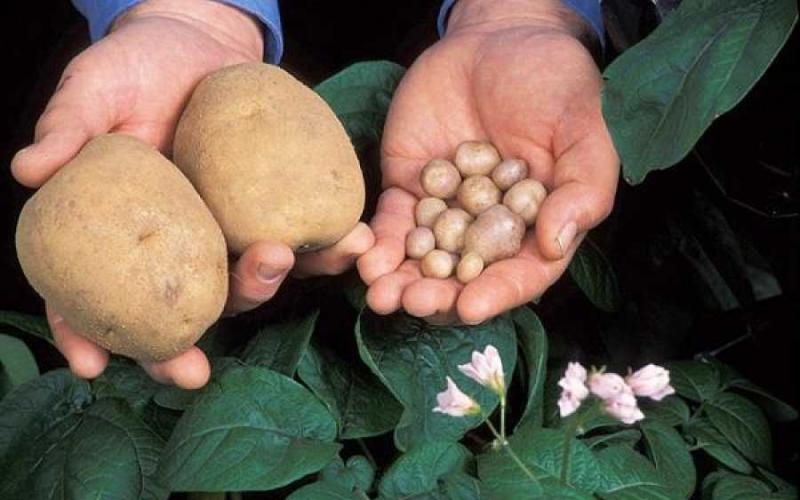
Potatoes grown from seeds are considered super elite, as they are absolutely free from potato infections.
Of course, like any method, the seed potato propagation method has its advantages and disadvantages. Therefore, before mastering a new technique, you need to weigh the pros and cons.
Benefit
This method has many advantages and they are very weighty.
- price - the cost of potato seeds is many times lower than tubers;
- immunity - potato seeds will provide you with absolutely healthy planting material that is resistant to fungi, viruses and bacteria. But the tubers can be infected;
- adaptability - in the process of growth, mini-tubers easily adapt to climatic conditions and transfer this ability to the formed tubers;
- varietal affiliation - when buying seeds, you can be sure that this is exactly the variety that you wanted to purchase. While when buying tubers, a dishonest seller can replace the elite variety with plain potatoes;
- storage - a small bag is enough to store seeds, while tubers need much more space and special conditions;
- shelf life - even if you did not have time to sow the seeds, they can remain viable for at least 3-4 years (but it should be borne in mind that seeds no older than 2 years have the best germination).
disadvantages
The disadvantages of the seed method can be called relative, since they are mainly associated with germinating seeds and caring for seedlings.
- potato seedlings are more whimsical than other members of the Solanov family;
- too fragile seedlings can complicate work during picking and transplanting;
- seedlings grow very slowly, often suffer from "black leg".
Potato tubers for planting are much more expensive than a bag of seeds
How soon the harvest will grow
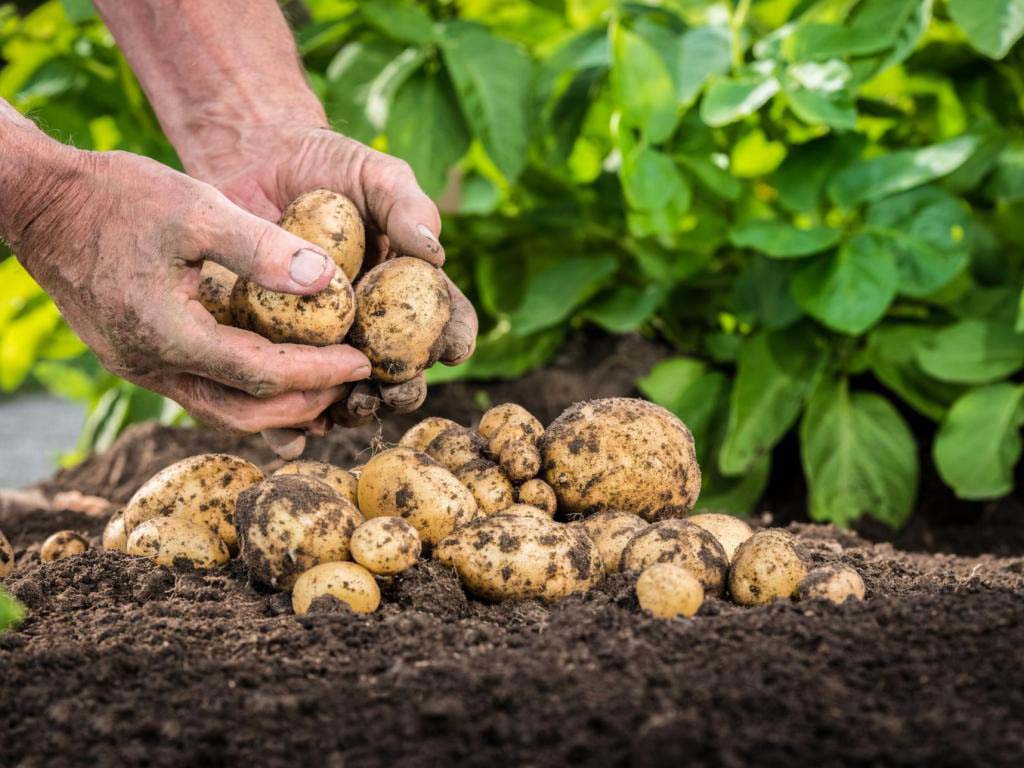
By growing potatoes from seeds, you will not get the harvest immediately. For the first time, you will harvest tubers with an average weight of up to 50 g, which, despite their miniature size, will become planting material for the next year. This potato planting will yield elite tubers that can be eaten and selected for future plantings. For some, this may seem too long and unprofitable. But in the long term, this method gives positive results, and this, you see, is a big plus.
Growing potatoes from seeds is fun, but time consuming
What varieties of seed potatoes are
Not all varieties are suitable for seed production, so if you want to harvest the seed yourself, determine which potato variety grows in your area.
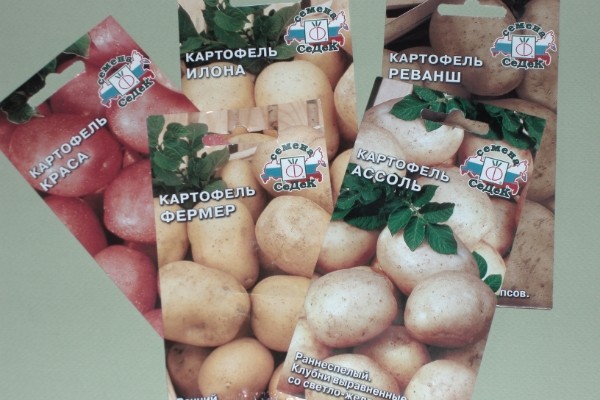
- Early varieties that form a harvest on days 50 - 65 are Ausonia, Triumph, Empress, Milena, Assol, Farmer, Velina.
- Average, harvest time 80 - 95 days - Revenge, Ballada, Krasa, Ilona, Lada f1.
- Late, which can be harvested in 95 - 110 days - Virgo.
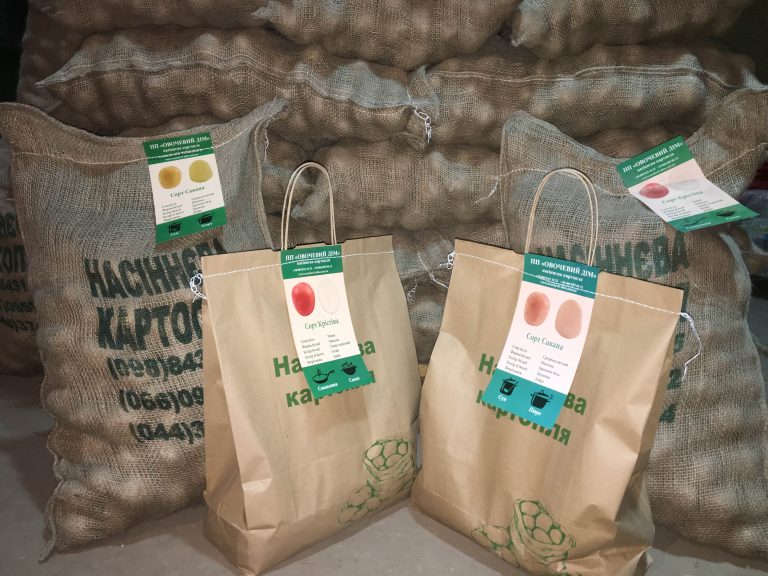
But you can go the easier way and get a bag of potato seeds from the manufacturer in a specialty store.
Not every potato variety can be grown from seeds.
Where are potato seeds, when and how can they be harvested
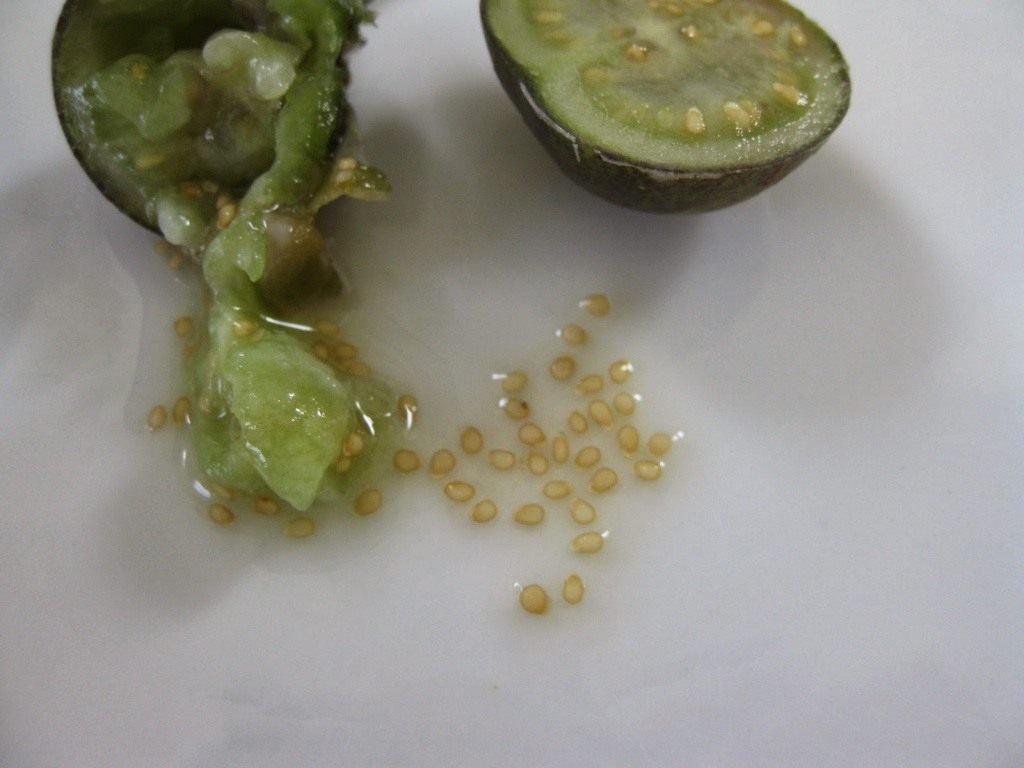
Many gardeners cut off the potato blossom so that the bush does not waste extra energy or use the flowers as medicinal raw materials. But if the potatoes are allowed to bloom, then small green fruits are formed in place of the flowers, somewhat reminiscent of tomato ovaries. They are poisonous, so you shouldn't taste them. If you remember botany, then these fruits are called berries. Depending on the variety, up to a dozen or more fruits can form on the bush. Each contains up to 200 round-oval flat seeds.
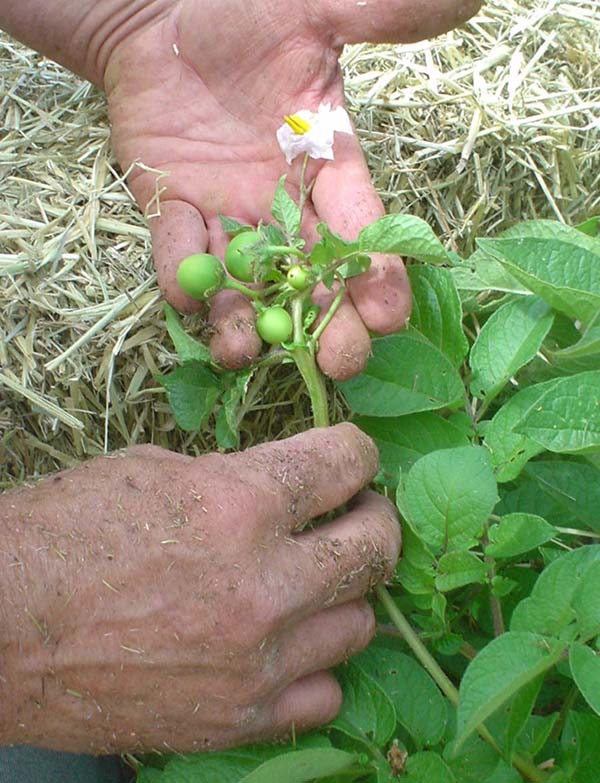
The seed-containing potato berry forms immediately after flowering
You can collect when the bushes begin to turn yellow and dry. To do this, simply cut the berries from the bush. Choose the largest and densest fruit. Still unripe berries ripen perfectly at home. Spread them out in a warm place and wait for the green fruits to soften and turn slightly yellow.
Harvesting potato seeds is pretty easy.
- First, cut the berry in half. Use a knife or teaspoon to remove the seeds from the fruit.

The seed-containing fruit really resembles a green tomato
- Rinse the seeds in water and spread on a napkin until they are completely dry.
- Pour the dried seed into a paper bag and store with seeds of other crops until spring.
Ripe potato seeds that are suitable for planting have a cream or marbled brown color.
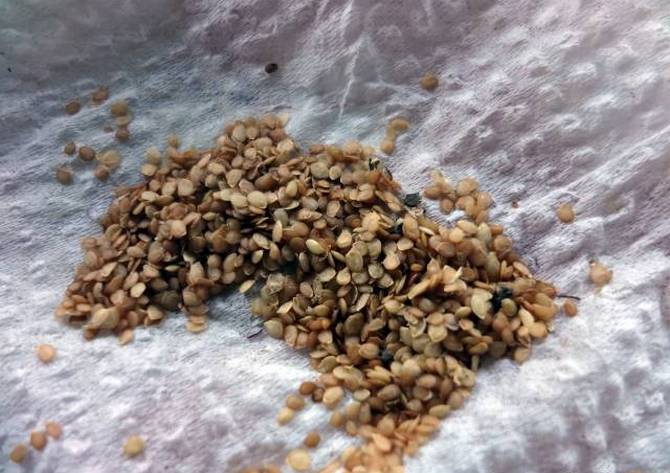
Before storing the seeds, dry them to flow.
How to select and prepare seeds for planting
They check potato seeds for germination in the same way as seeds of other vegetable crops - they are poured into a container with water. Seeds that have an embryo will sink to the bottom, while empty seeds will remain floating on the surface.
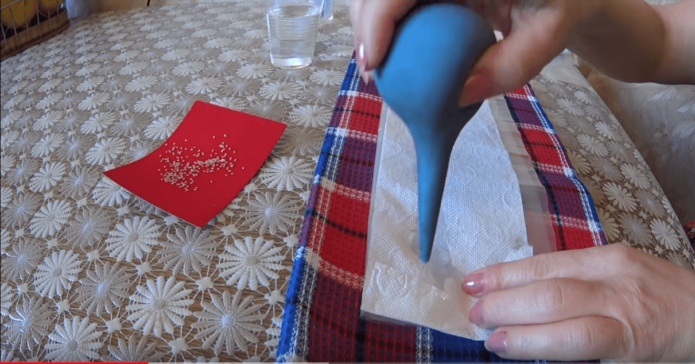
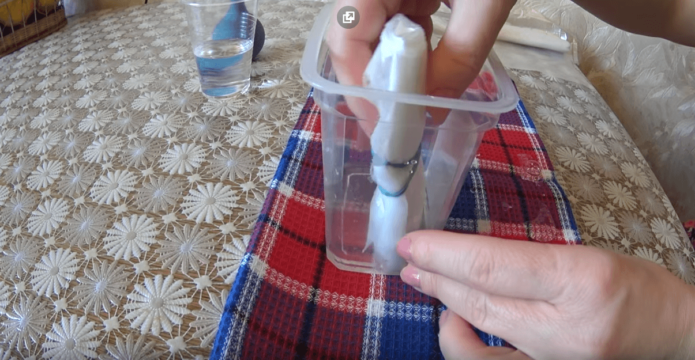
Potato seeds are not very germinating. To increase this indicator, the seed is subjected to soaking. It is not necessary to completely fill the seeds with water. It is enough to dampen the cotton cloth and wrap the seeds in it. In this state, the seed should be from 3 to 5 days, during which it is necessary to moisten the tissue so that it does not dry out.
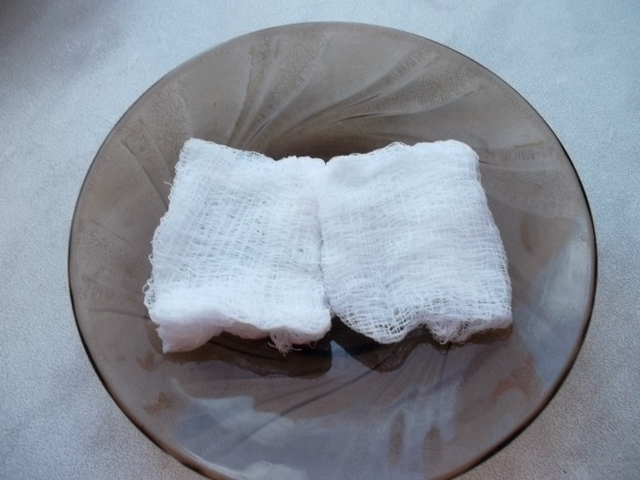
Gauze is not very suitable for soaking small potato seeds, it is better to take a piece of cotton cloth
The following procedures will increase the awakening of seeds before soaking:
- processing with microelements (15 - 20 min);
- warming up the seeds in a humid (up to 85%) chamber at a temperature of 40 - 42 ° C, but not more than 15 minutes;
- hardening - during the day, the seeds are in the room at normal temperature, and at night they are placed in the refrigerator, on the lower shelf.
To prepare seeds for planting, it is enough to use one of the described stimulation and soaking methods.
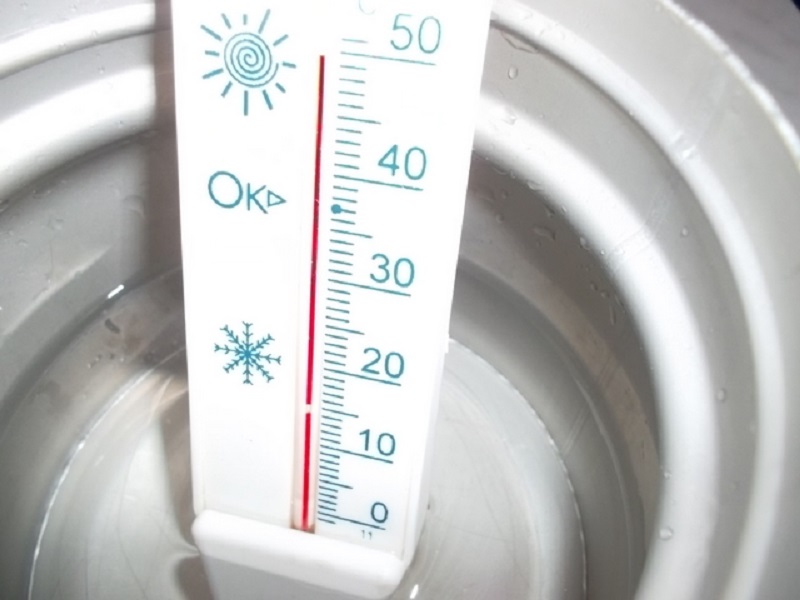
Temperature alternation works well for seed stimulation
Seeds collected with your own hands must be disinfected before starting the preparatory stage. To do this, soak them in a light pink solution of potassium permanganate for 15 - 20 minutes. Then rinse under running water and dry until flowing.
The entire seed preparation course can take up to 10 days, so it is important to accurately calculate the sowing time so as not to miss the deadline.
Growing seedlings
If you are a resident of central Russia, the Moscow region or a region with a short summer, grow potatoes only in seedlings.
Seedling growing methods
There are quite a few ways that you can use when growing potato seedlings. Therefore, we will consider only those that are most popular.
Seedling box
This method is considered the most traditional. Using his example, we will consider all the nuances of growing potato seedlings from seeds.
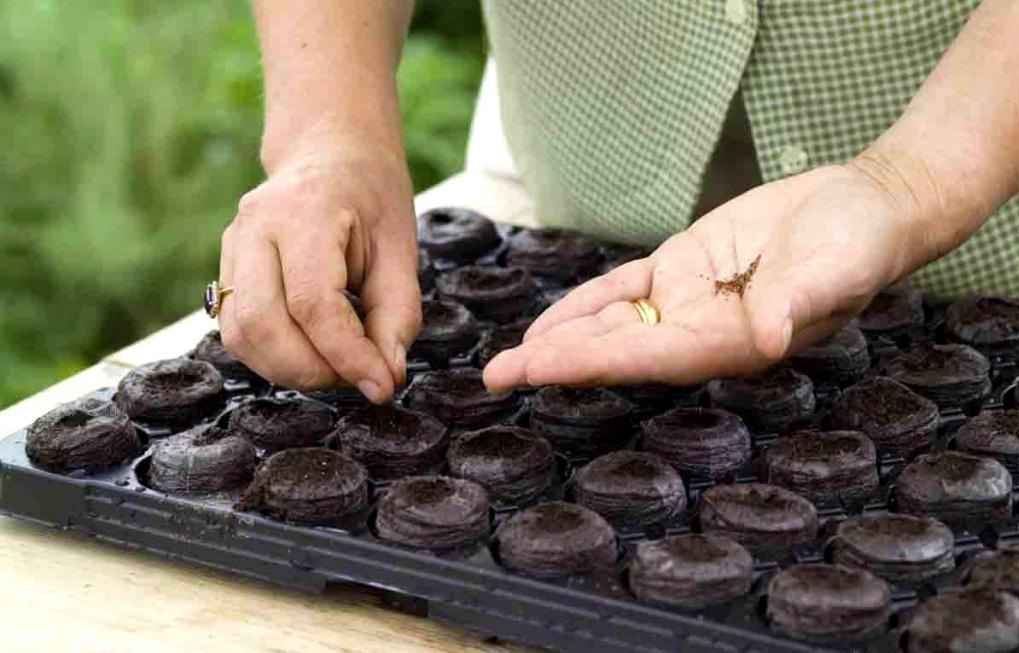
Sowing is carried out from late March to early April. If you purchased a bag of seeds, then be guided by the dates indicated on it, since different varieties may have slightly different sowing dates.
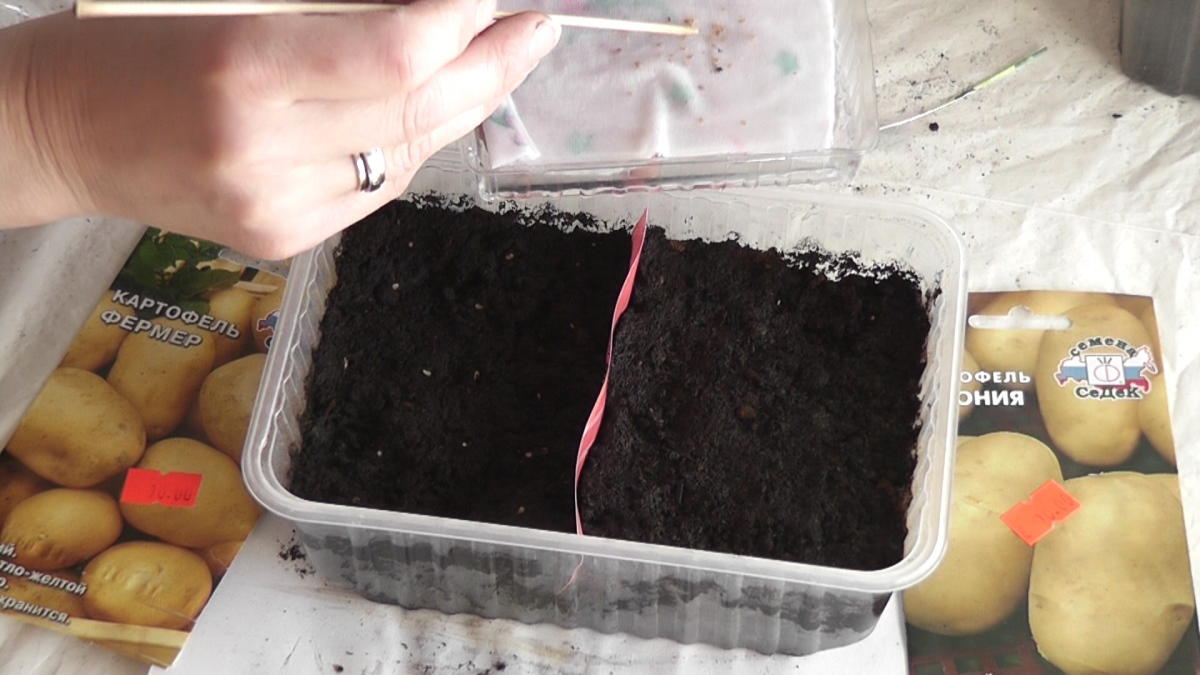
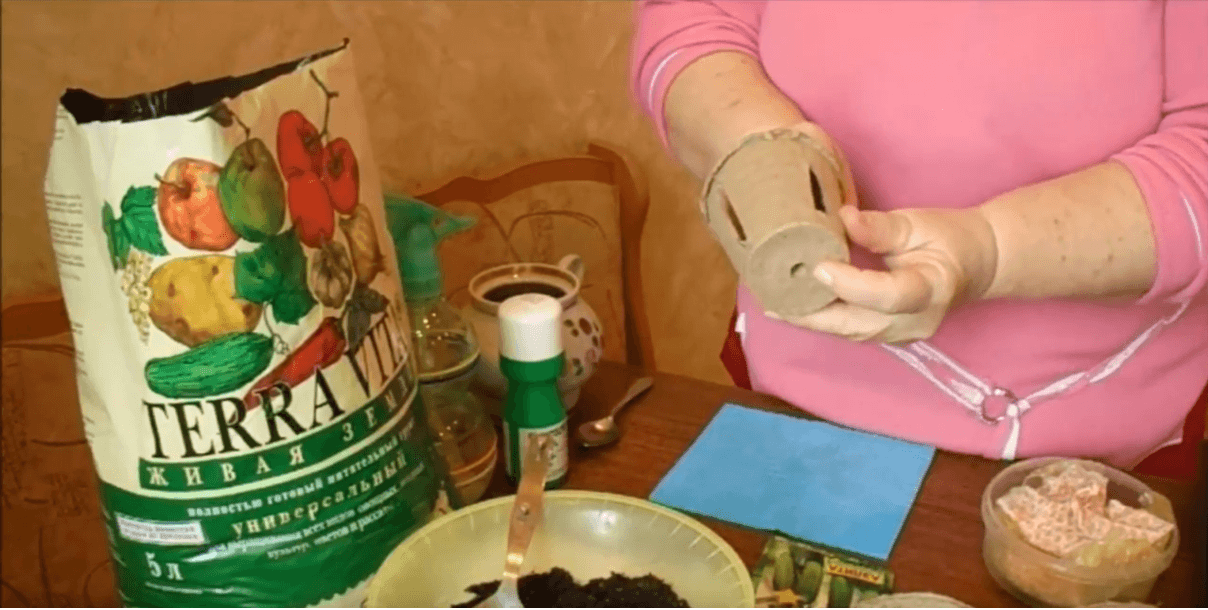
For growing seedlings, prepare plastic or wooden boxes no more than 10 cm high. The main thing is the presence of drainage holes at the bottom. The sowing soil must have good looseness. The soil can be purchased, but you can also make it yourself. To do this, mix:
- 1 part of black soil or other fertile soil;
- 4 parts of grated peat;
- 1 part coarse sand (optional, but desirable)
Vermiculite can be used instead of sand
Do not forget to disinfect the soil well before planting. You can spill it with a dark solution of manganese, steam it in a water bath, or fry it in the oven (just, please, do not try to fry the soil in a skillet on the stove). And one more tip - be sure to sift the soil through a sieve with large meshes to exclude large fractions that can injure the delicate roots of potato seedlings.
The planting process is the same as sowing any other seeds.
- Pour a layer of expanded clay (or other drainage) into the box so as to close the bottom of the container.
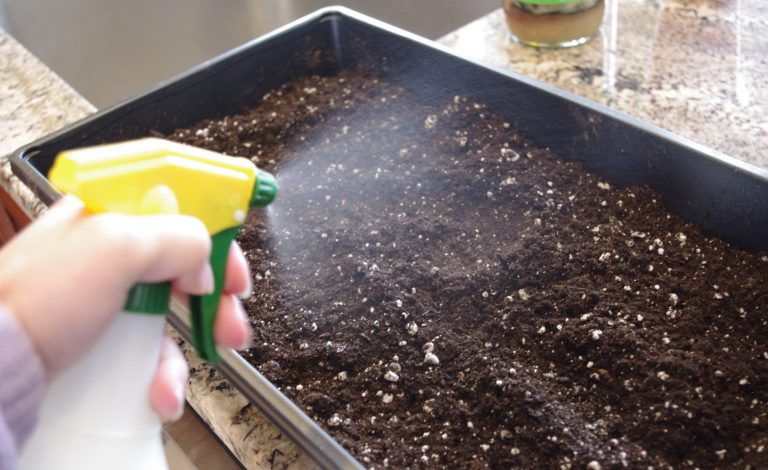
- Pour the soil mixture on top. Moisten well.

Moisten the soil before sowing seeds
- In wet soil, use a ruler to make rows. The distance between them should be about 10 cm.
- In rows, carefully so as not to break the sprouts that have appeared, lay out the sprouted seeds, leaving 5 cm between them.
- From above, the planting grooves can be sprinkled with sand or the remaining soil. Sowing depth - 0.5 cm.
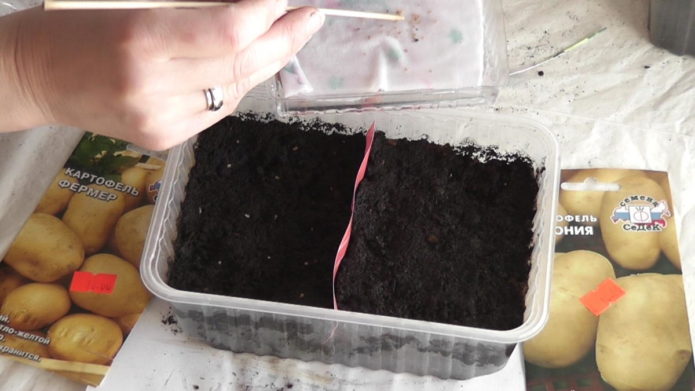
When sowing potato seeds, it is important to keep the distance
Some potato growers, given the fragility of potato seedlings, advise sowing seeds not in soil mixture, but in small sawdust of hardwood. But in this case, there is a great risk of acidification of such a filler, which is fraught with the occurrence of seedling diseases.
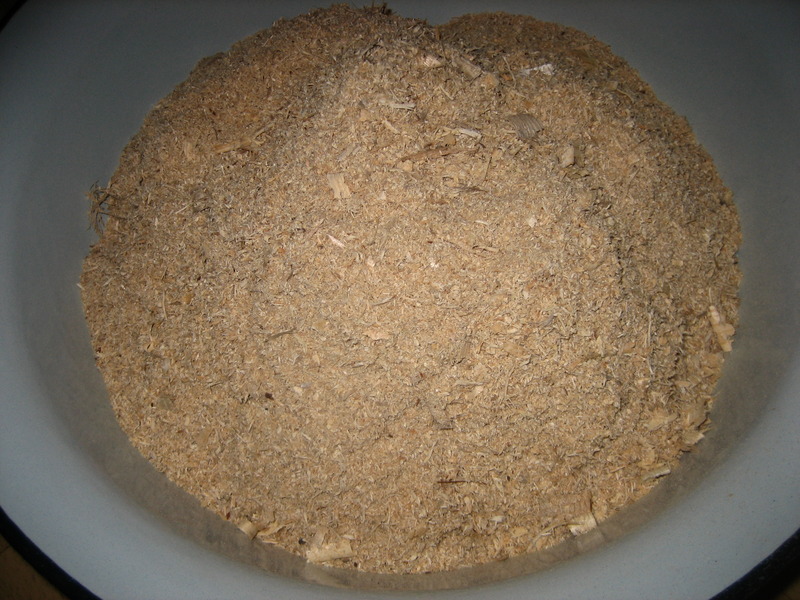
Perhaps moisture-absorbing sawdust can be a good basis for growing other crops, but for potato seedlings it is important to keep the substrate moisture at an average level.
"Snail"
This method allows at the first stage to save a lot of space, since the entire structure is placed in an ordinary bank.
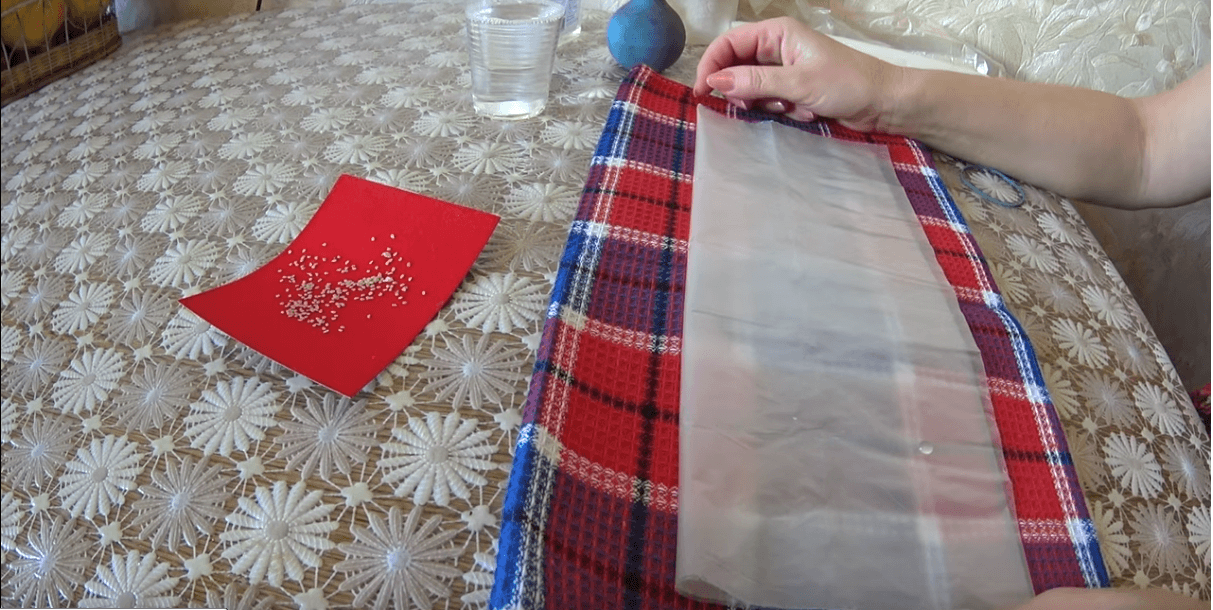
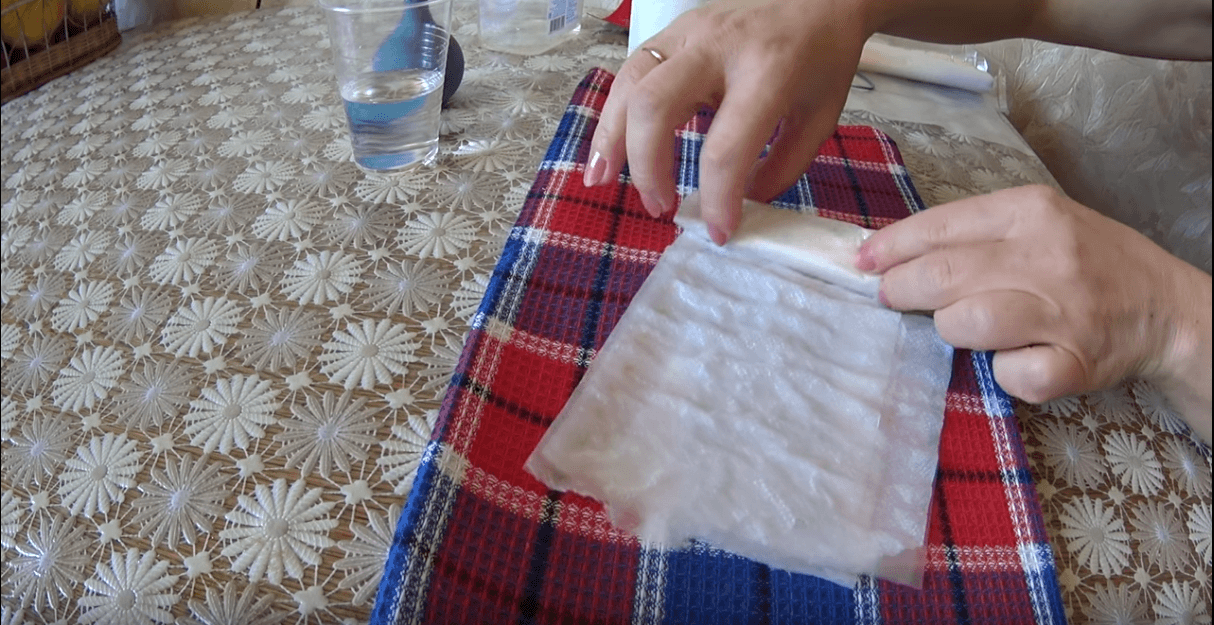
- Spread a 2-layer cellophane bag on a towel.

For a "snail" without soil, a simple plastic bag is suitable as a base
- On top, lay several layers of toilet paper or tissue, which are moistened with a syringe.
You can moisten the spread paper from a spray bottle or using a syringe
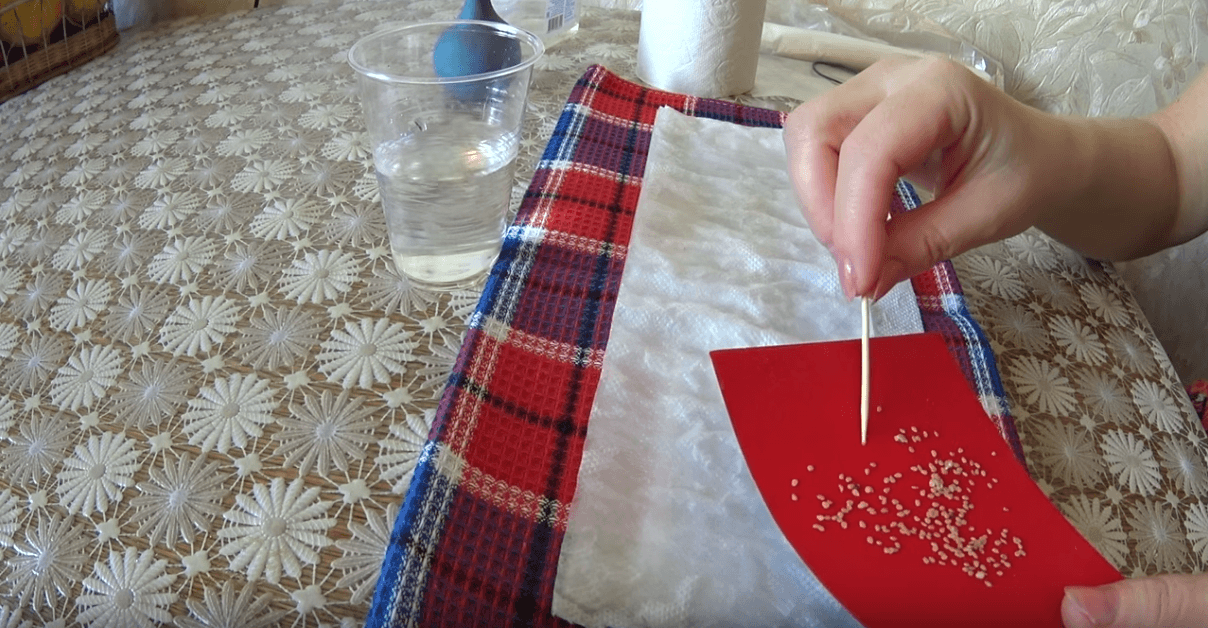
- Spread the seeds evenly spaced apart. The distance is about 2 - 3 cm.

It is convenient to spread the seeds with tweezers or a toothpick
- After the seeds are laid, start rolling the roll.

Roll the snail not very tight
- Fasten the finished "snail" with an elastic band and place it in a jar, on the bottom of which pour a little water or a weakly concentrated solution of universal fertilizer.
The finished "snail" must be held vertically, with the seeds up
- To create greenhouse conditions for better germination, you can put a plastic bag on the jar with the "snail".


This planting method has an option - "snail" with the ground. The landing principle is the same. The peculiarity is that the seeds are spread not on paper, but on a layer of soil.
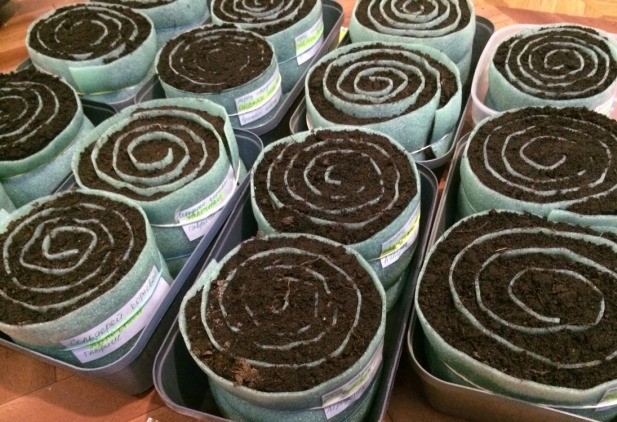
"Snail" with soil - a more complex structure that requires some skill
Germination of potato seeds in a snail has its own characteristics. Since the root system of a seedling requires a certain amount of free space, young plants must be dived into separate containers.
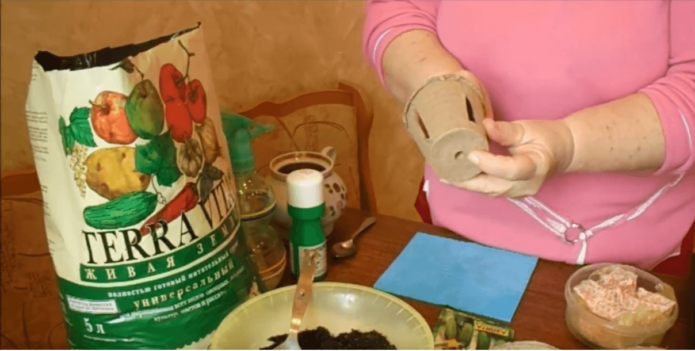
Peat cups
This method will not save space on the windowsill, but you can do without a procedure that is traumatic for seedlings - picking.
- Take 250 ml peat cups. Make a depression in the middle, for example with a pencil.
- Fill them with loose soil mixture for seedlings, moisten the soil. Put a potato seed that has been previously germinated in each glass.
In addition to the hole in the bottom, it is recommended to make longitudinal cuts in the walls of the cup
Gardeners often complain that peat cups planted in the soil along with the seedlings do not dissolve and prevent the growth of roots. Therefore, experienced gardeners suggest making cuts on the walls of the peat container so that the roots have the opportunity to develop freely.
Plastic cups
An easy and convenient way to grow seedlings. It is not necessary to cut the walls in such a cup, since the seedlings should be removed from such a container before transplanting into the ground, and it is worth making a hole for the outflow of excess water.
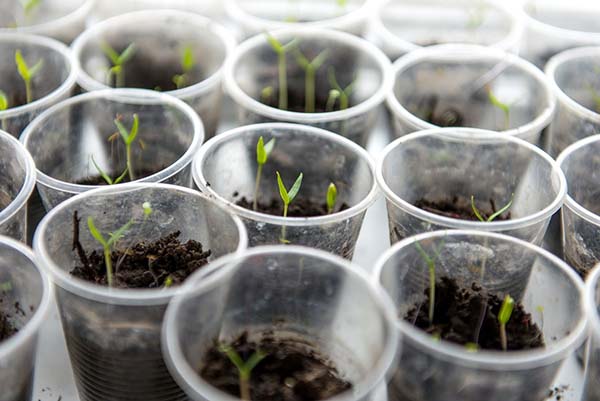
It is very convenient to grow seedlings in a plastic cup
Well, a very easy and economical way - planting in bags. Take small bags, fill them with soil mixture, place them tightly on a pallet with sides. Moisten and sow seeds.
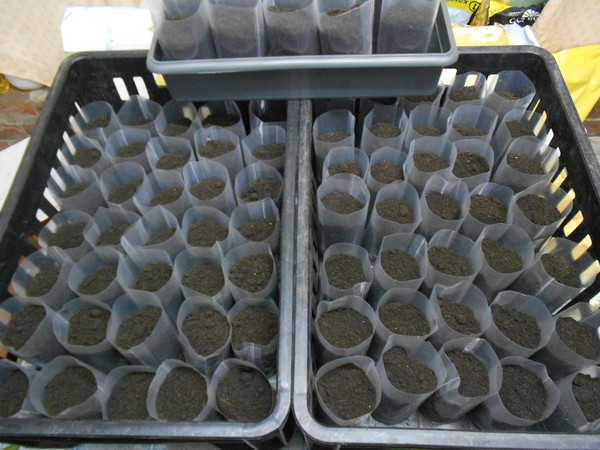
Plastic bags as a seedling pot - an easy and cheap way
Peat tablet
Growing in a peat tablet will also save the seedlings from picking. And the seedlings planted in the ground will experience less stress during engraftment.
- Before sowing potato seeds, peat tablets must be placed in a container with rims and filled with well warm water.
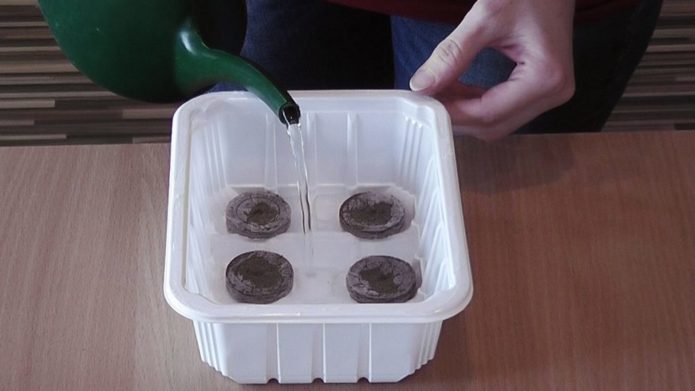
In order for the peat tablet to increase in size, it must be filled with water
- When the tablet has grown in size, use a thin pencil in the middle of the peat substrate to make a depression and place a potato seed in it.

Potato seeds can be sown into ready-made peat tablets
- Sprinkle the seeds lightly with peat or loose soil. Cover the container with pills on top with a bag or a transparent lid.

A feature of growing seedlings in a peat tablet is the moment of transplanting seedlings into the ground. Before planting mature seedlings on the garden bed, carefully remove the protective shell from the peat tablet.
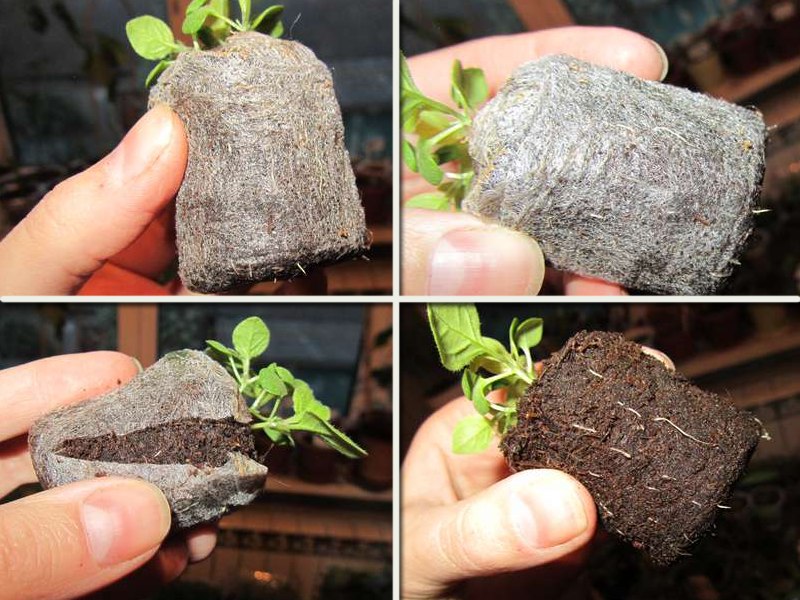
It is very easy to peel off a peat tablet
Seedling care
To create a favorable microclimate, the container with seeds should be covered with transparent cellophane or glass. Move the greenhouse to a bright place, but not in direct sunlight. The temperature inside the shelter should be at least 20 ° C, so the box with seeds can be placed near the battery. The night temperature should not drop below 10 ° C. Lighting also plays an important role.To prevent the seedlings from stretching, young plants should be illuminated for at least 10 hours a day.
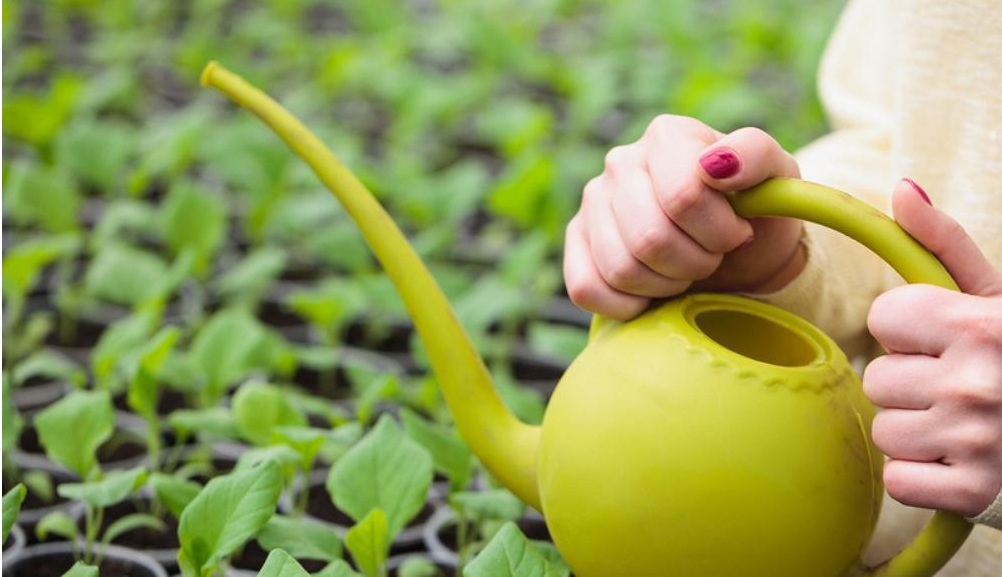
Ventilate the greenhouse periodically. Moisten the soil as needed. This is best done with a spray bottle. By watering with a watering can, you can wash the seeds out of the soil. In addition, watering from a watering can is difficult to control the amount of water, which can easily cause overflow. The row spacing can be loosened lightly with a thin stick so that the roots can breathe freely. If you follow all the rules, then the first shoots will appear in 10 days.
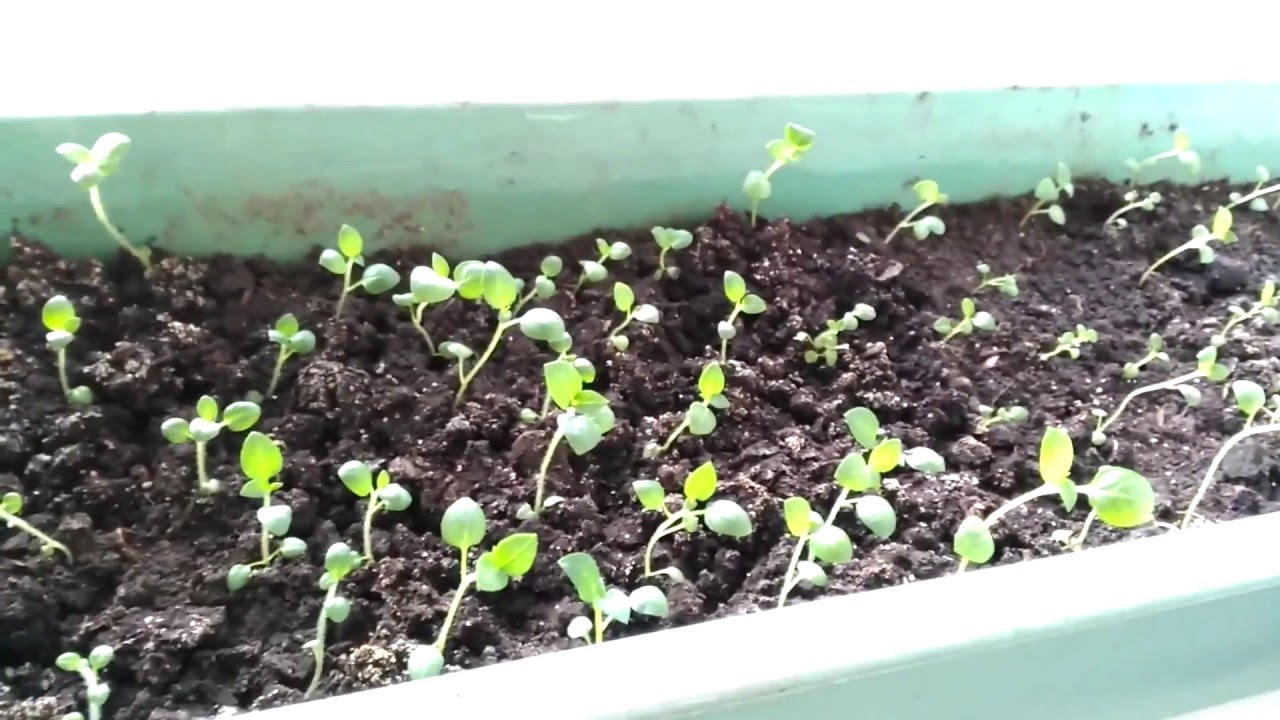
Delicate and fragile potato seedlings should appear in 10 days
Picking
When 2 - 3 true leaves appear on the seedlings, they will have to go through a difficult procedure - a pick. This means that each plant must be transplanted into a separate container - a plastic or peat cup, a seedling pot.
Perform the procedure very carefully. Fragile seedlings should not be pulled out of the soil by hand. Better take a dessert spoon and use it to pry each plant, transferring it to a separate container. Deepen the seedlings to the level of the cotyledon leaves.
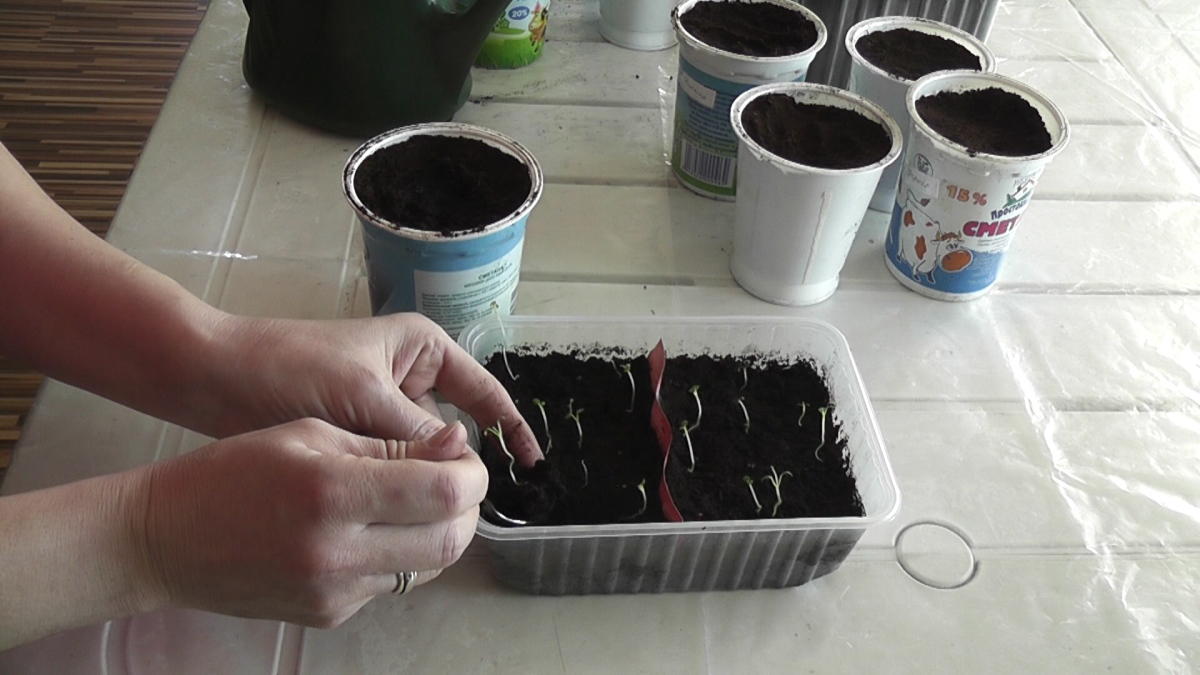
A tea or dessert spoon will help to painlessly pick potato seedlings
If you originally sowed potato seeds in separate containers, then picking is not necessary.
Care of potato seedlings
Since you initially dived the seedlings into the nutrient mixture, there is no need for excessive fertilization. To accelerate the formation of leaf mass and root system after transplanting, you can feed potato seedlings with urea or ammonium nitrate (1 g per 1 liter of water).
One of the complex fertilizers can be used 25 - 30 days after the pick:
- Kemira Lux;
- Baikal EM-1;
- Agricola;
- Uniflor Growth.
Water it in moderation, as excessive moisture will cause root rot, which will ruin the tender seedlings. But you cannot overdry the soil either. The soil should be moderately moist. For the prevention of "black leg", it is advisable to spill the substrate with Trichodermin or Fitosporin.
It is already possible to water the growing potato seedlings using a watering can with a narrow spout
For 1.5, and preferably 2 weeks before planting in the ground, the seedlings begin to be prepared for this procedure. It is best to start hardening on a sunny day. The first time, leave the potatoes in the air for a short time - half an hour or an hour. Then gradually increase your exposure to air. A few days before transplanting, the seedlings should already withstand a full day of being outdoors.
If the weather is damp and cool outside, it is best to start hardening on a closed loggia or balcony.
Before planting in the garden, the potato seedlings must be seasoned and healthy.
When and how to transplant potato seedlings into open ground
As soon as the threat of return frost has passed, potato seedlings can be planted in open ground. The transplant is carried out 45 to 50 days after the emergence of shoots. Seedlings ready to move to the garden must have at least 4 true leaves.
In the southern regions, favorable weather conditions are established in mid-May (sometimes a little earlier). In central Russia and the Moscow region - in the second half of May. In more northern regions - at the beginning of June.
- Dig holes in the garden bed at least 10 cm deep. If fertilizers were not applied to the soil in the fall, do it now, adding 300 g of humus or manure to each hole.
- Pour 0.5 L of water into each well.
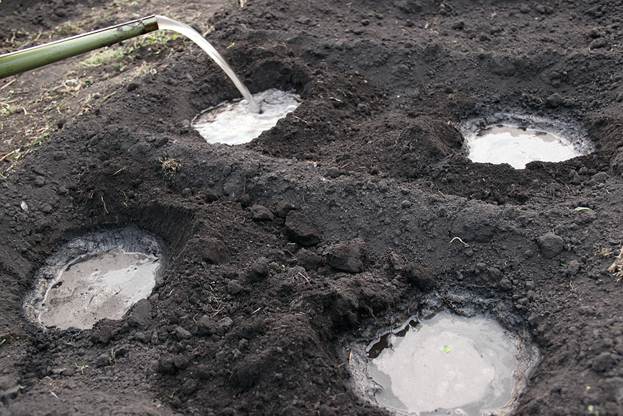
Seedling holes need to be well moistened
- When the soil becomes like thick sour cream, deepen the seedlings into it. Do not destroy the earth ball when removing it from the pots!
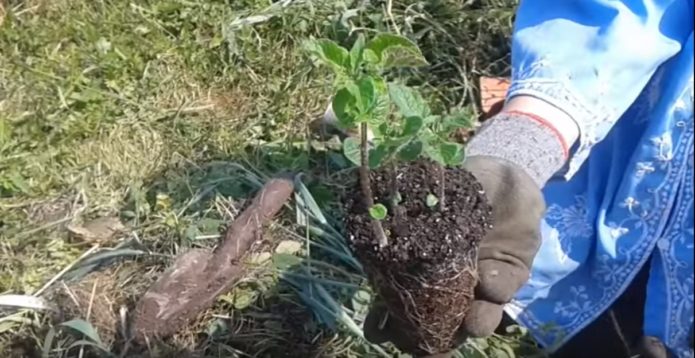
When transplanting potato seedlings, try not to destroy the earthen lump
- Deep the plants almost until the leaves begin to grow.
- Cover the hole with dry soil and press lightly with your hands.
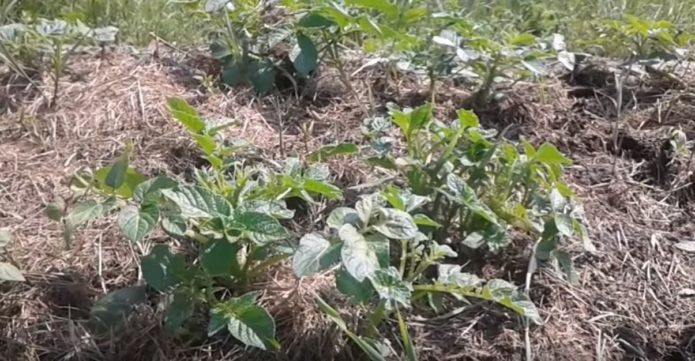
Cover the planted seedlings with mulch to avoid moisture loss.


Planting pattern - 15 - 20 cm between plants, 30 - 40 cm - row spacing.
Planting seeds in open ground
The seedless method of growing potatoes from seeds is not as popular as the seedling method. It can be used only in the south, where the sun warms the soil faster and there is no need to fear return frosts. Sowing potato seeds in open ground is the first decade of May.
Soil preparation
Choose a well-lit area for sowing seeds. In the shade, the bushes will stretch out, and the potato seed will turn out to be smaller. When choosing a place, the previous culture also plays a role. It is best to plant after the following vegetables:
- pumpkins;
- carrots;
- beets;
- corn;
- legumes;
- cruciferous.
The seedless method of planting potatoes involves better soil preparation. Therefore, it is advisable to start preparatory work in early autumn. Under a deep digging, at least on the bayonet of a shovel, add useful substances. There can be several options for improving the nutritional properties of the soil:
- humus or rotted manure - 1 bucket per 1 m²;
- nitrophoska - 30 - 40 g per 1 m².
After digging, you can simply sow the area with plants that are used as green manure - barley, rye, peas, mustard or rapeseed. After 5 - 6 weeks, until the grown plants begin to form seeds, dig up the area with them.
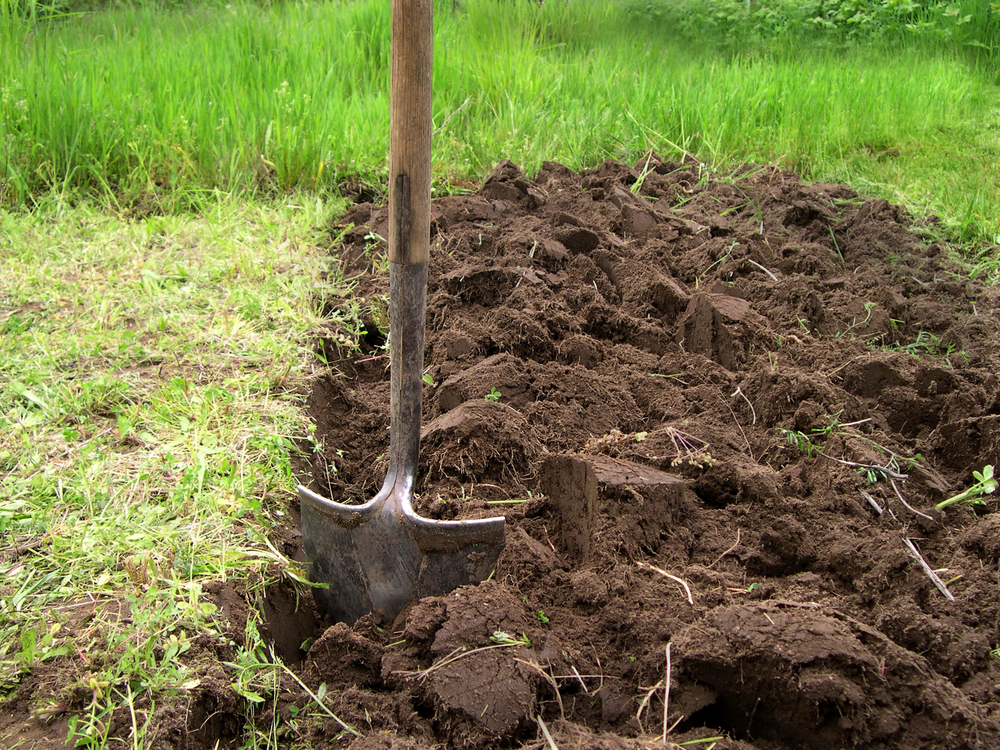
Before planting potatoes with seeds or seedlings, the soil must be dug deeply
Sowing seeds
When the soil at a depth of 10 cm warms up to 14 ° C, you can start sowing.
- On a well-dug and fertilized area, mark the beds with a row spacing of 60 - 70 cm. Spill them well with water from a watering can or hose. When the water is absorbed, sow the seeds. Sowing is carried out densely - after 5 or 10 cm, so that later it will be possible to leave the strongest shoots.
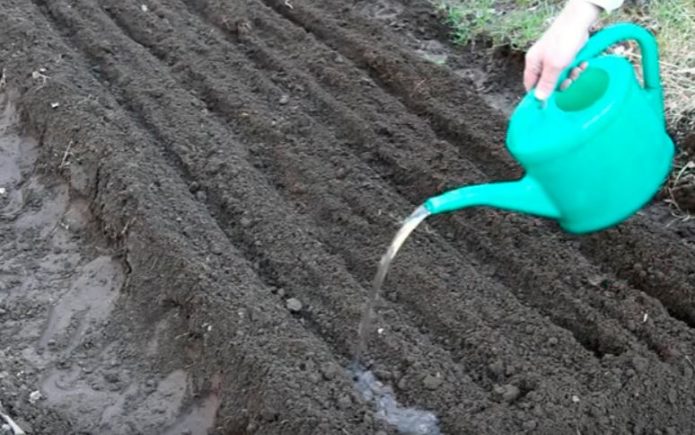
Before sowing seeds, it is important to moisten the beds well.
- But the planting depth should be 0.5 - 1 cm. If it is too deep, the seedlings will take a long time to make their way to the surface.
- After sowing, the beds can be mulched with dry grass or covered with non-woven fabric in case the night temperatures drop.

As soon as 2 true leaves appear at the seedlings, they need to be thinned out. The distance between thinned shoots should be 15 to 20 cm so that the root system does not feel constrained.
Seedling care
Water the seedlings often, but do not water. The main thing is to keep the soil in a moderately moist state. After watering, loosen with a small rake to break up the soil crust. And of course, do the weeding, don't give the weeds a chance to grow. After the seedlings get stronger and the frequency of watering grows, reduce. Use warm water when watering.
The first feeding is carried out with nitrogen-containing fertilizers, followed by potassium-phosphorus fertilizers. As the bushes grow, hilling is carried out, as well as when growing potatoes from tubers.
Also, don't forget to treat the potato bushes from the Colorado potato beetle. This pest in a very short time is able to destroy all the aboveground parts of potatoes, without which the possibility of obtaining a crop of tubers for planting is minimized.
When growing mini-tubers, it is important to keep the garden clean.
Harvesting
Each variety has its own ripening period. The harvest of mini-tubers is harvested, taking into account exactly these indicators. This usually happens in September or October. The gardener should be prepared for the fact that the potatoes will be very small - from 10 to 50 g. Even with very good care, the tuber mass will not exceed 100 g. The harvested crop should be slightly dried in the shade and then put into storage awaiting subsequent planting.
In order to plant a plot of one hundred square meters next year, you will need 10 - 12 kg of potato seed.
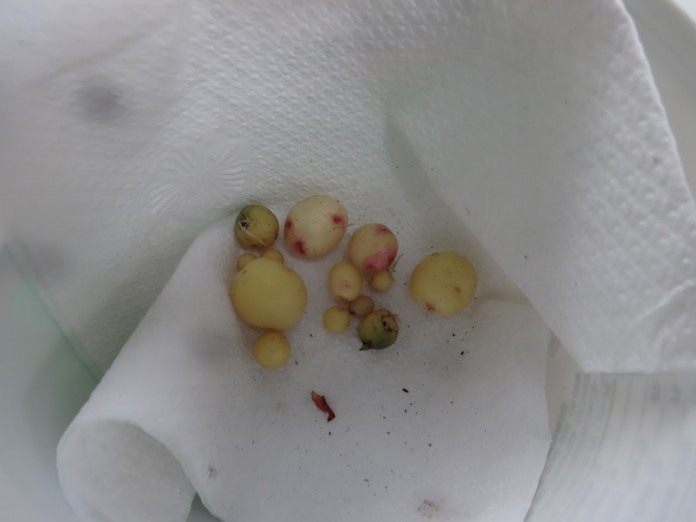
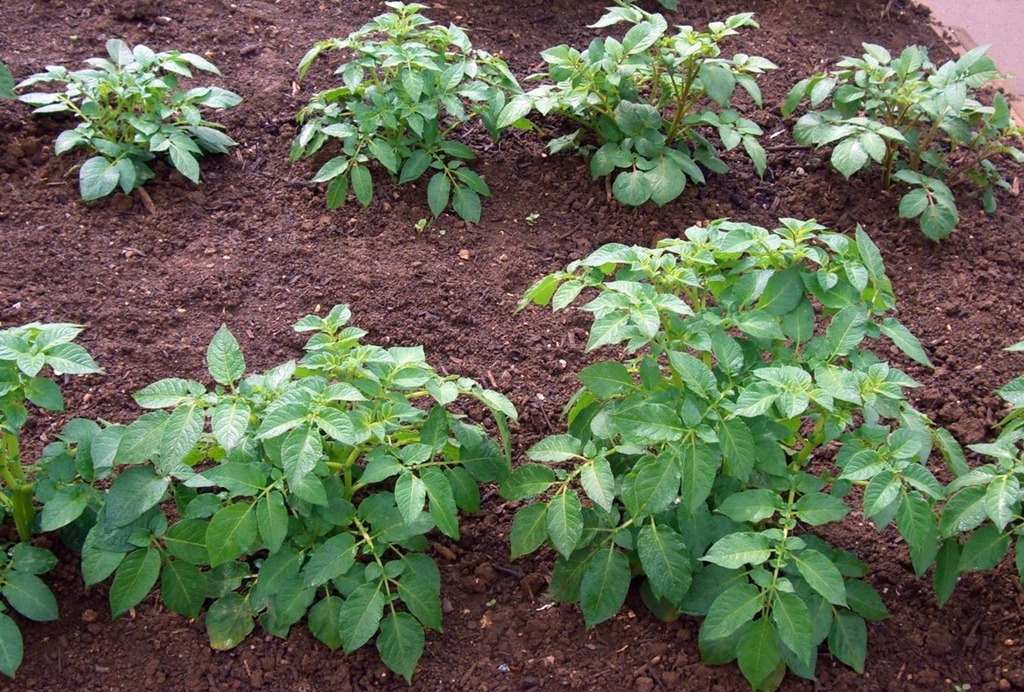
Potato sets can vary greatly in size
How to update potato seeds
The first crop that mini-tubers will give will be considered super elite.The next year and the next 2 years - elite. Then the elite qualities are lost, and from 5 or 6 years old, potatoes grown from seeds will become common, the yield of which will decrease from year to year. To prevent this from happening, you need to renew the seeds every 5 to 6 years, without waiting for the beginning of the degeneration of the variety. You can also collect seed on your own. But it is better to trust professionals and buy seed from producers.
Growing potatoes from seeds - reviews
I tried it for the first time last year. Normal grown potatoes, although of course there is a lot of fuss with them. The sprouts are capricious - they almost refilled, wilted, slightly poured, fell again. They stretch strongly. And they look like wood lice Of all the seeds sown (4 varieties were planted), no more than half survived before planting in the ground. Dragee varieties, Cinderella (9 out of 11 seeds), rose and grew best of all. I remember two more varieties - Milena and Carmen, but I don’t remember one icon_sad.gif I planted it in mid-June, 2–4 tails per hole (only 4 packs of seeds made about 20 bushes). Then it grows well, develops rapidly, and by autumn it caught up with the bushes of tubers in size. Well, she huddled, fed, like the usual one. There were a lot of potatoes, at least a dozen from each bush the size of a chicken egg, give or take a little. I did not collect trifles, it was there like peas. About a tenth of the tubers were quite commercial size, and about five were really large. Splitting was also observed, among the potatoes there were handsome men, there were freaks, which I naturally rejected. All green, selected 150 tubers of the best in appearance, are well stored. Well, then let's see what will grow out of them today.
I will tell you about my experience in growing potatoes from seeds. She grew potato seedlings as well as tomato. Sow for seedlings at the same time as tomatoes for OG (for me, on March 10), if earlier, then the backlight. But I feel sorry for the place under the lamps on the potatoes I sprinkled with earth, a layer a little smaller (and the seeds are smaller than tomato seeds). I dived into boxes, there were not enough separate apartments. Top dressing - along with other seedlings. In the exhaust gas planted in the 20th of May under the covering material. Frosts do not promise - I remove shelters. By the time of planting, the seedlings are 20–25 cm high. I put them in the holes almost lying down, leaving 1/3 of the height on the surface. Further - care as for ordinary potatoes. The harvest is incomprehensible in size - from peas to tubers the size of a woman's fist. For seeds, she left tubers ranging in size from a walnut to a chicken egg. Yes, the seeds were collected from potatoes by the Kiwi variety.
I tried to grow potatoes from seeds. The variety seemed to be "Farmer". He took the soil that he had harvested in the fall for planting seedlings, and kept it in the country. Prepared it (calcined in the oven and spilled with potassium permanganate). Seeds were sown in peat pots, 3-4 pieces per pot, the soil was poured not to the top and slightly sprinkled with loose soil. I poured it, covered it with glass on top and put it to the battery. Seedlings appeared on the 4th day and by the end of the week all the seeds had already sprung, of course the plants did not have enough light and they stretched out, then I poured the earth. Then I brought more light to the balcony (I have it insulated) and there is more light and cooler than in the room, so hardening began. When the potatoes had already sprung up at the dacha, the planted tubers took this one, planted it in the open ground. I did everything else as for ordinary potatoes: watering, loosening, fertilizing, hilling. In the fall, I dug up nodules and it turned out that they were severely affected by scab, in general, I threw them away so as not to infect the site.
I tried to grow potatoes with seeds for a long time. I don’t remember the variety, but from a bag of 25 seeds, 12 pieces survived until planting in the ground. In the fall, I collected about half a kilogram of tubers ranging in size from a pea to a chicken egg. Greened and kept in a cellar, strewn with straw cutting. Winter not one tuber survived, the trifle dried out, the larger ones rotted. That's all.
Seeds sprout with a bang. The spread is strong in terms of yield. From "peas", and even that is not enough to quite surprisingly almost marketable potatoes. There is no scatter in appearance. All tubers are exactly the same (color, shape, pulp color, eyes). In the second year, three bushes with 30 tubers in each stood out, left for seeds completely. But this is not even the main thing. The main thing is that not a single bush with late blight never got sick at all, although the last three seed bushes were dug at the end of September. I wonder if they are not GM. In the same year, their own seeds were sown from the blue-eyed by it, the blue-eyed, pollinated. The thought was this - the variety was too good, but very old, I wanted to update it so that there were no viruses and other nasty things there. The result was shocking. The cultivated "peas" resembled sea pebbles. The color ranged from pure white to deep purple with a transition through bright red. The bright purple "sticks" stood out. Average length to diameter 5: 1. Nothing similar to the classic blue-eyed was seen. But "sticks" for the sake of interest were planted next year. They turned out to be fruitful (about 15 in the nest), grew of a normal potato size, they taste like blue eyes, it is pleasant to clean them, the eyes are almost invisible. In general, the view is very funny. icon_lol.gif
If you decide to grow potatoes from seed, be patient and follow the rules. Even if the first time does not work out, do not give up. After all, this is actually an amazing opportunity not only to feel like a real breeder, but also to grow an unprecedented crop of potatoes that are resistant to diseases and the vagaries of nature.