On a balcony or windowsill, strawberries are not grown for large yields. Rather, it is just a hobby akin to home floriculture. But even in such cramped conditions, with a competent approach and the use of modern technologies, you can get a decent result. We will help the gardener choose the best strawberry variety and method of growing it, which are most suitable for his premises.
Content
Growing strawberries at home
Of course, in the conditions of a city apartment, it will not work to grow a lot of strawberries due to the limited space. It is good if there is a glazed and insulated balcony on which you can place containers with strawberry bushes. In this case, you can get a more or less good harvest. If this is not possible, then you can grow several bushes just on the windowsill.
Varieties for growing strawberries at home
Not all varieties are suitable for year-round cultivation of strawberries in an apartment. The best results can be obtained by planting strawberries of remontant varieties of neutral daylight hours (NDM). These varieties bloom for ten months a year and bear fruit almost continuously.
Tristan F1
A wonderful Dutch ampelous variety of remontant strawberries. Great for growing in pots or in vertical beds. Relatively winter-hardy and shade-tolerant. Long (up to 70-100 cm) shoots are covered with beautiful dark pink flowers with a wonderful smell. Mustache gives very little. The berries are small (25-30 g), oblong, conical. The taste is pleasant, intensely sweet. About 0.7-1 kg of berries are harvested from one bush per year.
Brighton
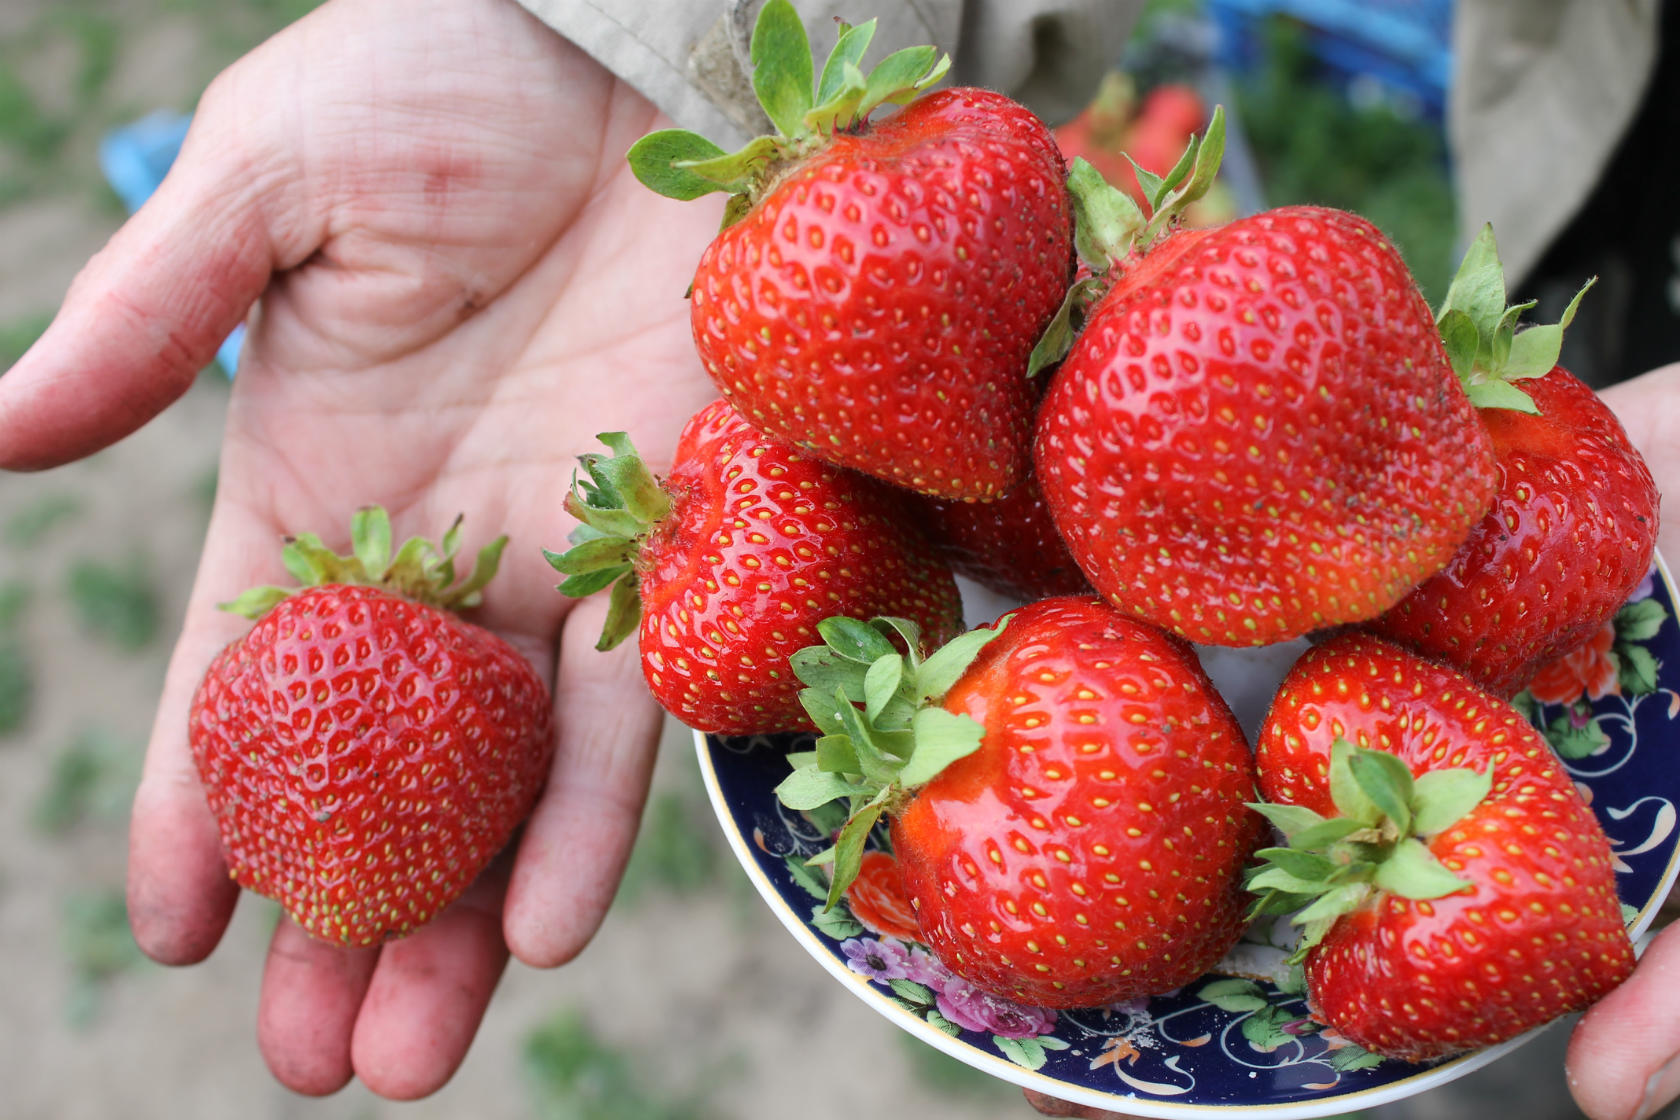
The American-bred Brighton remontant strawberry has compact, medium-sized bushes with small foliage. The berries are quite large (30-50 g), very dense, slightly crispy. The taste is sweet and sour with a pineapple flavor. At home, it bears fruit almost all year round, regardless of the length of daylight hours.
Brighton strawberries have rather large berries
Homemade delicacy
The variety was created specifically for growing on balconies and windowsills.The bush is beautiful with juicy dark green foliage and small juicy red berries. The taste is sweet and sour.
Moscow delicacy
This is a Dutch strawberry variety NSD with a high yield. With good care, an average of 1.5 kg of berries are harvested from each bush per season, which have an excellent sweet and sour taste with a strong strawberry aroma and notes of cherry in the aftertaste.
Geneva
American large-fruited variety with juicy, sweet, aromatic berries. The weight of the berries at the beginning of fruiting reaches 50 g, but over time they become smaller. Fruiting in waves, the break between which is 1.5-2 weeks. Peduncles are long, hanging down. No more than seven mustaches are formed on the bush.
Queen Elizabeth II
This variety was not created specifically for home conditions, but it is successfully grown in them. Has an undulating yield (every 2 months). The berries are large and very large. Their usual weight is 40-50 g, and some specimens reach 120 g. The taste of the berries is excellent, sweet, with a slight sourness and strawberry aroma.
Soil preparation
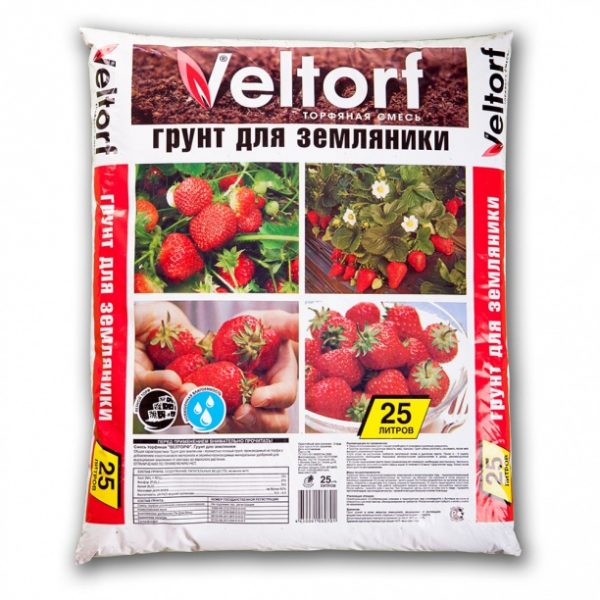
Strawberries like light, loose soil with ample nutrients. The easiest way is to buy ready-made universal primer in the store.
The easiest way to plant strawberries is to buy ready-made soil in the store
But it's cheaper and not much more difficult to do it yourself. Various options are possible:
- A mixture of turf soil (preferably from ephedra), humus or compost and coarse river sand, taken in equal amounts.
- A mixture of peat and vermicompost in equal parts.
- A mixture of peat, humus and sod land in a ratio of 2: 1: 1.
In this case, the acidity of the soil should be in the range of pH 5.5-6.5, which can be checked using litmus paper or a special device called a pH meter. If the acidity of the soil is overestimated, then it should be reduced by adding dolomite flour or lime-fluff. The underestimated acidity can be increased by adding coniferous soil or sour peat.
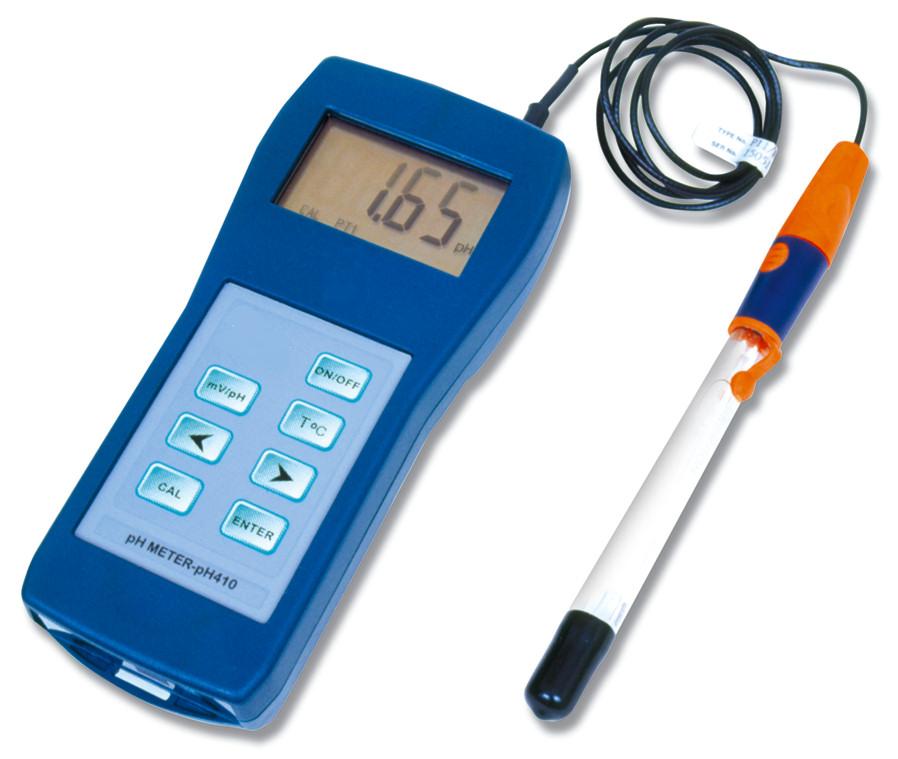
It is convenient to measure the acidity of soil and solutions using portable instruments
Further, the prepared soil is poured into pots or boxes with drainage holes in the bottom. At the bottom of the containers, a drainage layer 3-4 cm thick should be laid, consisting of expanded clay, crushed stone, pebbles, broken red brick, etc. The optimal pot size for one plant is 3 liters. Add a tablespoon of wood ash and the same amount of superphosphate to each pot. If strawberries are planted in long boxes, then the distance between the bushes is made equal to 20 cm.
Sowing seeds
The method of propagating strawberries with seeds is not the easiest, but often it is the only possible one, since it is not always possible to buy seedlings of varieties suitable for growing indoors. When purchasing strawberry seeds, you must definitely look at the production date, since their germination capacity lasts no more than one year.
Sowing dates
In living nature, there are certain biorhythms. The greatest activity of plant growth is observed in early spring (February - March) and at the end of summer (July - August) - this time should be chosen for sowing seeds. Additionally, some are guided by the lunar calendar. In accordance with it, favorable days for sowing strawberries in 2019 will be:
- February - 6, 8, 12, 17;
- March - 7, 11, 16;
- July - 3, 10, 12, 13, 15;
- August - 6, 7, 9, 12.
Seed preparation for sowing
To increase the percentage of germination and accelerate the time of emergence of seedlings, the seeds must undergo pre-sowing treatment in one of the ways described below (to achieve the best effect, the methods can be combined):
- Stratification. It is started 2-10 weeks before sowing. For this:
- The seeds are spread in a thin layer on a well-moistened cotton pad.
- Cover them on top with the same moistened disc.
- Place the seeds in a plastic container.
- The container is placed in the refrigerator.
- The seeds are ventilated daily and water is added if necessary.
- Bubbling.The seeds are placed in a jar with warm (+ 25-27 ° C) water for 2-3 days, into which the end of the hose from the aquarium pump is lowered and turned on. Then the seeds are dried and sown.
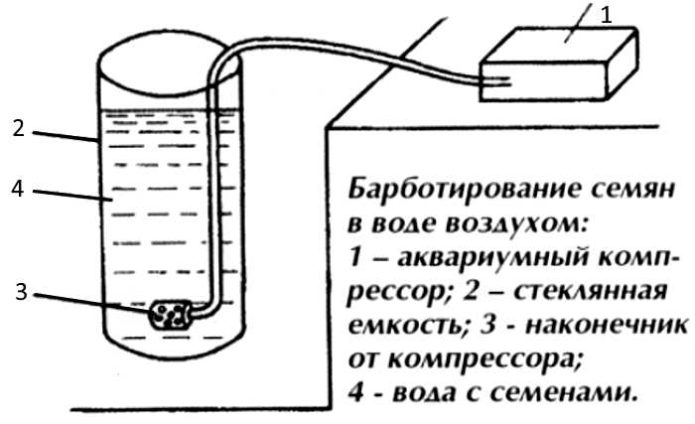
An aquarium compressor can be used to bubble seeds.
- Soak. Seeds, laid on moistened cotton pads, placed in a container, as in the case of stratification, are placed in a warm place, for example, on a radiator. The term of such a procedure is 3-5 days.
- Germination. Soaking is continued until the seeds begin to hatch, after which they are immediately sown.

Sowing seeds in peat or coconut tablets
This is the most convenient way to grow strawberry seedlings from seed. For these purposes:
- Take tablets with a diameter of 25-30 mm and soak them in water for 2-3 hours. During this time, they should swell and increase in thickness to 7-10 cm.
- 2-3 prepared seeds are laid out in the recesses of the upper ends of the tablets (subsequently, one of the most developed seeds will be left from the resulting sprouts) and lightly sprinkled with peat.
- Tablets are placed in a tray or a special container, on the bottom of which 2-3 cm of water is poured and covered with a transparent lid or bag. Throughout the entire period of seed germination, the tablets are periodically moistened from a spray bottle, preventing them from drying out.
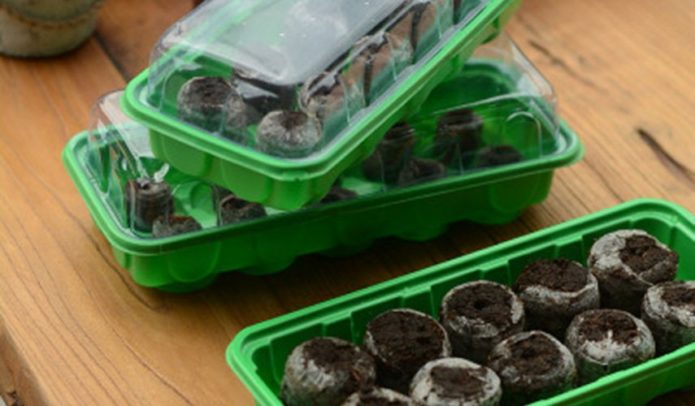
It is convenient to sow strawberry seeds in peat tablets
- Place the container in a warm place.
- After emergence, the container is opened.
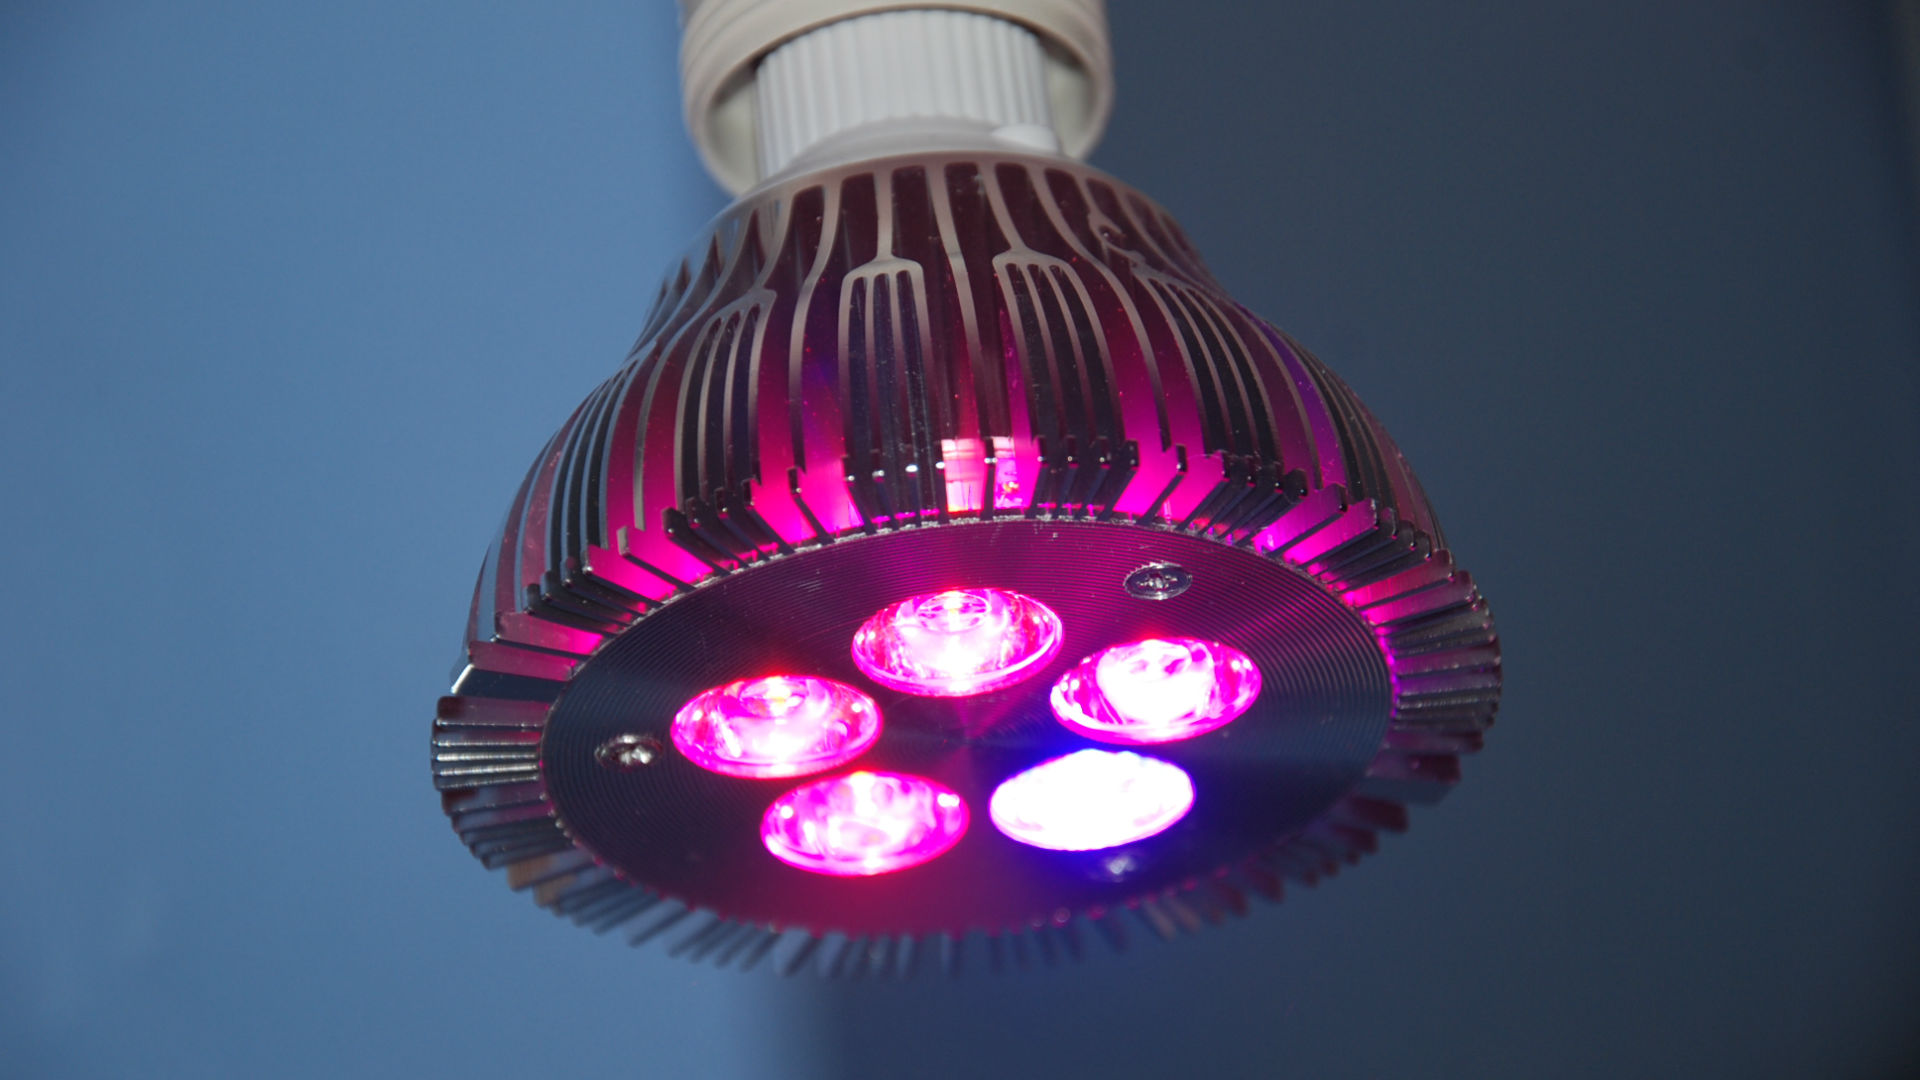
- From this point on, young plants will need 12-14 hours of daylight. In winter, for this, you will have to apply artificial lighting with fluorescent lamps or special phytolamps.

Phytolamps give light to the spectrum that plants need
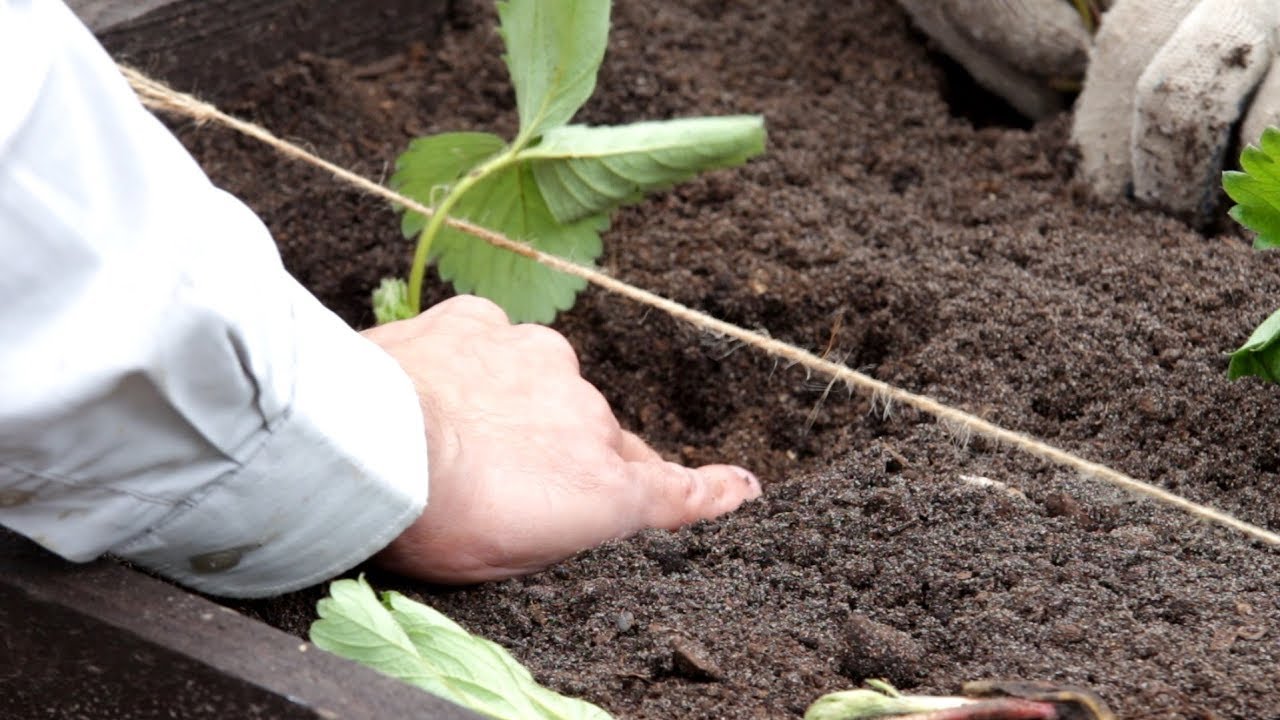
- When 2-3 true leaves are formed on the seedlings, it is planted together with the tablets in prepared pots.

Strawberry care
Caring for the planted strawberries is simple, it is useful to carry out it with children who will be interested and exciting.
Lighting, temperature and humidity
Strawberry varieties NSD are undemanding to light and bear fruit even in shaded areas. However, the best results can be achieved by applying additional artificial lighting for 12-14 hours a day, as shown above. The most comfortable temperature for strawberries is in the range of 18-25 ° C, and the humidity is in the range of 60-80% (you can measure it with a hygrometer).
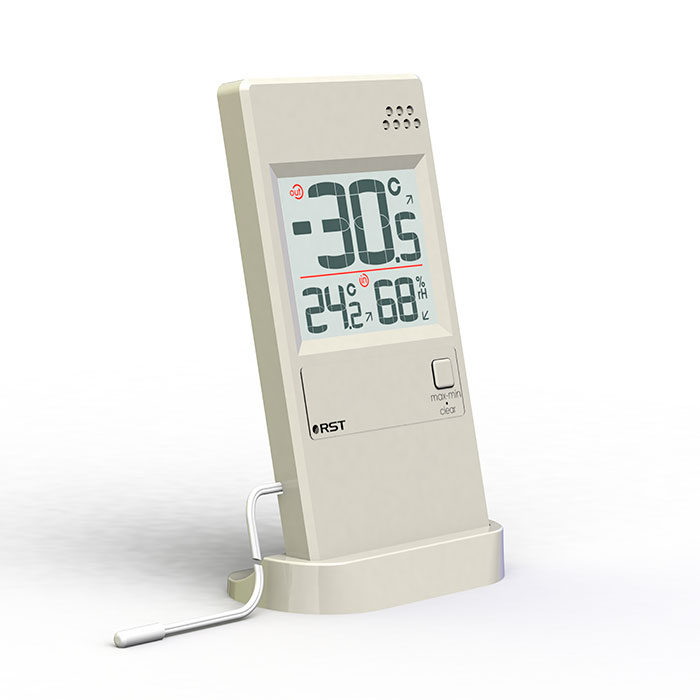
Hygrometers are often combined with thermometers
Watering
Strawberries are a moisture-loving crop, so you need to water them regularly, without letting the soil dry out. At the same time, the formation of a crust on the surface of the soil should not be allowed - it is necessary to maintain its air permeability by loosening. And also do not flood the plants with a large amount of water, because in case of its stagnation, the roots can rot, and the bushes can die.
Top dressing
To get a good harvest of large and tasty strawberries, you need a lot of nutrition. For regular feeding, you can use the following fertilizers:
- Organic fertilizer Gumi-20M Rich. It contains 2% nitrogen and phosphorus, 3% potassium, 11 trace elements and the biofungicide Fitosporin-M. It can be used for root dressing by dissolving 1 teaspoon of fertilizer in 1.5 liters of water and for foliar dressing by adding 2 drops to a glass of water. Application interval - 2 weeks.
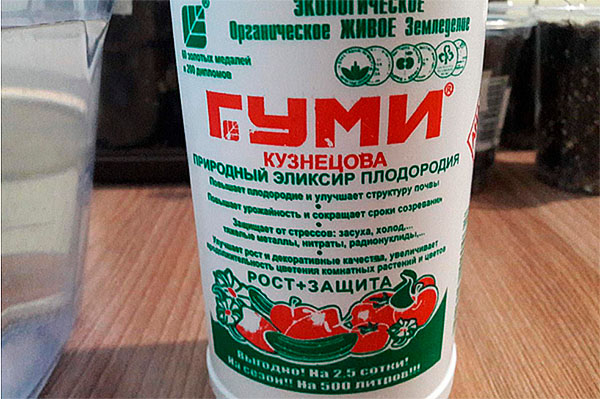
Ecological fertilizer Gumi can be used for both root and foliar feeding
- Ash infusion. It is an excellent potash fertilizer. It is prepared by infusing a glass of sifted wood ash in 1 liter of boiling water. After a day, add another 9 liters of water, mix and water the strawberries, 1 glass of infusion per bush. The feeding interval is 1 month.
- Yeast. This is an excellent vitamin fertilizer, for the preparation of which 100 g of fresh yeast is diluted in 500 ml of warm water.After 1-2 hours, this concentrate is poured into a bucket of water, stirred and used for watering strawberries at the rate of 500 ml per bush. Such fertilizing with continuous fruiting is carried out monthly.
Pollination
Since the bees do not fly in the apartment, the gardener will have to pollinate the flowering strawberries on his own. To this end, you can simply periodically turn on the fan during flowering and direct air currents to the strawberries. A more painstaking (and more reliable) method is hand pollination with a soft brush. To do this, collect pollen from the pistils with a brush and transfer it to the stamens.

Hand pollination of strawberry flowers with a brush can be easily applied at home
Ways to grow strawberries at home
In addition to the traditional pot and box growing, there are other ways to grow strawberries at home.
In bags
This is a simple method, convenient for use in confined spaces, since an impromptu bed turns out to be vertical. To do this, you can use ordinary bags of flour or sugar. To save space, they can be arranged in two tiers, placing them vertically on top of each other after filling with nutritious soil. But it is more convenient to make bags from a special polyethylene sleeve sold in garden centers. Its diameter is usually 13-16 cm (but can be large) and the length is chosen based on ease of maintenance. The sleeve fit looks like this:
- A piece of the desired length is cut from the sleeve. In an apartment, bags with a length of 2–2.5 m are usually used, depending on the height of the ceilings. It should be understood that a stepladder is needed to service the upper bushes.
- On one side (it will be the bottom), the sleeve is tied or sealed and several holes with a diameter of 5-10 mm are cut through to release excess water.
- A small layer (7-10 cm) of expanded clay or other drainage material is poured onto the bottom.
- Fill the bag with nutritious soil to the top and tie it.
- A metal hook from a bar with a diameter of 5 mm is fixed on the ceiling. This hook, along with a plastic dowel for attaching it, can be purchased from a hardware store. For this operation, you will need an electric impact drill or hammer drill.
- The bag with soil is suspended on a hook so that its lower part is 10-15 cm above the floor level.
- A tray is placed under the bag to collect water.
- Along the entire length of the bag with an interval of 20-25 cm, make slots 8-10 cm wide for planting.
- One strawberry bush is planted in each slot along with a peat pot or a tablet.
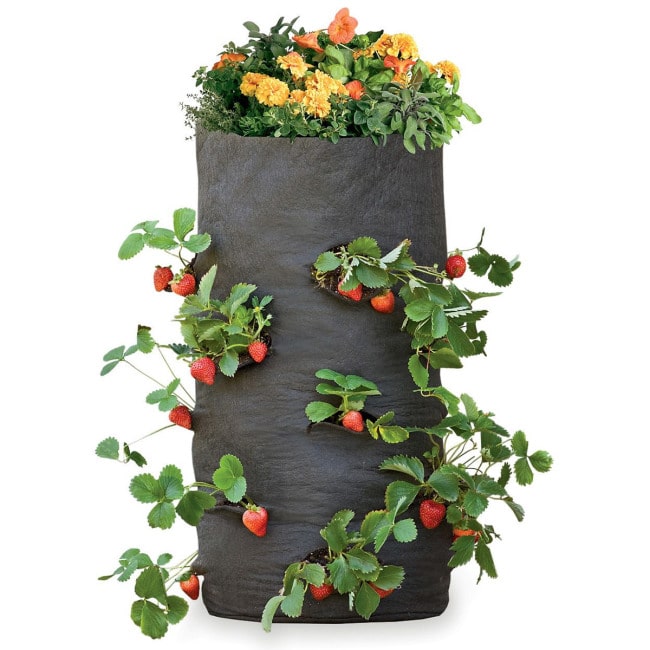
Strawberries can be grown in bags of any diameter
- Each bush is watered using a small children's watering can with the net removed, or a drip irrigation system is mounted for this. The irrigation rate is 2 liters of water per 30 liters of soil daily.
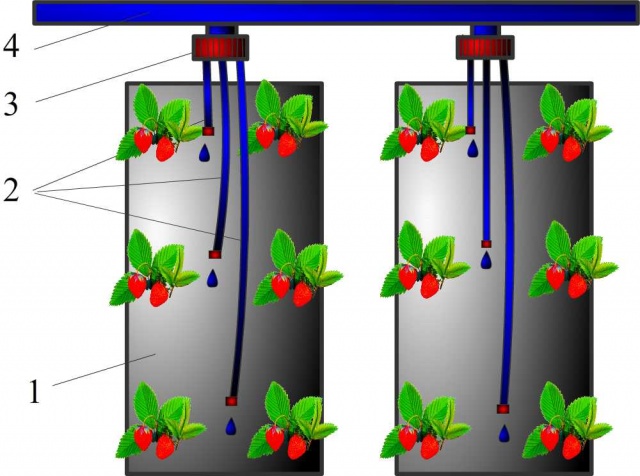
Strawberries in vertical bags are easy to water using the drip system
- Fertilizers are applied in liquid form, combined with irrigation. The feeding scheme is described above.
Hydroponics
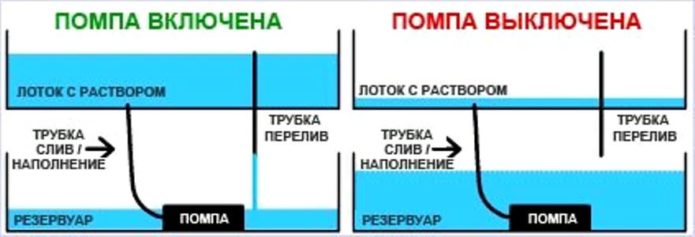
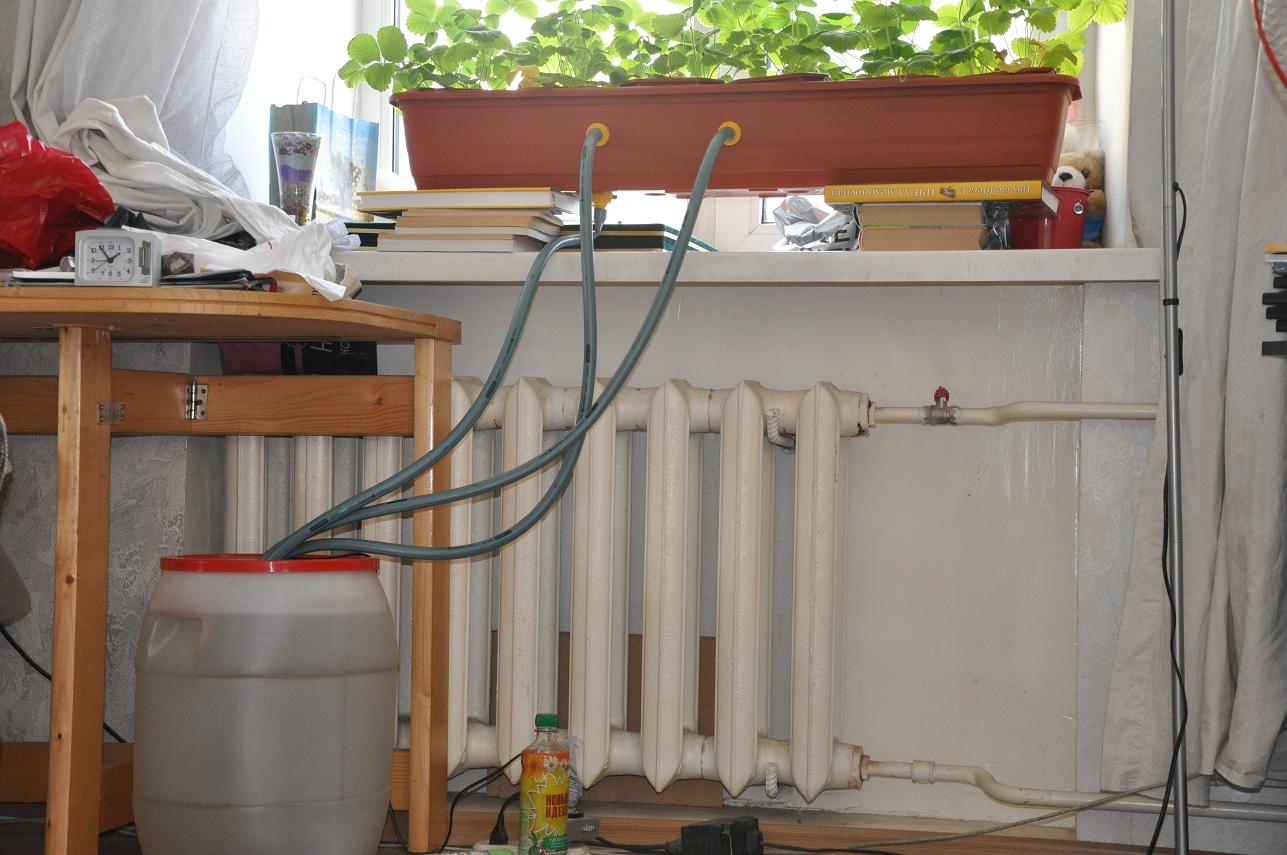
The principle of this industrial technology is that the plants are grown without the use of soil and nutrients are supplied to the roots in liquid form. It would seem that you just need to lower the roots of the plant in a container with a nutrient solution and the growth process will go. But we must not forget that, in addition to food and water, the plant in the root zone definitely needs fresh air, otherwise it will suffocate. Therefore, when designing hydroponic systems (and there are a lot of them developed and created), one has to solve the problem of supplying fresh air and removing waste air. And one more problem is the creation of support for the plant in the absence of soil. We will not give here many different design solutions, we will focus only on the oldest hydroponic method - the method of periodic flooding, which has another name - "ebb and flow". Its essence lies in the fact that the nutrient solution is pumped into the growing container, where it completely covers the roots. After a while, the pump is turned off and the solution is drained by gravity into a container for storing it. Thus, during the draining of the solution, the substrate and root system are saturated with oxygen-enriched air, and when the tank is filled, the rising solution displaces the accumulated gases.
Intermittent flooding hydroponic plant design
It is quite possible to recreate the simplest hydroponic installation using this method at home from available tools right on the windowsill. For this:
- A long plastic box for growing flowers is taken and two holes are drilled in its bottom, in which two fittings are fixed.
- The first nozzle serves for periodic feeding of the nutrient solution and its discharge. Its end should be located 0.5-1 cm above the bottom, so that when the water is drained from the box, a solution always remains in it. The outer part of this fitting is connected with a flexible hose of the appropriate diameter to the feed pump.
- A longer tube is fixed to the inner end of the second fitting, through which an excess amount of water will be drained to prevent its overflow. From the outer end of this fitting, the hose is simply lowered into a container with a solution so that the excess is drained there by gravity.
The simplest flood hydroponic plant is easy to make from materials at hand
- For planting strawberries, prepare several plastic pots 3-4 cm in diameter smaller than the width of the box. In the bottom of the pots, a large number of holes are drilled (or burned with a soldering iron) to quickly drain the solution.
- The pots are filled with a neutral substrate to support the strawberry roots. Mineral wool, expanded clay, coconut briquettes, etc. are often used as such a substrate.
- A lid on the box is made of a suitable material (plastic, getinax, plywood, etc.) and round holes are cut in it along the average diameter of the pots for their installation.
- Assemble the system:
- The box is installed on the window sill using pads of such a height that the solution supply and outlet hoses can be freely positioned below.
- A container with a solution is installed on the floor and an aquarium pump is lowered into it, which is connected with a hose to the supply fitting at the bottom of the box.
- The hose from the second fitting is lowered into the solution container.
- The pump is connected to the power supply through a programmer (this is an electronic device with which the time for filling the box with a solution and draining it will be programmed).
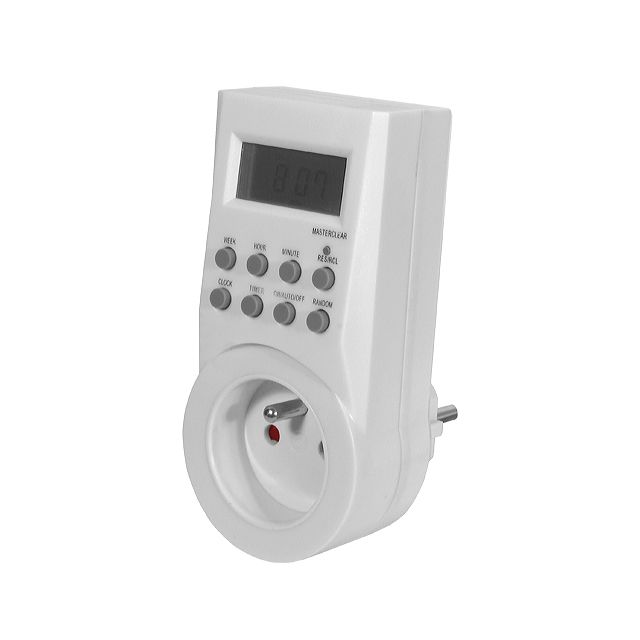
Using the programmer, set the pump cycle for hydroponics
- Cover the box with a lid.
- One plant is planted in pots, carefully covering the roots with a substrate, slightly compacting it at the same time.
- Pots with seedlings are installed in the holes in the box lid.
- Set the program for feeding and draining the solution and turn on the system.

A hydroponic plant can be made from scrap materials
To start the system, the solution delivery time is set to 10 minutes, and the drain time to 15 minutes. The total cycle time is 25 minutes. During daylight hours (when the lighting is on), such cycles can be repeated continuously, and during the rest period - twice. In the future, when the gardener gains experience in hydroponics, he will learn how to independently select the optimal modes of turning on and off the pump, depending on the season, weather, strawberry varieties and other factors.
In addition to the time parameter, it is also important to observe temperature and humidity conditions. As mentioned above, the best indoor temperature for strawberries is 18-25 ° C. The temperature of the solution should be more stable and be 24-25 ° C. And it is also advisable to monitor the moisture content of the substrate. She must be:
- during growth - up to 70%;
- in the flowering phase - up to 75%;
- during the period of fruit ripening - up to 80%.
Video: Flooding System for Home Hydroponics
Solutions for hydroponics
For the growth, development and fruiting of strawberries, various macro- and microelements are required in balanced volumes. And if, growing in the soil, the plant itself takes from it the required substances in the right quantities, then with the hydroponic method all the elements must be dissolved in water and brought to the root system. It should be understood that it is important to have each of the required substances, and both its deficiency and excess are harmful.
Table: norms for the content of chemical elements in hydroponic solution for strawberries
| Development phase | Element content in solution, mg / l | |||||||||||
| Nitrogen | Phosphorus | Potassium | Calcium | Manganese | Sulfur | Iron | Copper | Magnesium | Zinc | Boron | Molybdenum | |
| Seedling | 150 | 70 | 140 | 200 | 50 | 50—110 | 4 | 0,05 | 0,5 | 0,05 | 0,5 | 0,05 |
| Vegetation | 80 | 70 | 350 | 260 | ||||||||
| Flowering / fruiting | 80 | 45 | 100 | 200 | ||||||||
In principle, such a solution can be prepared by yourself if you find and purchase all the required chemicals. But, it is clear that this is not easy to do, since it will be difficult to comply with the required dosage. Some mistakes in this case can lead, at best, to a decrease in the quality of berries and yields, and at worst, to harm the health of those who will eat such fruits. Therefore, it is not recommended to set up a chemical laboratory for the production of fertilizers at home; it is better to purchase ready-made certified compositions for hydroponics. The most famous and popular fertilizers from the Flora trademark.
Flora hydroponics kits are certified in Russia
Such fertilizers are available in three basic (mandatory) bottles and several additional (optional). It is not difficult to prepare a working solution from them, using special tables drawn up by the manufacturer. To do this, in a 5-liter (you can use containers and other volumes) bottle with water using a syringe, inject the required amount of drugs, shake and pour into the solution tank.
Table: preparation of working solutions based on Flora preparations
| A drug | Lighting 18 hours | Lighting 12 hours | |||
| Drug dosage in ml / liter | |||||
| pH 5.5-6.5 | Seedling | Vegetation | Before flowering | Bloom | Last 10 days of flowering |
| FloraGro | 0,25 | 0,6 | 1,5 | 0,5 | Pure water |
| FloraMicro | 1,0 | 1,0 | |||
| FloraBloom | 0,5 | 1,5 | |||
| Ripen | Increasing the content of active substances, improving taste and smell | 5,0 | |||
| Bio Roots | 2,0 | Root activator | |||
| Bio bloom | 5,0 | Spray three times per cycle at intervals of 7 days | Boost immunity | ||
| Diamond nectar | 2,0 | Metabolism activator | |||
Video: preparing a nutrient solution for hydroponics
Pros and cons of hydroponics
This method has many advantages:
- Low water consumption, since, in addition to the amount that evaporates, all the rest of the moisture is absorbed by the plant.
- Since the plant does not have to spend its energy to extract nutrients from the soil, they are all spent on fruiting, as a result of which the yield is significantly increased.
- Hydroponically grown strawberries have a higher vitality than garden grown strawberries.
- Lack of labor for weeding, loosening and mulching.
- Economical consumption of fertilizers, since they are all absorbed by the plant. True, the positive effect of this factor is offset by the high price of nutritional formulations.
There are also disadvantages to hydroponics:
- Strong dependence of development on the balance of the nutrient solution, its acidity, temperature. Any mistake in cooking can lead to disruption of growth and even rapid death of the plant.
- Untimely change of the solution can lead to acidification of the roots, the formation of algae on the substrate, the development of fungi.
- High price of certified nutrient solutions.
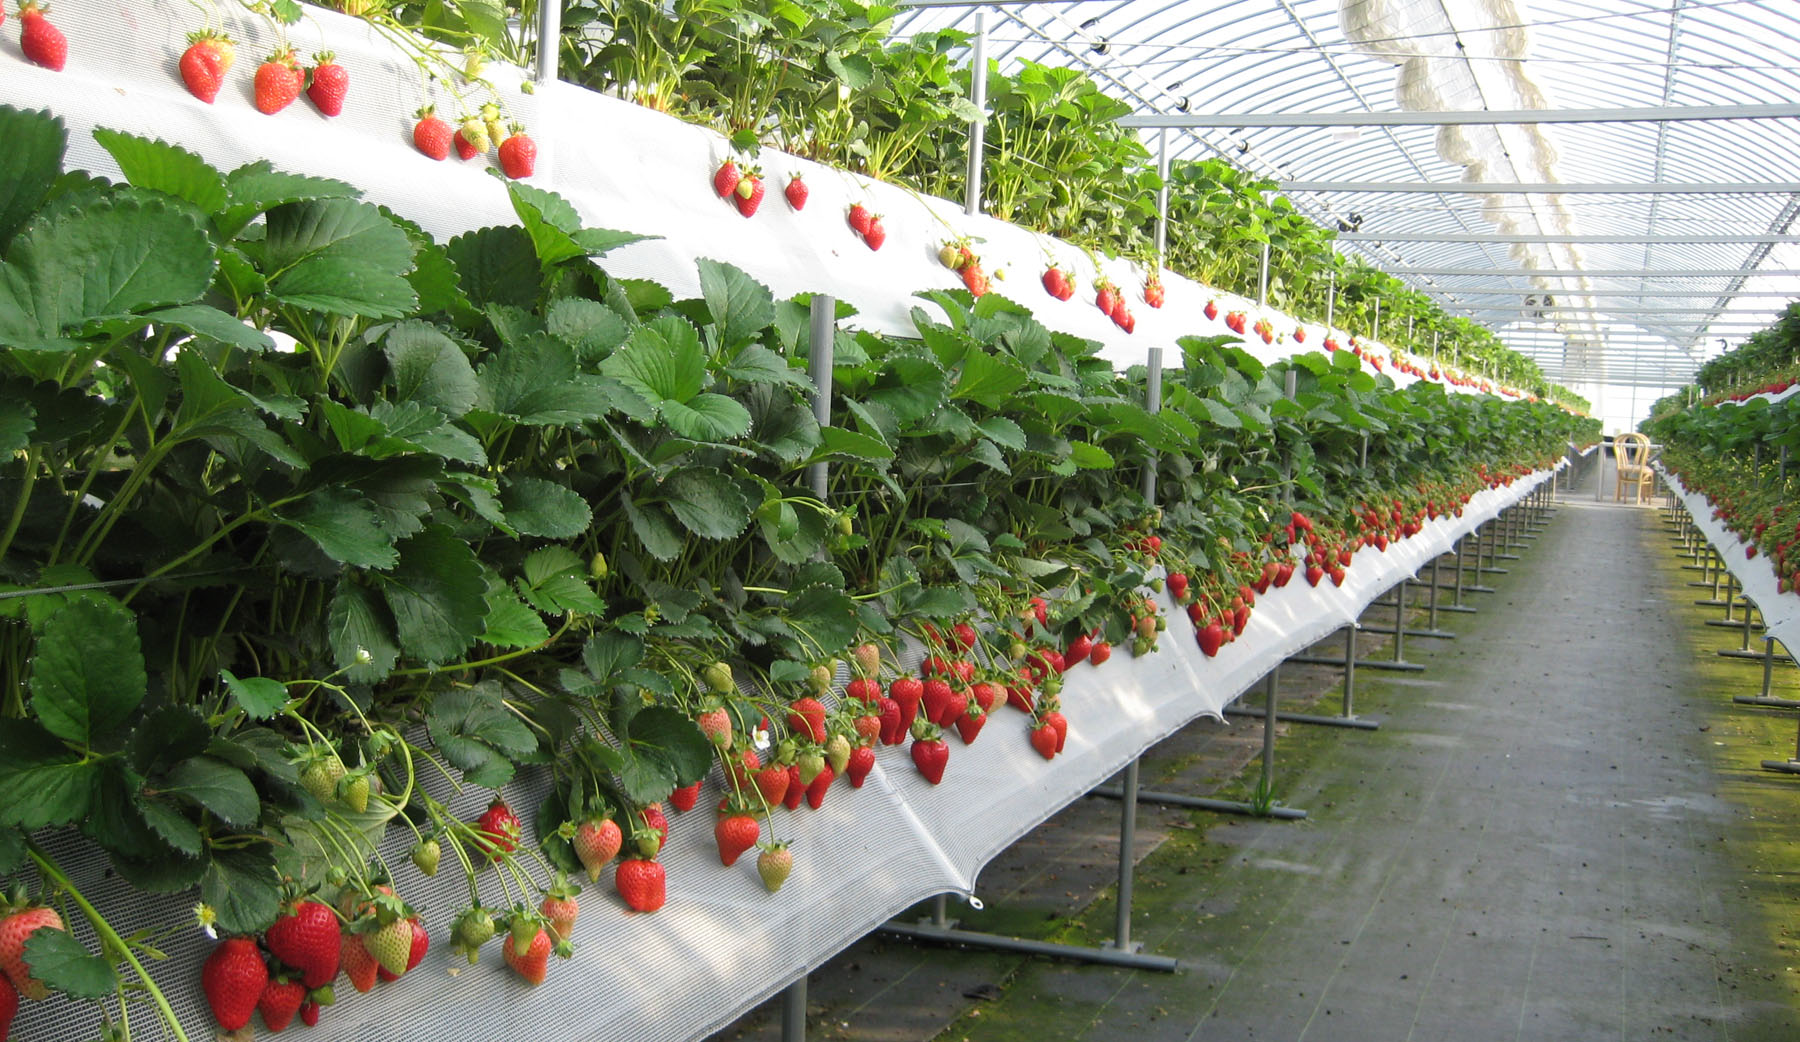
Dutch technology
The essence of this intensive technology is as follows:
- For cultivation, high-yield varieties with the shortest ripening periods are used. For instance:
- Alba;
- Octave;
- Sonata;
- Honey;
- Daryonka;
- Clery and others. Any Dutch hybrids will do.
- Saplings are planted in waves with an interval of 1.5-3 months, depending on the early maturity of the variety. It is important that the plants of each next wave begin to produce ripe berries as soon as the fruiting of the previous wave stops. Ideally, harvesting takes place almost continuously.
- Fruiting plants are thrown away, the container is disinfected, the substrate or soil is replaced and new seedlings are planted.
To ensure such a rhythm of work, it is necessary to create conditions that are most suitable for the growth of the culture, as well as the availability of planting material throughout the year. It does not matter how strawberries are grown - hydroponic or traditional. It is only important to maintain the continuity of the process. In Holland, where the soil is poor, of course, they prefer hydroponics, in Russia it is more economically profitable to grow strawberries in soil. But in any case, this happens in heated greenhouses. Well, or, as in our case, on an insulated balcony or windowsill.
Conditions for growing strawberries indoors
They have already been mentioned earlier, so we simply systematize their list in the context of intensive cultivation:
- The optimum air temperature range is 18-25 ° C, and it is desirable that during flowering it does not go beyond the level of + 21-22 ° C. Temperatures below +12 ° C and above +35 ° C are critical, if they are exceeded, growth slows down or stops.
- Humidity 70-80%.
- The level of carbon dioxide in the air is 0.1%. This indicator directly ensures normal photosynthesis, without which there is no nutrition. Reduce this indicator when it rises by ventilation, and increase by supplying smoke, for example, from burning gas, candles, firewood, etc. There are special detectors to measure the level of carbon dioxide.

There are special detectors for measuring the concentration of carbon dioxide in the air.
- Providing the duration of daylight hours 12-16 hours.
- Using for artificial lighting only special phytolamps, which give light of the desired red-violet spectrum.
- Pollination.
- Watering and feeding.

Planting material, frigo seedlings
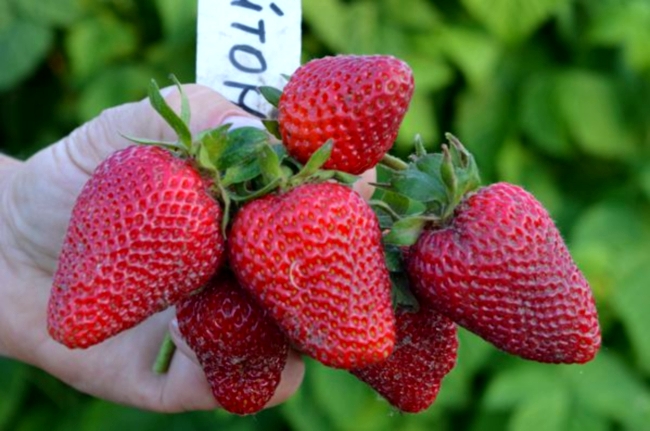
To provide planting material throughout the year, the ingenious Dutch have come up with a special technology called frigo. It consists in the fact that in late autumn, rooted rosettes of strawberry whiskers with a well-developed root system are harvested on plantations, while all the leaves are removed, leaving the bud, petioles and small leaves intact. Such seedlings are tied in bundles, placed in plastic bags, which are placed in boxes and placed in refrigerated chambers for storage at a temperature of -1.5-2 ° C. In this state, they can be stored for up to one year.
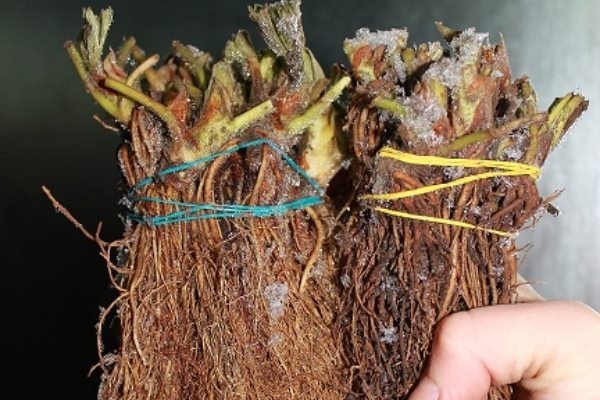
Frigo strawberry seedlings can be planted throughout the year
You can use them for planting at any time, they quickly wake up, grow and give a quick harvest. Frigo seedlings can be purchased in online stores, and if there are suitable conditions (refrigeration chamber), it is not difficult to harvest them yourself.
Video: about frigo seedlings
Modern strawberry varieties, bred specifically for indoor conditions, are capable of bearing fruit almost all year round, even without sufficient lighting. And the use of modern cultivation methods makes it possible to maximize the use of small free spaces for growing several dozen bushes covered with beautiful, tasty and aromatic berries.