Spring is the period when plants, including gooseberries, require increased attention. It is at this time that the most important agrotechnical measures are held. The gardener needs to know and perform them in order to obtain high yields, as well as to ensure a long and productive life of the shrub.
Content
Planting gooseberries in spring
Gooseberries can be planted both in spring and autumn. In any case, seedlings with an open root system (ACS) should be planted at rest.
Landing dates
Gooseberries are planted in the spring as early as possible - in late March - early April. This culture is one of the first to awaken from winter sleep, and the awakened plants take longer to take root. Usually, planting is carried out at an air temperature of + 5-7 ° C.
Choosing a landing site
Gooseberries love light, warmth and lack of drafts with good ventilation of the shrub. The best place for this culture is a small southern or southwestern slope, on which water will not accumulate and stagnate. It is desirable to have protection from cold winds in the form of thick trees, a fence or a wall of knowledge located at some distance from the north or north-east side.
The gooseberry loves loose, fertile soil. It grows well on loams, sandy loams, chernozems with a neutral or slightly acidic reaction. The optimum pH is 5.5–7.0. Do not plant gooseberries in areas where currants or raspberries grew before them, as well as next to these plants. It is good if, a year before planting the shrub, green manures (phacelia, legumes, mustard, barley) were grown on the site.
It's good if a year before planting the gooseberries, green manures were grown on the site
Selection of seedlings
You can buy seedlings both in autumn and spring. Both times of the year have their pros and cons:
- in the fall there is more choice of planting material;
- in spring it is more likely that the seedling will take root (since it will not freeze).
When choosing a seedling, attention is paid to the thickness of the branches and the condition of the root system. There should be at least two or three shoots, with a diameter of 0.6 to 0.8 cm in an annual and 0.8–1.5 cm in a two-year-old plant. A healthy root system should consist of fibrous (15–20 cm long) or branched (20–25 cm long) roots with brown bark. The less white and dry roots there are, the higher the quality of the seedling.
Closed-root plants (CCs) should be quite bulky with a lot of leaves.The diameter of the shoots of a one-year-old seedling with ZKS is in the range of 0.5–0.6 cm and 0.6–0.8 cm for a two-year-old. The plant in the container should sit tightly, without staggering - this indicates that the roots have grown enough and firmly hold on to the clod of earth.
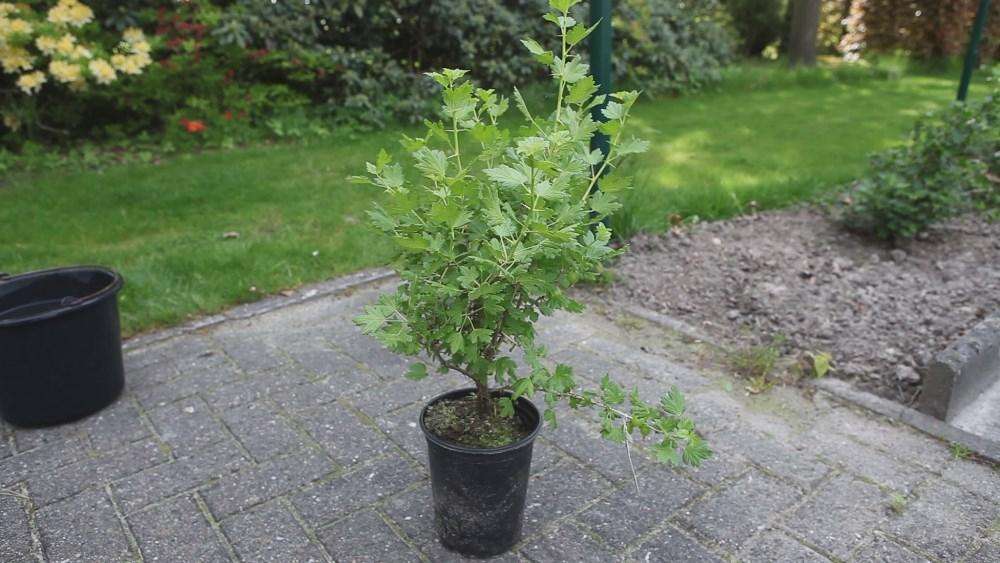
Closed-rooted gooseberry seedlings should have a lot of leaves
Gooseberry planting scheme and preparation of the planting pit
The distance between the gooseberry bushes, as well as to the neighboring plants, is chosen based on the diameter of the bush of the selected variety. On average, 1.5 m between plants in a row and 2.5 m between rows can be recommended. Often, in order to save space, a combined planting method is used - first, the bushes are planted with an interval of 0.5-0.75 m, and after a few years they are planted.
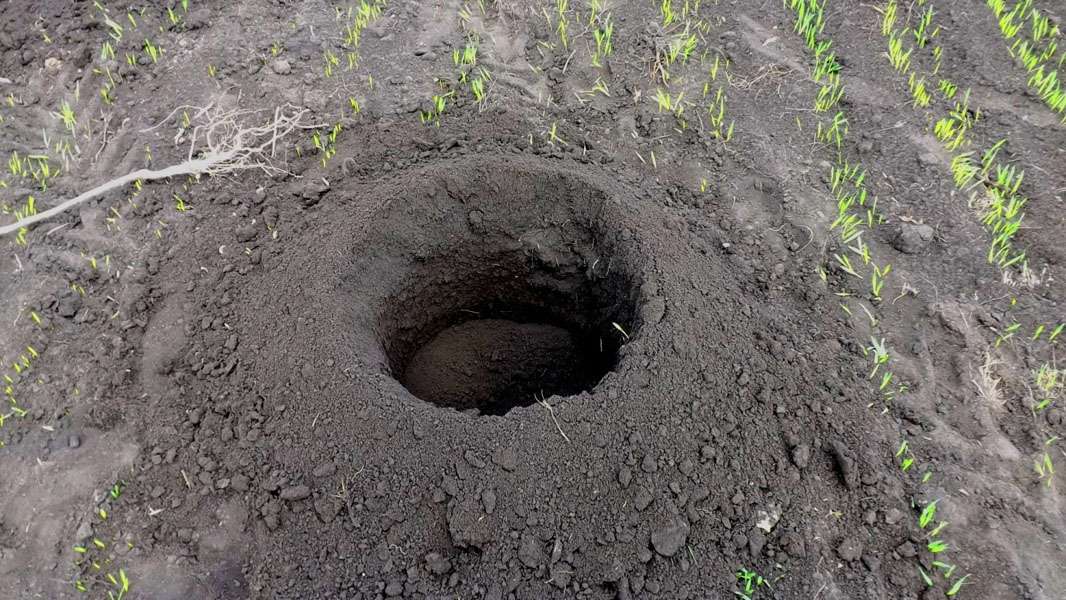
Planting holes are ideally prepared in the fall, but if this does not work out, they are dug up in the spring at least a week before planting so that the earth has time to settle. The process consists of the following steps:
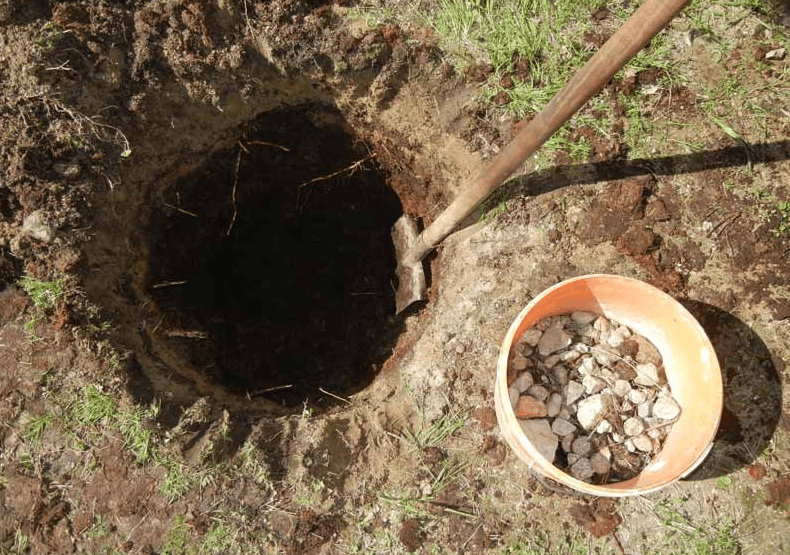
- They dig holes 40–50 cm deep and 60–70 cm in diameter. In this case, the topsoil, if it is fertile, is set aside for later use.
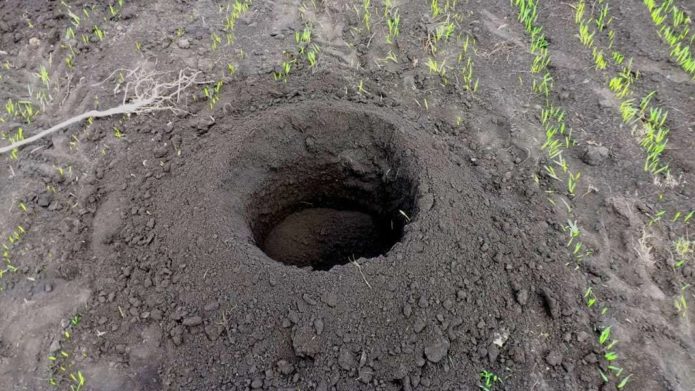
For gooseberries, pits 40-50 cm deep and 60-70 cm in diameter are suitable
- If necessary, if the soil is heavy, a drainage layer of rubble, expanded clay, broken brick is laid on the bottom.

A layer of drainage from rubble, expanded clay, broken brick is laid on the bottom of the gooseberry pit
- The pits are filled with a nutrient mixture of black soil (you can use the soil set aside when digging the pit), peat and humus in equal proportions. They also add 45–70 g of superphosphate and 0.5 liters of wood ash to the pit.
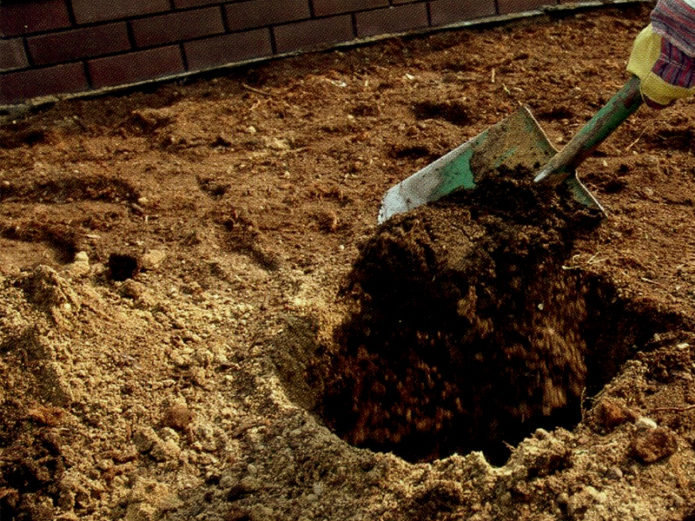
Fill the pit with superphosphate and ash nutrient mixture
- The components are thoroughly mixed with a pitchfork.

Planting gooseberries
In early spring, when favorable conditions come, they start planting:
- The seedlings are taken out of the storage area (they are stored in a cellar in winter at a temperature of 3-5 ° C) and their roots are soaked in water for several hours with the addition of rooters - Heteroauxin, Kornevin, Epin, etc.
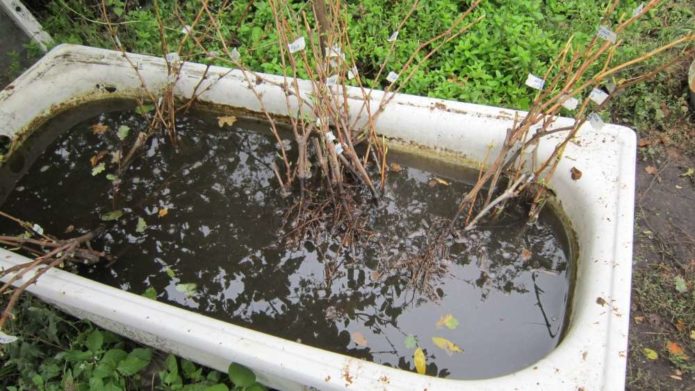
Gooseberry seedlings are soaked for several hours before planting.
- A part of the soil is taken out of each hole so that holes are formed in sizes sufficient to accommodate the roots of the seedlings.
- Plants are planted, adding small mounds under the roots, if necessary. It is important that in this case the root collar is deepened by 5-8 cm, while further on the shoots, additional roots are formed. When backfilling, the soil should not be strongly compacted, since the roots of the gooseberry are afraid of injury.

When planting gooseberries, the root collar is deepened by 5-8 centimeters
- Circles are formed around the seedlings along the diameter of the planting holes.
- Young plantings are abundantly watered, which helps to compact the soil and remove the air sinuses from the root zone.
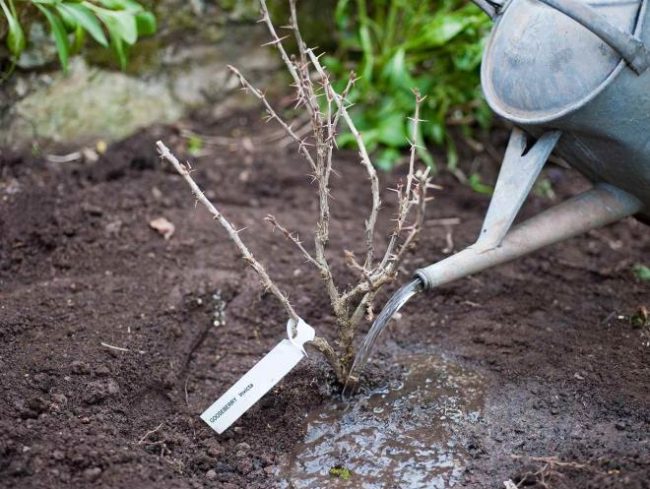
Young plantings of gooseberries are abundantly watered, which helps to compact the soil and remove air sinuses from the root zone
- After the soil has shrunk, an additional amount of earth is poured into the trunk circle and watering is repeated.
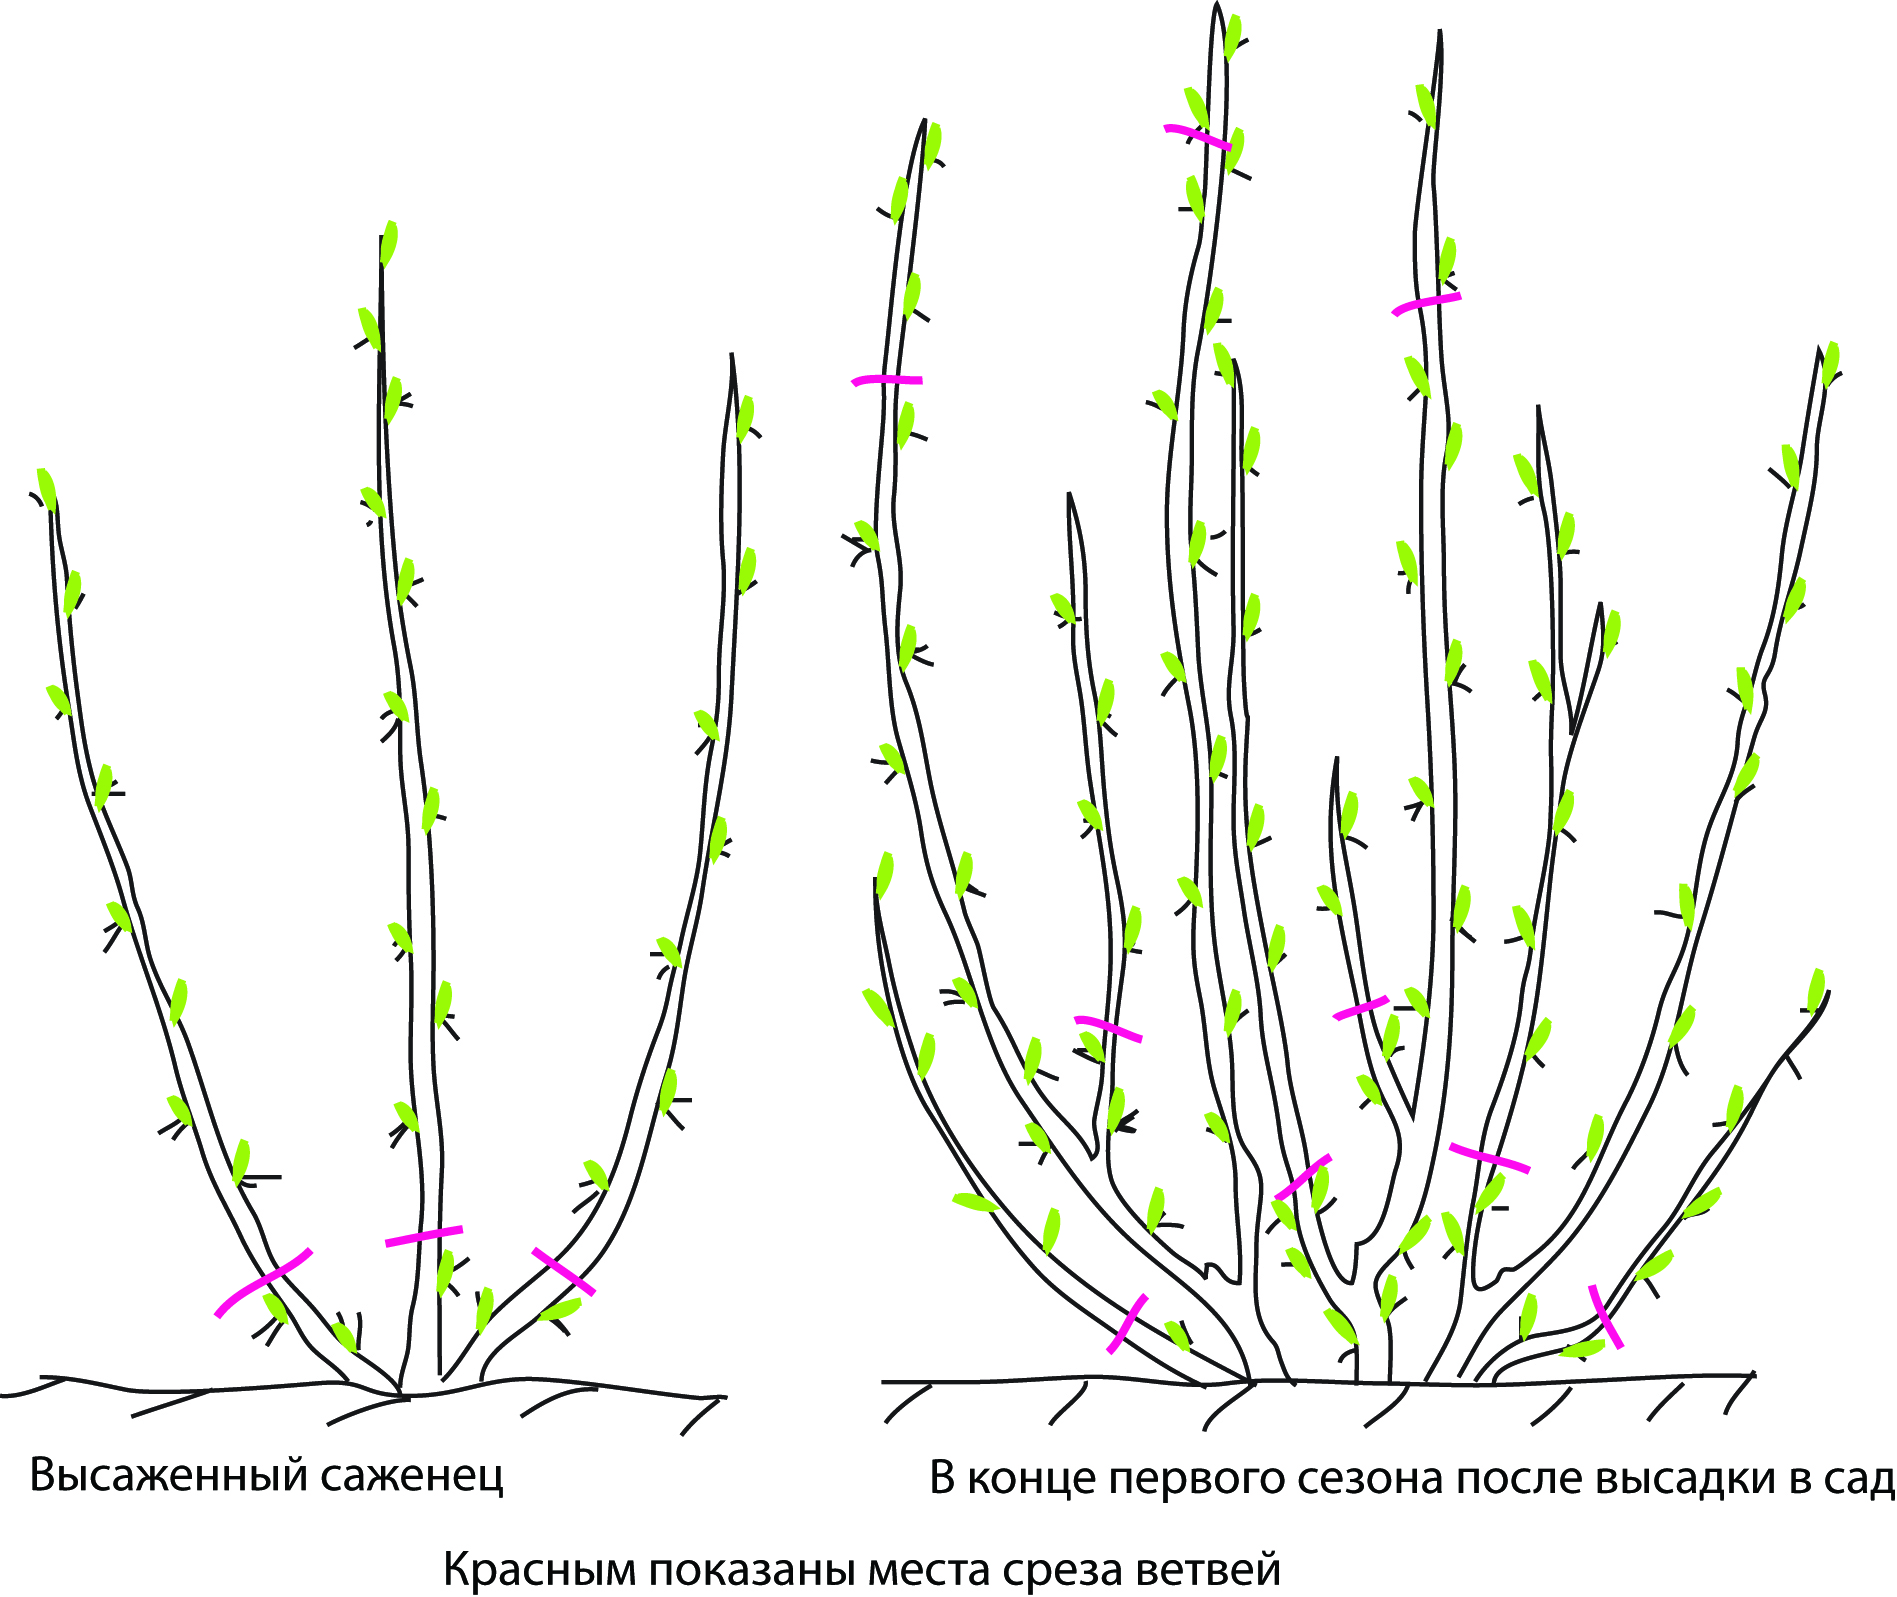
- Shoots are cut to a height of 5-10 cm so that the rest of them has 2-3 buds.

Cut the gooseberry shoots to a height of 5-10 cm so that the rest of them have 2-3 buds, and as a result, many new fruiting shoots grow in the second year
- After 1–2 days, the soil is loosened and mulched with humus, compost, rotted sawdust, etc.

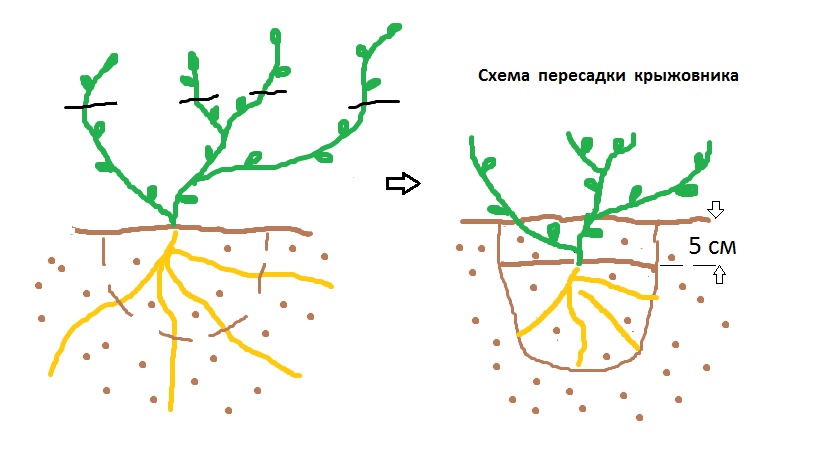
Gooseberry transplant in spring
If, when planting gooseberries, the thickened planting method was applied (see above for the combined planting method), then over time the bushes will need to be transplanted. A transplant may also be needed for other reasons, for example, when redeveloping a garden. Most gardeners and experts agree that it is preferable to transplant gooseberries in the fall: at this time it takes root better. But with due diligence, if necessary, you can transplant gooseberries in the spring. This should be done early, before his awakening. If the buds begin to swell, then it is better to postpone the transplant until autumn.
The less the root system is injured during transplantation, the more likely the successful outcome of the operation is. Therefore, you need to try to extract the plant with a clod of earth. They act as follows:
- Prepare a landing pit according to the rules set out above. Its diameter should be 80–90 cm, and its depth should be 40–50 cm.
- Assess the condition of the bush. When thickened, it is thinned out, removing dry, damaged and old shoots. The rest are cut by 30% to balance the volumes of the crown and root system.
When thickened, the gooseberry bush is thinned out before transplanting, removing dry, damaged and old shoots
- A circle with a radius of about thirty centimeters is outlined around the bush. A groove is dug along this circle, deep into the bayonet of the shovel.
- Dig in the soil under the base of the bush and take it out with a clod of earth.
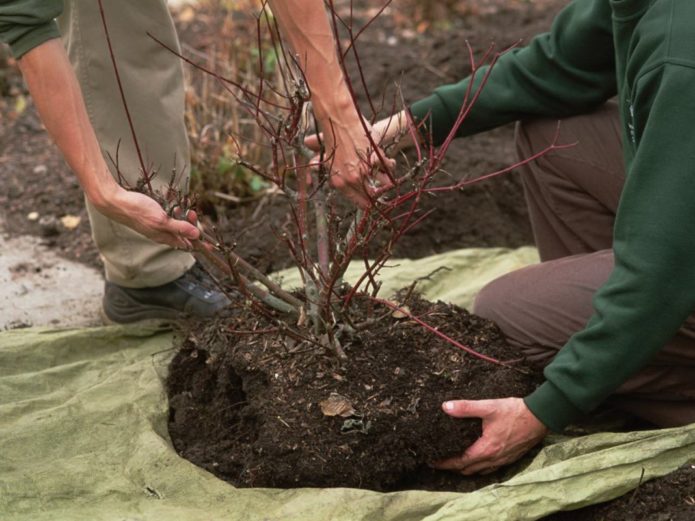
In order that the earth does not crumble from the transplanted bush, it can be transferred to a new place on the sacking
- Part of the nutrient soil is removed from the planting pit, forming a hole with dimensions corresponding to a coma of the earth with the root system of the transplanted bush.
- A bush with a lump of earth is lowered into the hole. In this case, you need to make sure that the bush is 5-7 cm deeper than it grew before.
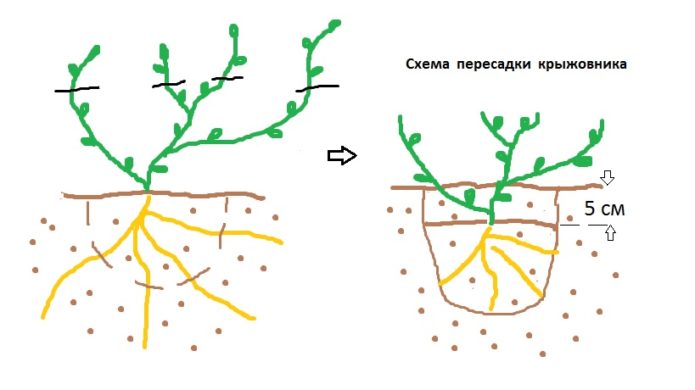
The transplanted gooseberry bush is deepened by 5-7 cm
- Fill the space around the root system with nutritious soil, compact and form a near-stem circle.
- Sprinkle abundantly with water, loosen and mulch with humus.

Gooseberry care in spring
Spring care is the most important for gooseberries.
Top dressing
Bushes need additional dressing 2-3 years after planting, provided that the recommended amount of nutrients has been introduced into the planting pit. In early spring, gooseberries are fed with nitrogen-containing mineral fertilizers. Usually, ammonium nitrate or urea (carbamide) is used. Fertilizer consumption rate:
- 30-40 g per young bush;
- 40-60 grams per bush over four to five years old.
You can simply scatter the granules over the surface of the trunk circle, followed by digging, but it is better to dissolve them in water and water the plants. It is advisable to carry out this dressing twice with an interval of 10-15 days with half the fertilization rate. You can also feed the gooseberries in the spring with humus, using it to mulch the soil after watering. Do not do other dressings in the spring.
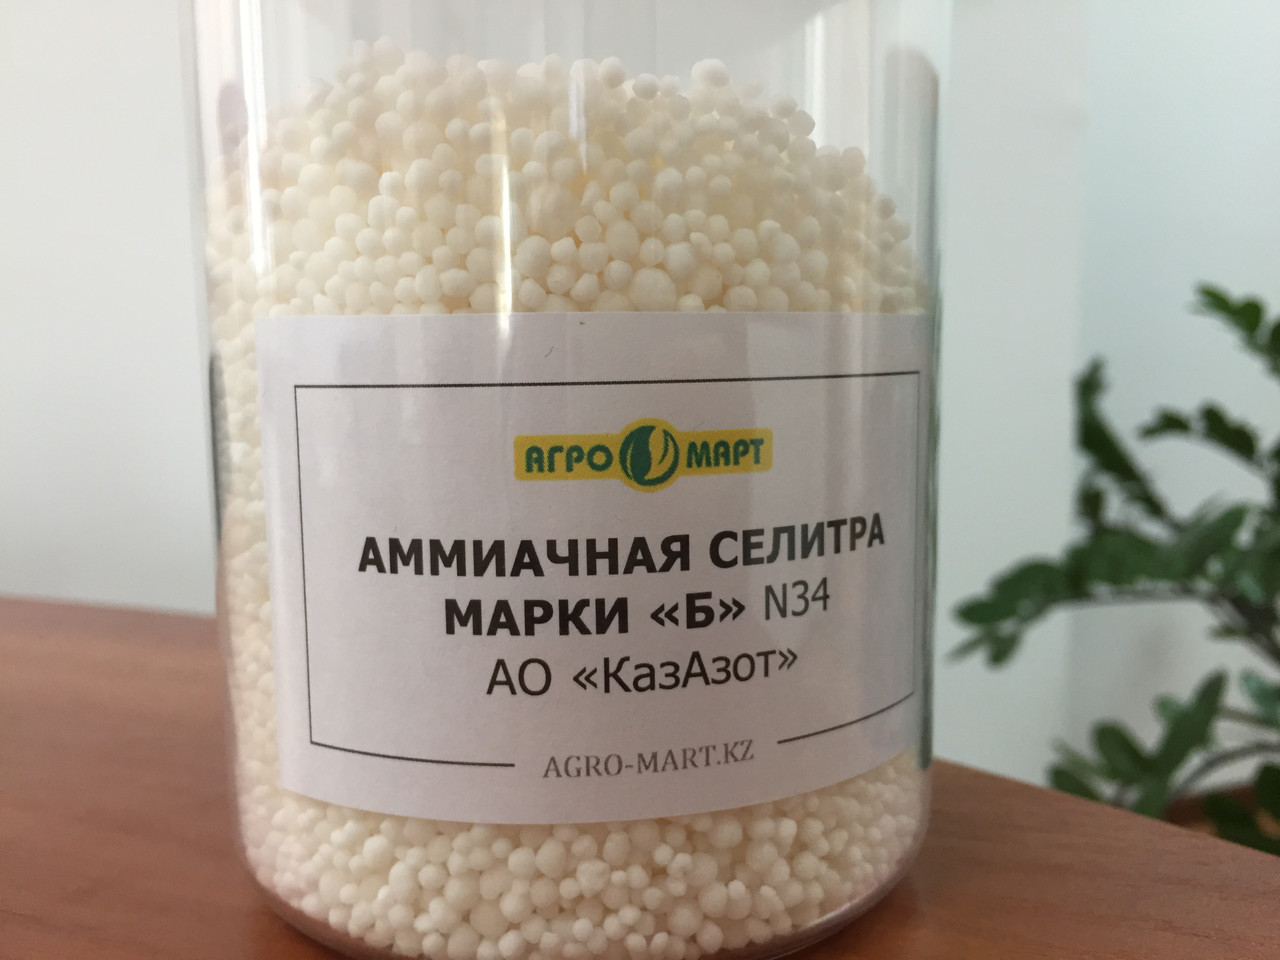
In spring, gooseberries need nitrogen fertilizers.
Watering
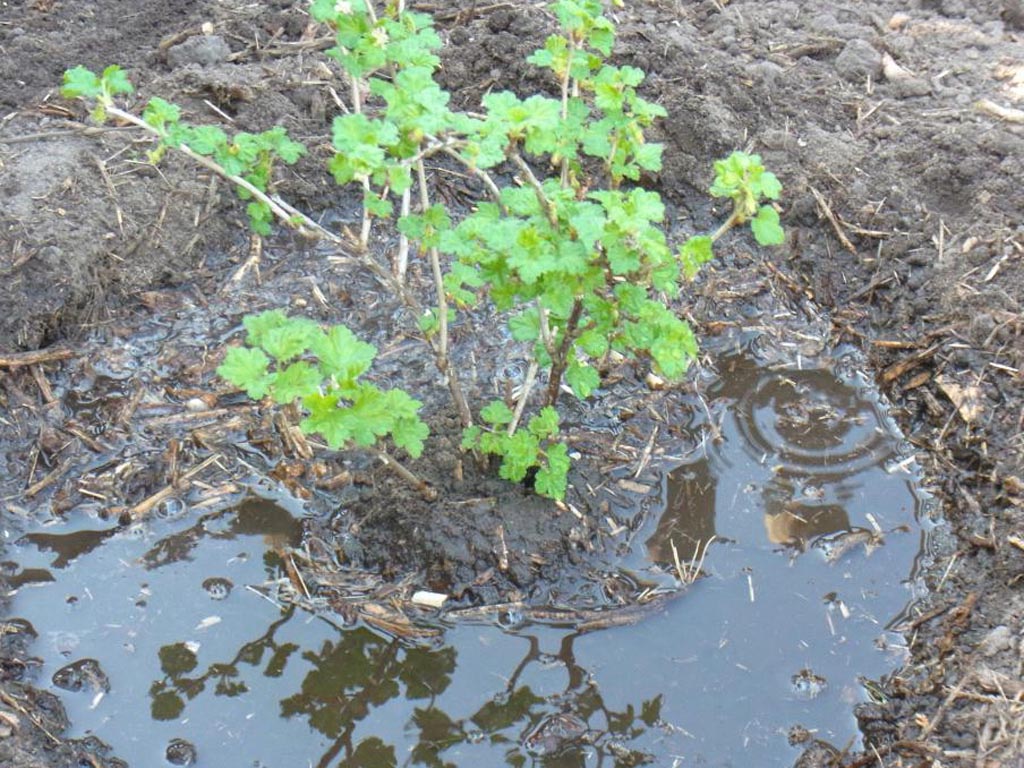
Spring watering is important for the rapid growth of the leaf apparatus of the bush, as well as for setting ovaries and fruits. You will need 3-4 watering (depending on weather conditions, there may be less). The first watering is carried out in early April and is repeated at intervals of two to three weeks before summer. It is important that the soil does not dry out and remains moist to a depth of 5–10 cm.
To better absorb moisture into the ground, a side of the ground is made around the gooseberry bush
After each watering, the soil should be loosened to provide air access to the roots. Mulching near-tree circles will allow you to retain moisture longer and increase watering intervals.
Pruning
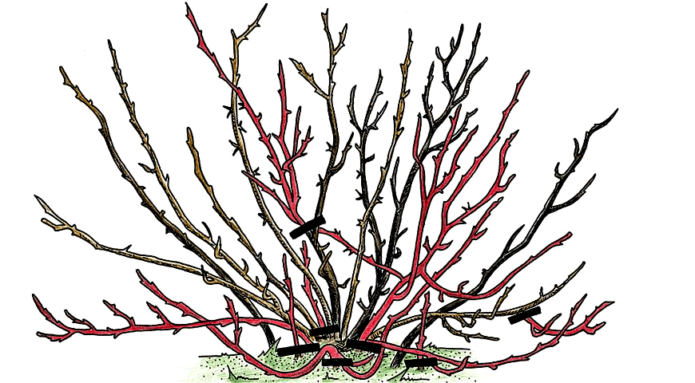
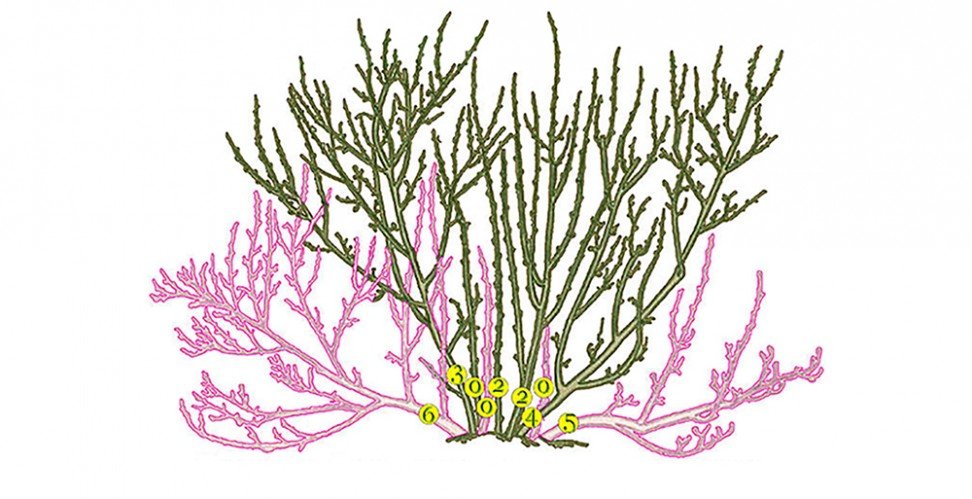
The formation of new shoots should be monitored regularly, otherwise in 2-3 years the bush will be too thick and impenetrable for light. This will lead to the crushing of the berries, create conditions for the development of diseases and attract pests. As a result, the yield drops, new shoots lengthen and sink to the ground, the bush becomes shapeless and weak. Gooseberries need regular thinning and shaping pruning, which experienced gardeners recommend doing in early spring immediately after the snow melts, before the bushes wake up and the first leaves appear on them. Cutting gooseberries is easy, but remember that shoots up to four years of age are productive. So the trimming sequence is:
- All dry, damaged branches are cut.Shoots older than four years must also be removed.
- Thin the bush, leaving 2-3 shoots at the age of one, two, three and four years. In this case, first of all, excess shoots that grow inside the bush and intersect with other branches are subject to removal.
- On the remaining shoots, dry and damaged branches are cut out to the first healthy bud, too long are shortened.
- All branches are cut 5-7 cm, limiting their growth in length and stimulating the formation of lateral fruiting shoots.
When pruning gooseberries, remove all shoots older than four years
With proper and regular pruning, gooseberries, entering at the age of 3-4 years at the time of fruiting, can grow and actively produce berries for ten years, and some varieties - up to fifteen years or longer. The most productive bushes are 6–8 years old.
Video: correct gooseberry pruning
Spring stages of gooseberry breeding
In the spring, all methods of propagation of gooseberries are available to the gardener, except for green cuttings (this will have to wait until summer). Let's dwell on the main ones.
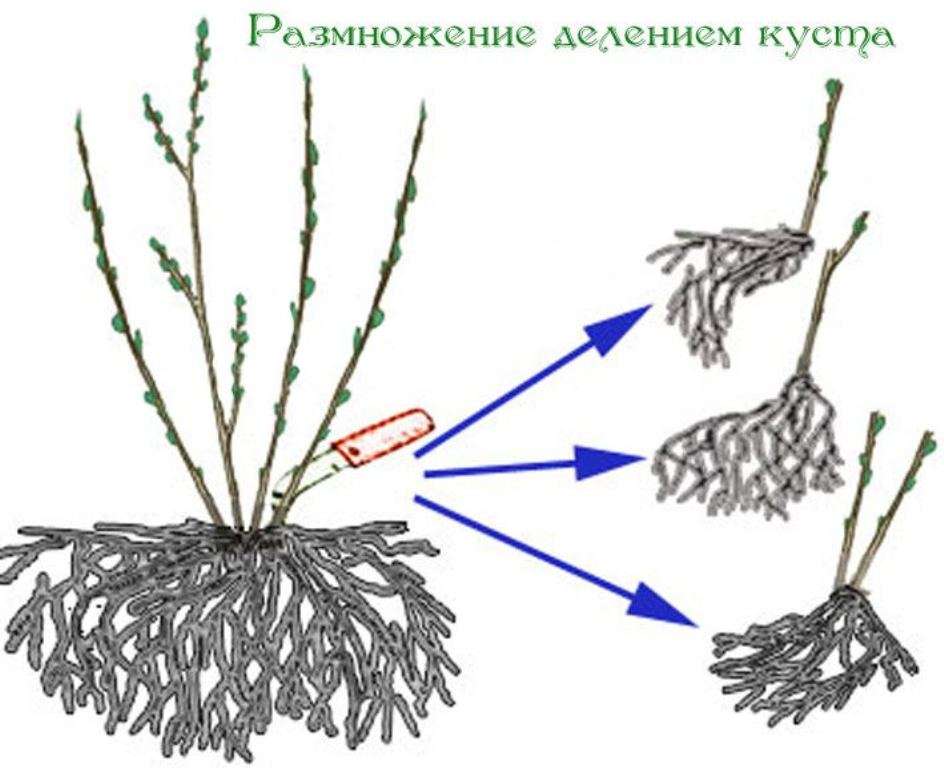
Reproduction by dividing the bush
This method is used when there is a powerful, dense bush with a large number of healthy one to four-year shoots. This is done in early spring before bud break as follows:
- Dig a bush in the same way as for transplanting.
- Gently free the roots from the ground and spread them.
- Using a secateurs or a sharp knife, separate shoots or groups of 2-3 shoots with good roots are separated from the bush.
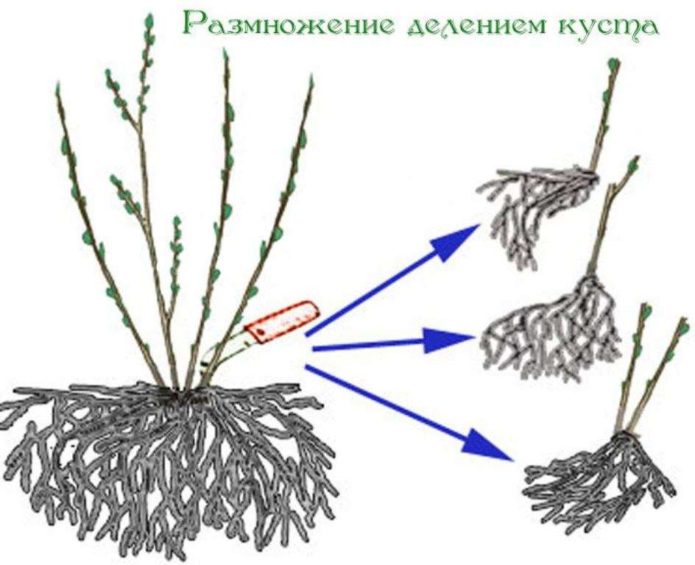
With the help of a pruner or a sharp knife, separate shoots or groups of 2-3 shoots with good roots are separated from the bush
- The obtained seedlings are planted in pre-prepared planting pits according to the previously described algorithm.
Propagation by root shoots
Often, shoots appear around the bush from the roots. Usually they fight and destroy it, but if necessary, you can use these shoots to propagate gooseberries. For this:
- In the spring, shoots are dug out of the ground, cutting off the root coming from the mother bush.
- Then young plants are planted in a permanent place in the same way as ordinary seedlings.
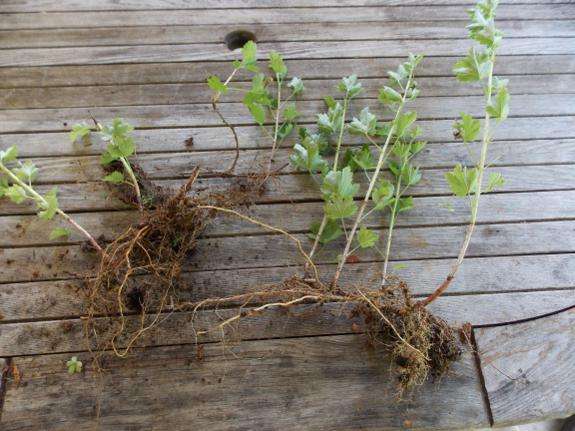
Gooseberry root can be used for propagation
Reproduction by layering
This is the most popular method and has three options.
Horizontal layering
Young bushes three to four years old are suitable for this method. The bush is propagated as follows:
- Depending on how many seedlings are needed, 3-5 annual shoots are chosen.
- In the spring, when the soil warms up to 10–15 ° C, radial grooves 5–7 cm deep are dug in the near-stem circle, one for each shoot.
- The grooves are filled with a mixture of humus and peat.
- The shoots are laid in grooves, but they do not fall asleep, but are fixed in several places with wire pins.
- The grooves are watered regularly, keeping them constantly wet.
- After the appearance of vertical shoots 4–5 centimeters high, they are covered with fertile soil and continue to be watered regularly.
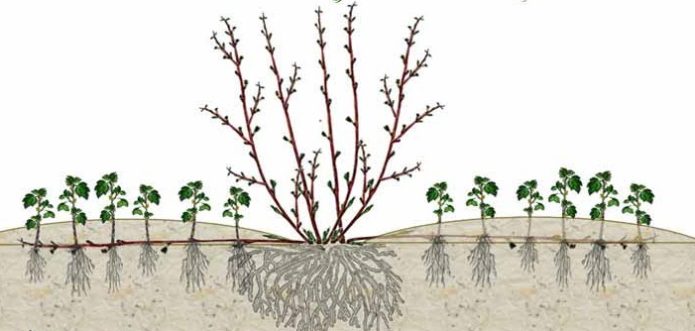
From each horizontal layer, you can get up to 5-6 gooseberry seedlings
- In this way, seedlings are grown until autumn, hilling them when they reach a size of 13–17 cm.
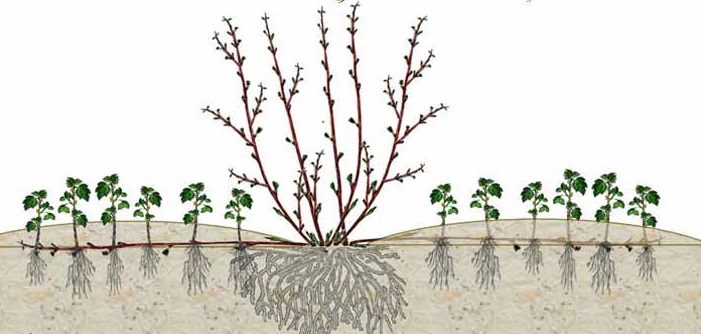
The advantage of this method is that the mother bush continues to bear fruit as usual during the rooting process.
Arcuate layering
The method differs from the previous one in that the branch is attached to the ground in only one place and immediately covered with earth, leaving the base and top on the surface. To stop growth, the shoot is pinched 10-12 cm. Further care consists in regular watering and hilling. By the fall, this shoot will produce one, but powerful seedling.
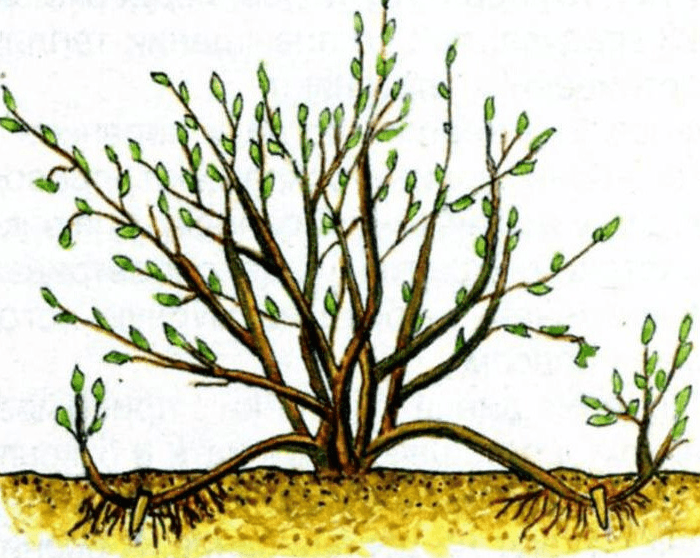
By autumn, one, but powerful gooseberry sapling will turn out from an arcuate layer
Video: propagation of gooseberries by arcuate layers
Vertical layering
In this way, bushes are propagated at the age of 6-8 years and older, which have practically exhausted their fruiting resource and need to be replaced. At the end of winter or early spring, all shoots older than three years are cut to the point of growth (from which new shoots grow), and the rest are shortened to 8-10 cm. As a result of such a cardinal pruning, young shoots will begin to actively appear.
When it reaches a height of 10-15 cm, then it should be sprinkled with fertile soil by half, carefully filling the sinuses between the shoots. During the summer, as the shoots grow, hilling is repeated 3-4 more times, after watering the plant. By autumn, the rooted cuttings are transplanted to a new place or stored until spring. The bush will not bear fruit this season.
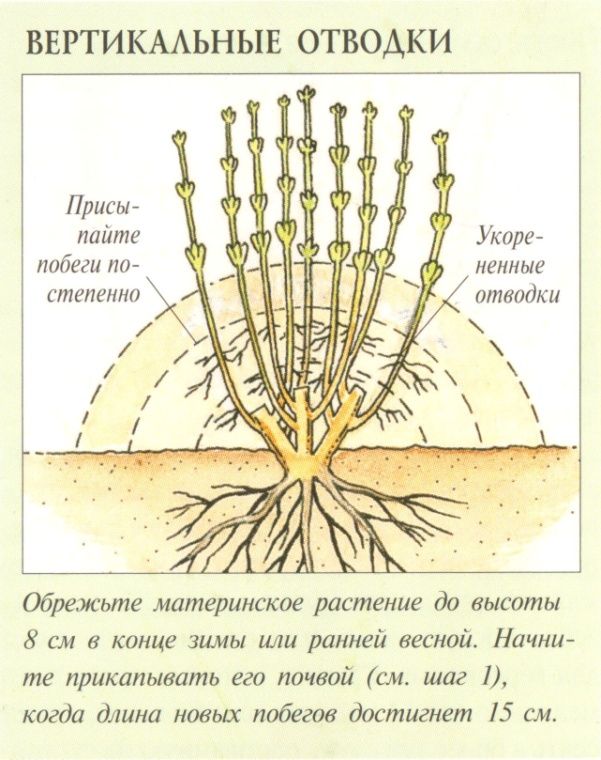
Old gooseberry bushes are propagated by vertical layers
Protecting gooseberries from pests and diseases in spring
At the end of winter and early spring, you should take care of preventive measures to protect gooseberries from pests and diseases. If this is not done in time, then there is a significant risk of infection of shrubs with various fungal diseases, as well as attacks of harmful insects.
Table: Spring activities for disease prevention and gooseberry pest control
| activity | Duration | Method of conducting | Achieved effect |
| Boiling water treatment | March | Boil water, pour it into a watering can or bucket, water the bush (you can process it only until the buds swell) | Bush awakening, pest control and disease prevention |
| Sanitary pruning | End of February - beginning of March | Cut dry, damaged and diseased shoots | Pathogens and possible pests hibernating in dry branches are removed from the plant |
| Eradicating herbicide treatment | Spraying the bush and the soil under it with a 3% solution of copper sulfate or Bordeaux liquid. In addition, treatments with DNOC (once every three years) and Nitrafen are effective. | Prevention of all known fungal diseases and pest attacks | |
| Treatment with systemic fungicides (means of combating fungal diseases) | After flowering | 2-3 treatments are carried out with an interval of 10-15 days. The drugs are used:
| Prevention of fungal diseases |
| Insecticide Treatment (Pest Control) | 2-3 treatments are carried out with an interval of 10-15 days. The drugs are used:
| Prevention of pest attacks |
Video: processing gooseberries from powdery mildew with boiling water
Gooseberry agrotechnology in the spring is full of activities, but it is not difficult. Planting, transplanting gooseberries, caring for them, protecting against diseases and pests are quite accessible to any gardener.