Traditionally, garden strawberries are propagated by rooted rosettes and bush division. But in cases of growing mustacheless varieties, the optimal breeding method is to grow seedlings from seeds. This is not a very simple matter - there are certain nuances and subtleties in it, without which plants cannot be obtained. Let's take a closer look at the rules and methods of sowing strawberry seeds.
Content
Collection and preparation of strawberry seeds for sowing
Strawberry seeds can be purchased at the store, but their germination can be very poor, since this crop lasts no more than one year. To avoid this problem and get enough seed, the seeds can be harvested by yourself. In any case, they must be prepared in a certain way before sowing.
How to harvest seeds correctly
For sowing strawberries, hybrids cannot be used, since with this method they do not retain their varietal characteristics. Therefore, seeds are collected only from varietal plants. This can be done in different ways - we will describe two methods of collecting seeds. The first one is older:
- The most ripe and large berries are selected from healthy and productive bushes.
- Using a scalpel or a sharp blade, carefully cut off a thin layer of skin with seeds.
- The resulting sections are dried for several days, spreading them evenly on a plate. This is done in a well-ventilated and sun-warmed place.
- When the sections are dry, they collect the seeds from the plate, if they stick, they are scraped off with a knife.
Seed collection method using a blender:
- The collected berries are placed in a kitchen blender and poured over with plenty of water.
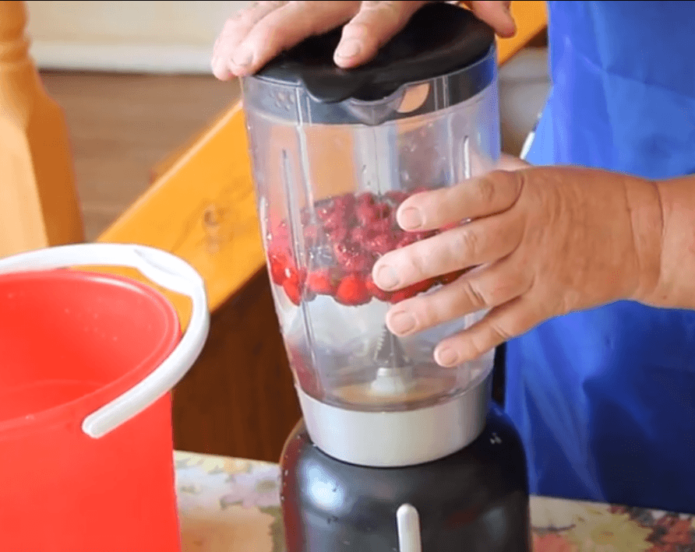
The collected berries are placed in a kitchen blender and poured over with plenty of water.
- Turn on the blender for 1-2 minutes.
- Filter the resulting mixture through a fine strainer.
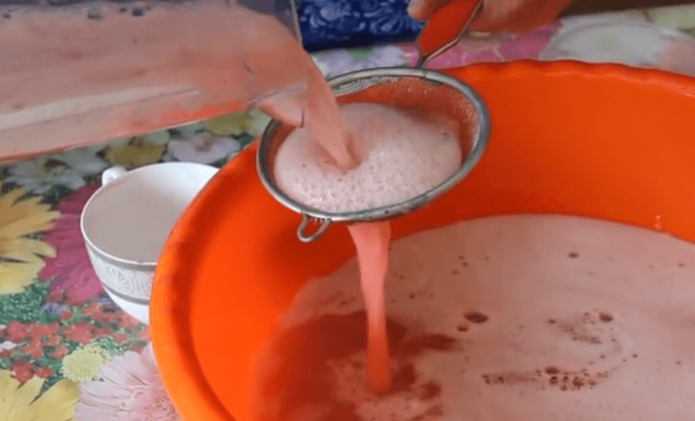
To collect seeds, filter the resulting mixture through a fine strainer
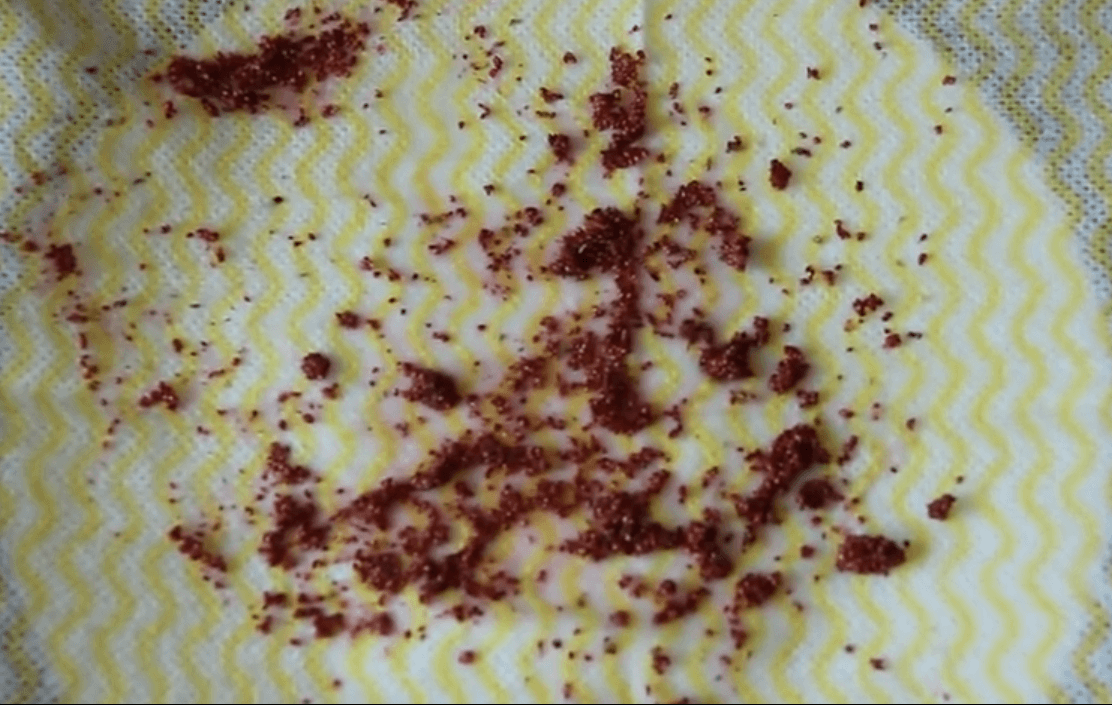
- The seeds from the strainer are transferred to a napkin to dry.

The seeds from the strainer are transferred to a napkin to dry.
- The remaining mixture is re-placed in a blender glass, allowed to settle and filtered again. The procedure is repeated several times until all the seeds are collected.


Video: collecting strawberry seeds using a blender
Sowing dates
Strawberry seeds have poor germination. Without preliminary preparation, seedlings may appear in 1-2 months. In total, it takes up to six months to grow seedlings ready for transplantation. Therefore, to get the harvest in the current year, seeds should be sown no later than February - March. If it is supposed to grow strawberries in a heated greenhouse for the winter harvest, then sowing seeds for seedlings can be in June - July.
Soil preparation
Growing strawberry seedlings requires a special soil that is easy to prepare yourself. To do this, it is enough to mix three components:
- sod land - 2 parts;
- peat - 1 part;
- coarse river sand - 1 part.
And also it is good to add wood ash to this mixture (one glass per bucket of mixture) and vermicompost (one liter per bucket of mixture). In order to destroy possible pests and pathogens, the soil mixture should be subjected to heat treatment, for example, calcined in the oven for half an hour... And of course, you can buy the ready-made mixture at the store.
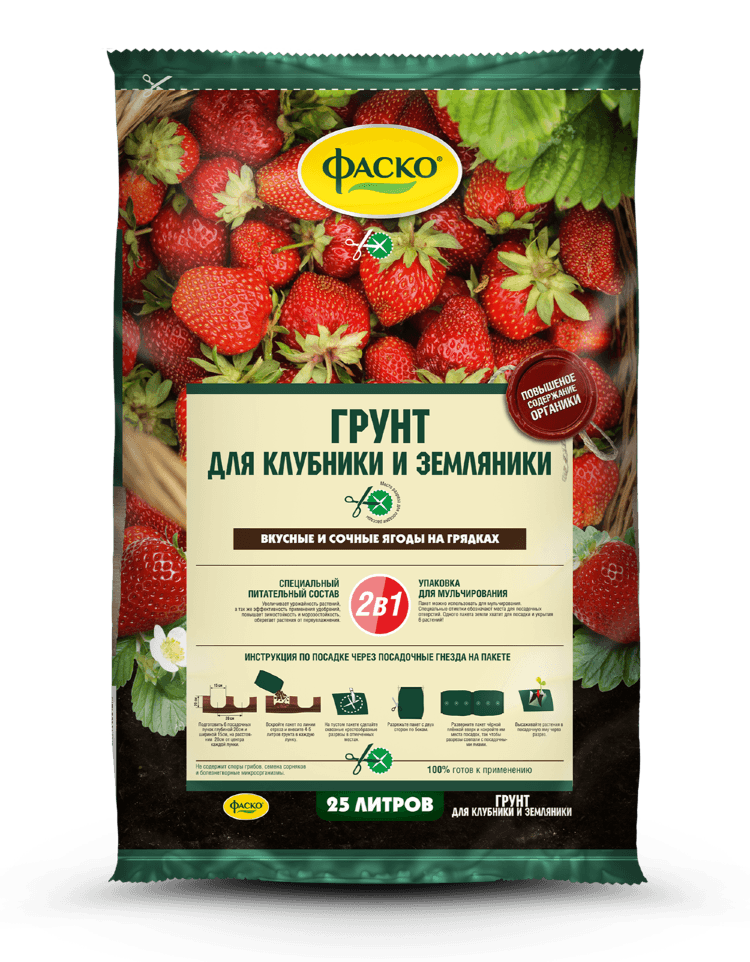
Ready-to-use strawberry and strawberry primers are on sale
Seed preparation for sowing
Strawberry seeds, which have undergone special training, can sprout within a week after sowing. This also increases the germination rate.
Stratification
In botany, stratification is understood as long-term holding of seeds at a certain temperature in order to increase their germination.
This process is usually combined with seed hardening, which consists in alternately keeping them at low temperatures and in room conditions. The duration of stratification can range from two weeks to three months. Usually the seeds are evenly scattered in a thin layer on a moistened cotton pad and covered with the same disc on top. The resulting structure is placed in a plastic container and placed in a refrigerator. Periodically (at least every other day), the seeds should be ventilated by opening the container lid for a few minutes, and about once a week they should be left at room temperature for a day. Throughout the process, the moisture content is constantly monitored, adding water to the bottom of the container if necessary.
Throughout the entire stratification process, the moisture retention is constantly monitored, adding water to the bottom of the container if necessary
Bubbling
A good way to increase the percentage of germination and accelerate the emergence of seedlings is bubbling seeds in warm (+ 25-27 ° C) water for 2-3 days. For this purpose, seeds are poured into a container of water, the end of the hose from the aquarium compressor is lowered there and turned on. After the end of bubbling, the seeds are dried and used for sowing.
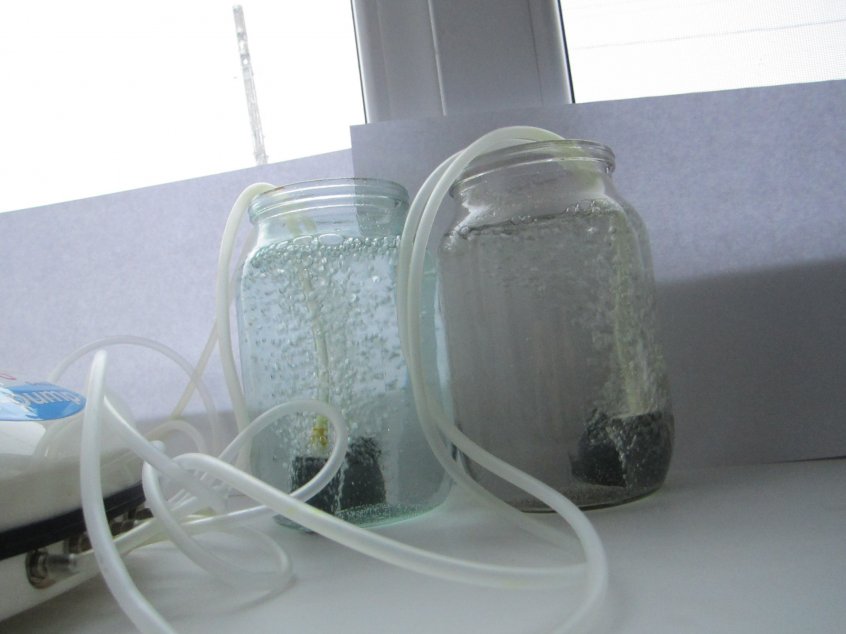
The seeds are sparged in warm (+ 25-27 ° C) water for 2-3 days
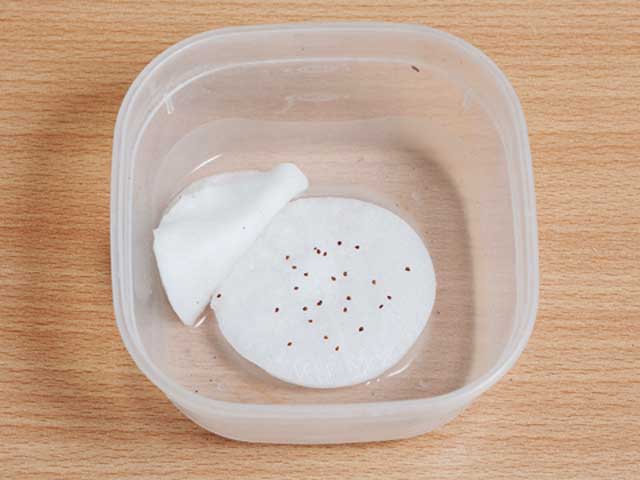
Soak
If there is no compressor, then the seeds can be simply soaked in water before sowing (rain or melt water should be used) for several days. The same construction is suitable for this as for stratification. Only in this case is the container placed in a warm place, for example, on a radiator. The method can be improved by replacing the water with a solution of one tablespoon of 3% hydrogen peroxide in 500 ml of water. In this case, the soaking period is reduced to two days.
Germination
Sowing germinated seeds will significantly shorten the germination time. To germinate strawberry seeds, they simply increase the soaking time (if the soaking was carried out in hydrogen peroxide, then after two days the seeds are washed and continue to germinate in clean water) until they begin to hatch. After that, they are planted in one of the ways described below.
After the strawberry seeds begin to hatch, they are planted in the soil
Seed sowing methods
Every gardener has their own favorite method of planting strawberry seeds. Let's consider the most popular ones.
Sowing on toilet paper
There are two options for this method, and both of them are not recommended for use, since they cannot be used to grow ready-made seedlings, but only small sprouts that require further transplantation.
Into the bottle
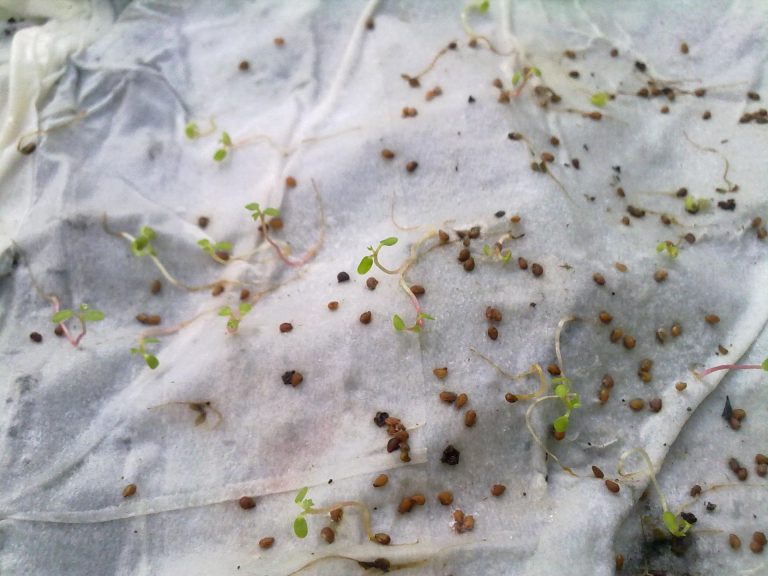
For this option, take a plastic bottle and cut it lengthwise into two halves.The bottle is covered from the inside with several layers of toilet paper and moistened well. Then the seeds are laid out on paper at a distance of 2-3 cm from each other. A bag is put on the bottle and placed in a warm place. When the seeds germinate, roots and first leaves are formed, the sprouts are transplanted into tablets or soil.
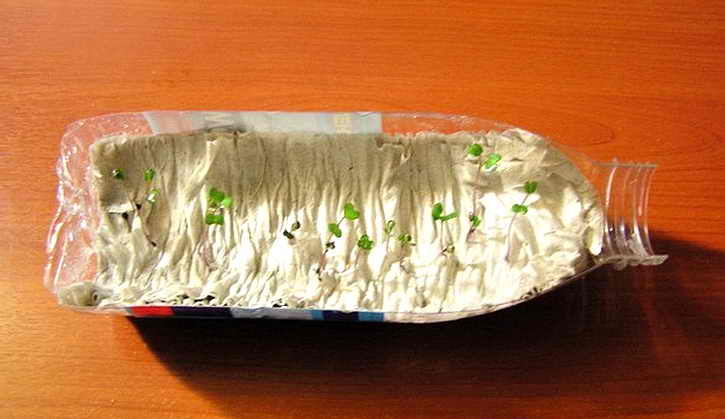
The bottle is covered from the inside with several layers of toilet paper, which is well moistened and seeds are sown on it
Into a snail
A strip 10-12 cm wide is cut out of the film, laid out on the table and 3-4 layers of toilet paper are laid on top. Her moistened abundantly and seeds are placed two centimeters from the top edge with an interval of 2-3 cm... After that, the strip is rolled up and fastened with tape. The finished snail is placed in a container with a small amount of water at the bottom. Then proceed in the same way as in the first option.
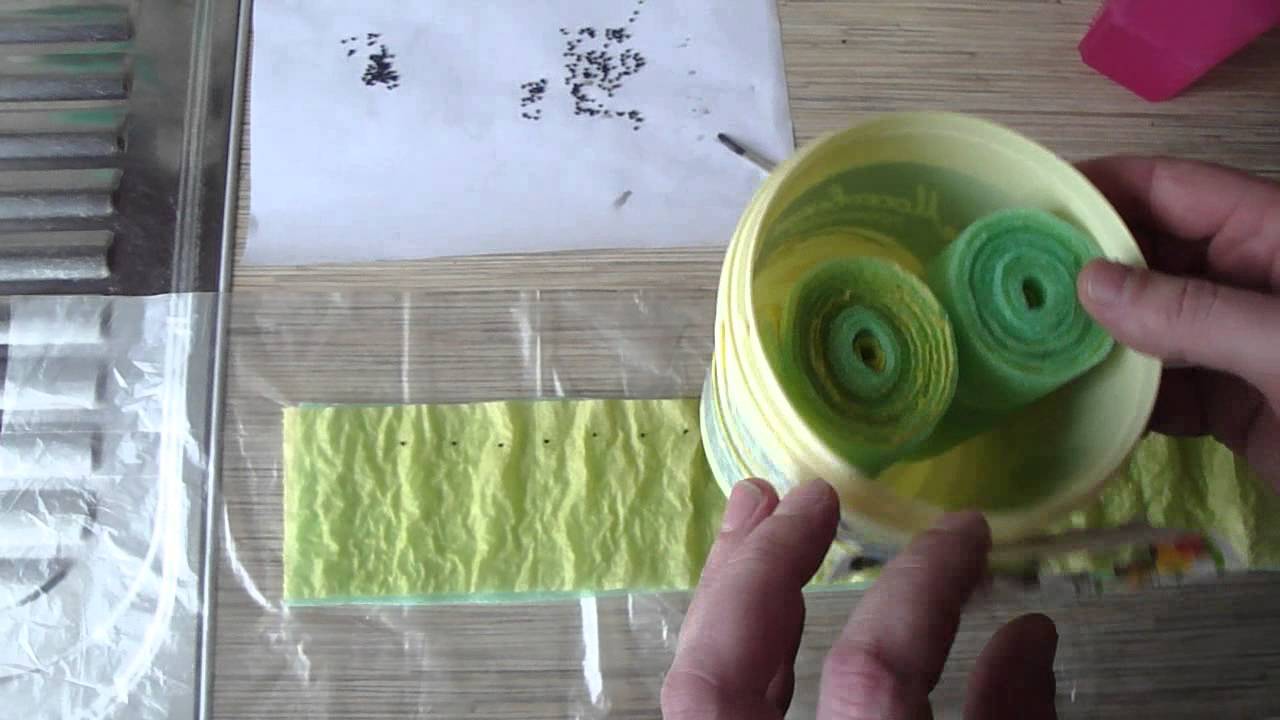
A strip 10-12 cm wide is cut out of the film, laid out on the table and 3-4 layers of toilet paper are laid on top
Into a snail with soil
This method is quite widespread in growing seedlings of various crops. It is as follows:
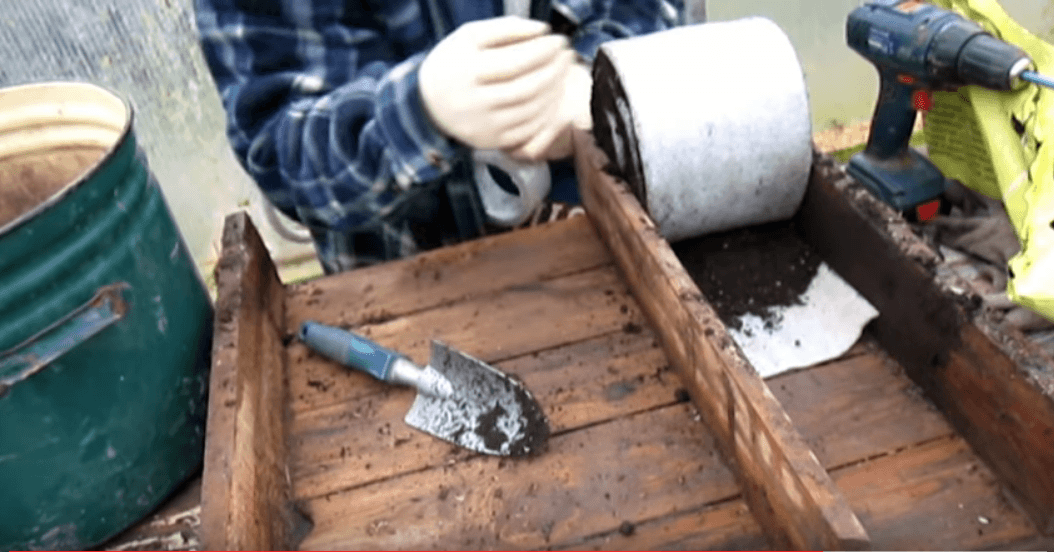
- As the base of the snail, strips of vinyl backing are cut under the laminate. The optimum thickness of such a substrate is 2 mm. The stripes are usually 15 cm wide and can be up to 4 m long.
- The strip is laid out on a flat surface and a layer of wet soil mixture with a thickness of two centimeters is poured onto it.
- Carefully fold the strip into a snail and fix it with tape. This process is conveniently carried out using a device that is easy to make from scrap materials. It is a box with a width equal to the width of the strip and 50-60 cm long. The height of the sides of the box can be 5-10 cm.
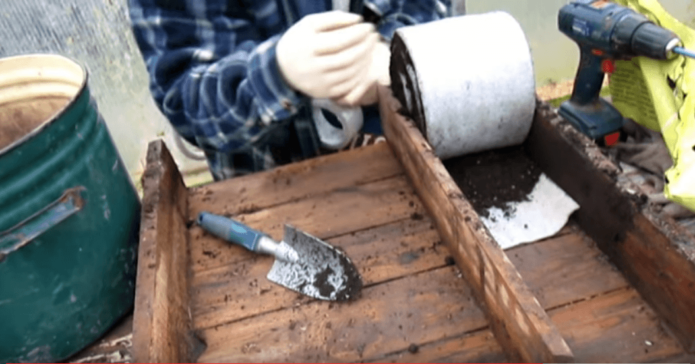
With the help of such a homemade device, it is convenient to roll large diameter snails.
- The finished snail is placed vertically and a part of the soil is removed from its upper part, forming a groove 1-2 cm deep.
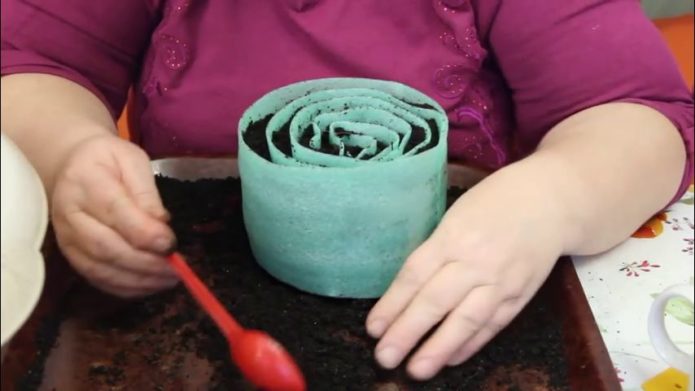
The finished snail is placed vertically and a part of the soil is removed from its upper part, forming a groove 1-2 cm deep
- Seeds are sown into the resulting groove and moistened.
- Place the snail in a suitable tray or deep plate and pour water into them to a height of 2-3 cm.
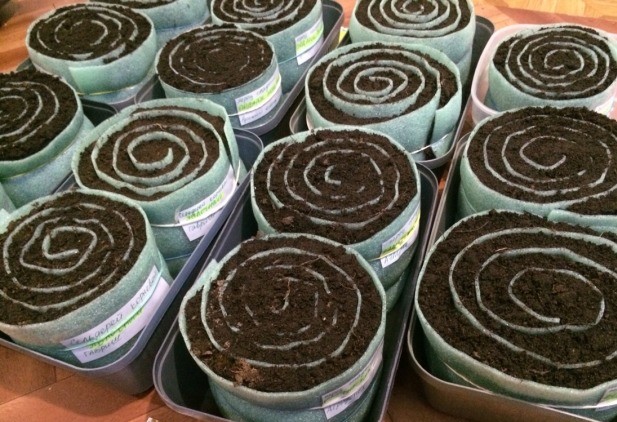
Snails with seeds planted in them are placed in trays with water
- The snail is covered with a bag and placed in a warm place. The package will need to be removed after the shoots appear.
- Arrange additional lighting using fluorescent lamps or special phytolamps. The duration of daylight hours should be 12-13 hours.

Video: snail rolling device
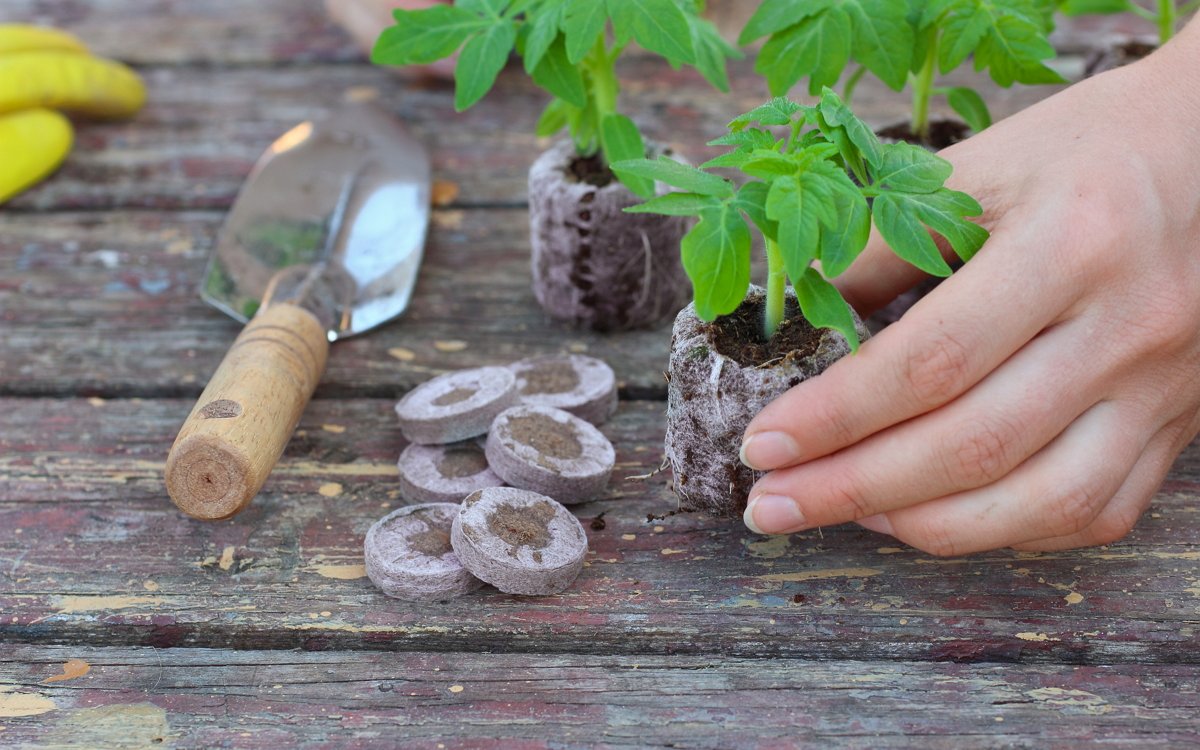
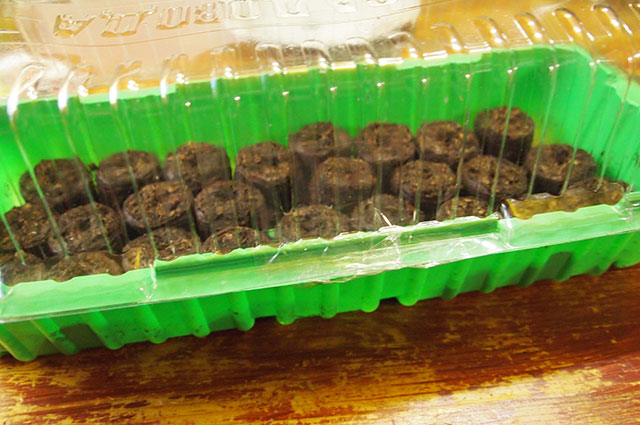
In peat tablets
In this progressive method, special peat tablets are used for planting, which can be bought at the store. They are made from pressed peat soaked in nutrients and trace elements. To maintain their shape, the tablets are placed in a mesh. The diameter of the product varies from 23 to 72 mm, and the height is about 2 cm. There is a depression in the center of the upper end for sowing seeds. The main advantage and advantage of the method is that the plant lives in it from the moment of sowing the seed to planting the finished seedlings in the ground. Moreover, the seedlings are planted together with the tablet, which eliminates trauma to the roots and ensures 100% plant survival. The seeding order is as follows:
- Take tablets with a diameter of 25-30 mm and soak them in water. After swelling, cylinders 7-8 cm high are obtained.

After soaking, peat tablets swell and increase in height to 7-8 cm
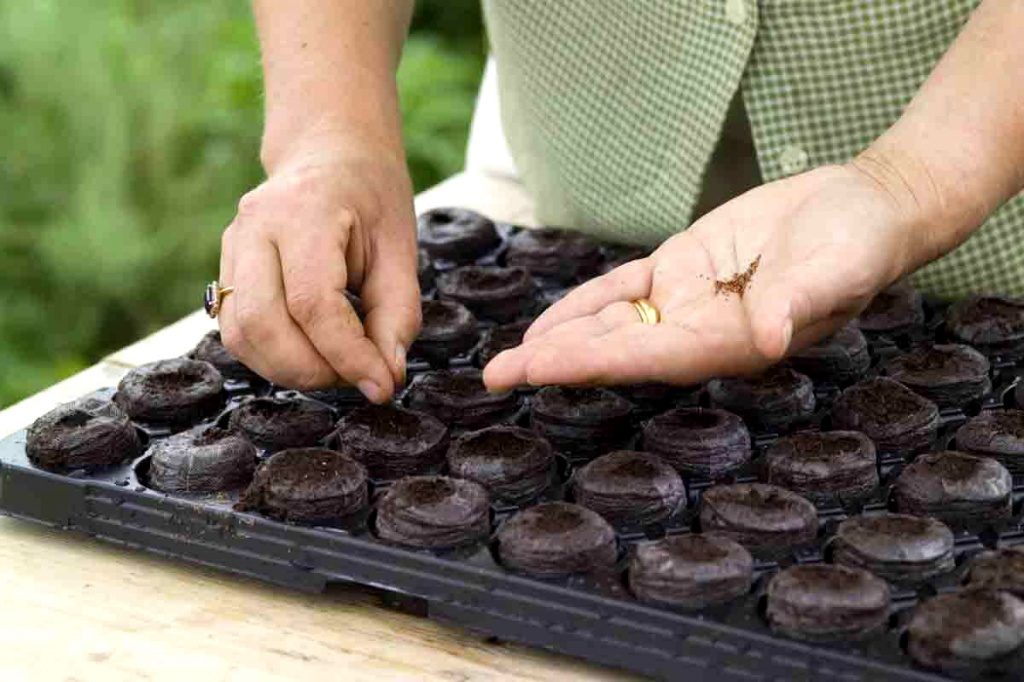
- Place the tablets in suitable trays or in special containers into which water is poured to a height of 1–2 cm.
- Three seeds are placed in tablets, after which they are moistened from a spray bottle.

Strawberry seeds are sown in swollen peat tablets
- Cover with a bag or container lid.
After sowing seeds into peat tablets, the container is tightly closed with a transparent lid
- Then they are looked after as usual.

Into coconut tablets
Made from coco peat (70%) and coconut fiber with flakes (30%) and soaked in nutrient solutions, these tablets are an even more advanced seedling growing medium. Unlike peat tablets, coconut tablets:
- do not sag and keep their shape better;
- absorb moisture faster;
- do not form a crust on the surface:
- have better air permeability;
- they do not decompose for a long time and can be used several times.
The order of sowing in coconut tablets is no different from sowing in peat tablets.
Video: review of peat and coconut tablets
Into boiling water
Of course, you don't actually plant seeds in boiling water. When they say so, they mean sowing seeds in soil watered with highly hot (about 80 ° C) water. It looks like this:
- The container is filled with nutrient soil.
- Pour it abundantly with hot water from a small watering can.
- Strawberry seeds are planted immediately.
- Cover them with black foil.
- Close the container with a lid and wrap it up with warm things (blanket, blanket, etc.).
- After 1-2 hours, the container is freed from insulating materials and placed in a warm place for seed germination.
High temperature softens the hard shell of the seeds, which accelerates their germination and increases the percentage of germination. Stratification and soaking are not necessary with this method.
Into the hydrogel
This is a new polymer material that has recently been used for growing seedlings. Its main feature is the ability to retain a large amount of moisture. Hydrogel granules are able to absorb water 300 times their own mass. This allows maintaining the required moisture level of the germinated seeds for a long time. For growing strawberry seedlings, it is better to combine the use of a hydrogel with nutrient soil. For sowing seeds, soaked hydrogel granules are poured on the bottom of the container with a layer of 3-4 cm, a layer of soil mixture 0.5-1 cm thick is poured on top, and the seeds are sown in the usual way.
Video: sowing strawberry seeds in a hydrogel
Growing strawberry seedlings, although not entirely simple, is quite affordable for a novice gardener. Having mastered one of the methods he liked most, he can always provide himself with planting material in the required quantities.