To plant, transplant, plant - the prefixes of the verb are different, but the essence is the same. And it consists in creating a new strawberry bed in different ways. Regular renewal of strawberry plantings contributes to their yield.
Content
Why transplant strawberries
Strawberries (and if you speak correctly, these are strawberries) - a perennial plant, it seems, what is easier, planted and forgot. And all worries come down to watering, weeding and top dressing. But after a few years, uncontrolled plantings for some reason begin to give a meager harvest, the berries are gradually becoming smaller. From the old strawberries, perhaps, only the taste that causes nostalgia remains. So that the transplant does not seem like a meaningless undertaking, we will briefly consider for what reasons you have to do this.
Thickened beds
For too long, strawberries cannot sit in one place. Some give her a period of 3 - maximum 4 years for this, others - 5-6 years. During this time, the bush grows, overgrowing with "children" - young bushes that form on the main root around the mother bush. Every year the number of these increments increases and each plant begins to take up more space. Gradually, the bush seems to move apart, the mass of leaves increases in diameter, and one fine day you realize that it's time to transplant the strawberries.
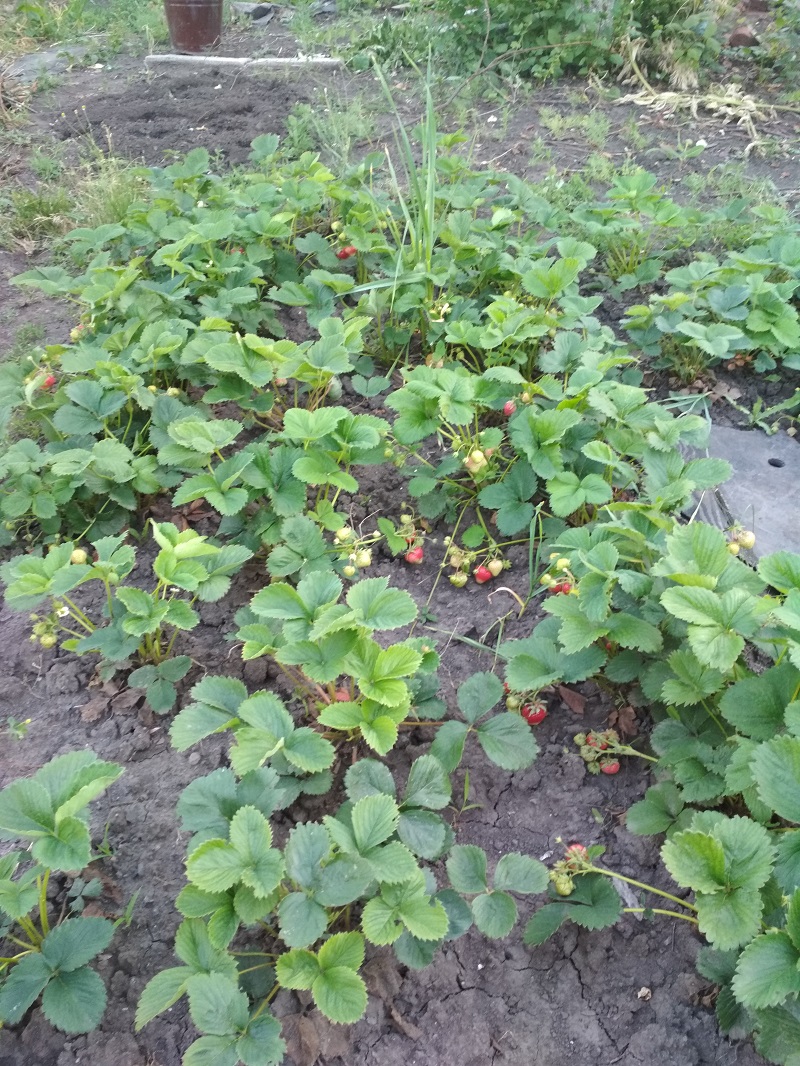
Overgrown bushes and chaotically rooted sockets - this is how a strawberry garden looks like, which has not been touched for 3 years
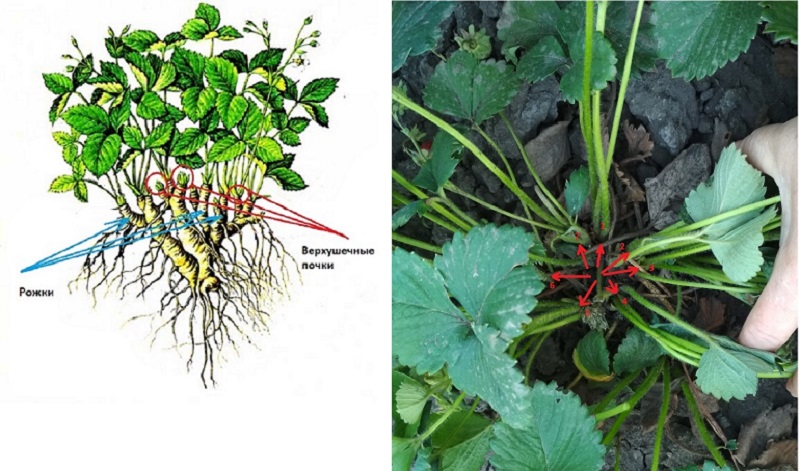
On the left is a diagram of an overgrown strawberry bush with horns and apical buds. Right - top view of a strawberry bush with six newly formed bushes on the main root
Newly formed bushes that already have their own root system and are intended for transplantation are separated from the main root, which is considered waste material.
Planting material update
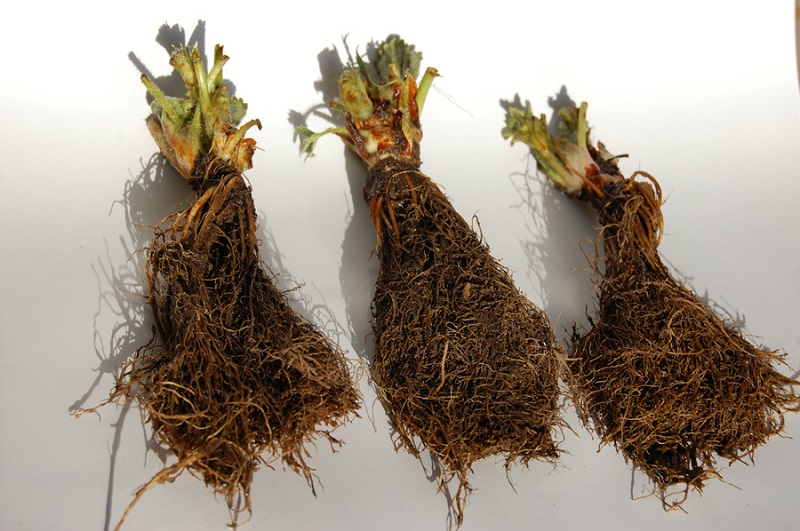
Each time, replanting the strawberry shoots or rosettes that form on the whiskers separated from the main bush, the plantings are rejuvenated. Despite the fact that transplanted bushes do not always give a crop in the same year, it is necessary to update the beds. After all, what is an old strawberry? This is a bare root (over time it sticks out from the ground), rough, lignified, often affected by rot or mold.
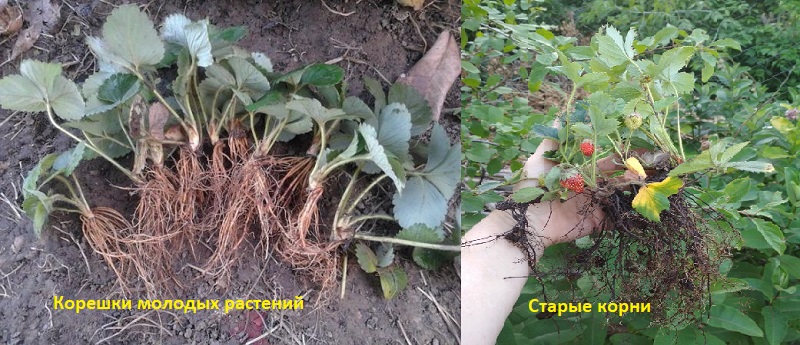
The root system of young and old strawberries is unlike day and night
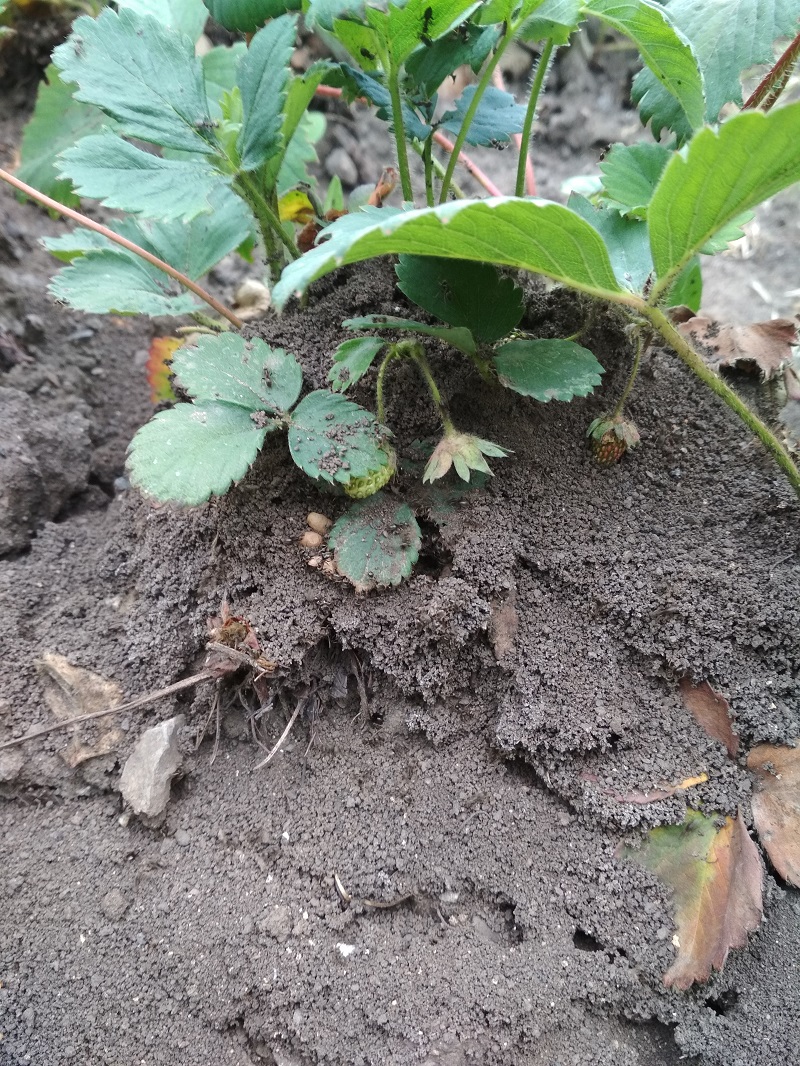
A luxurious anthill appeared under an old strawberry bush
The old bush has small leaves and a few miniature berries. It is unsuitable for obtaining planting material: it does not give a mustache, and new horns do not form on it. And you can't look at an 8-9-year-old strawberry bush without tears, next to younger plants it looks just touching and pathetic.
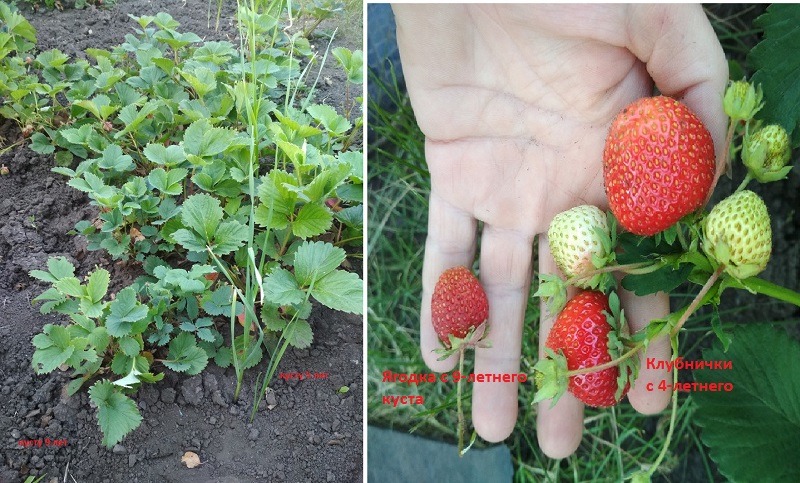
Old strawberry bushes are small and the berries give small
When strawberries are transplanted
It is customary to transplant strawberries in two stages - in the spring and at the junction of summer - autumn, of course, in each region the time frames are shifted. If in the sultry South, the transplant can begin at the end of March, then in the middle lane this will happen a month later. In the South-East of Ukraine this year, after the warm April days, a harsh May began, so the transplanted strawberries came to life only towards the end of May. In the Urals, they begin to study strawberries at the end of May, and autumn transplants, in general, are contraindicated. Any of these seasons can bring a “surprise”.
The weather in spring is unstable: here you have both frost and dry winds, so the seedlings can experience tremendous stress. A layer of mulch or agrofibre will save the beds from drought. Temporary mini-greenhouses made of film stretched along the beds on wire arcs will protect from frost. Strawberries planted in spring only yield the next year. On some bushes, of course, flower stalks, and even a mustache, can appear, but it is better to pluck them. Then the next year the strawberries will be in full force: they will form a strong root lobe, build up the green mass, and will be able to "bear" a good harvest. Is there a good moment with a spring transplant? Yes, this is the minimum of pests who are still waiting for warm days in their wrecking hiding places. No aphids, weevils and caterpillars will prevent the plant from gaining strength.
A person is given more time to transplant at the end of summer than in spring. Someone starts doing this at the end of August, and in regions with a favorable climate, this can be done in September and even in October. By this time, the weather has more or less stabilized, there is an opportunity to prepare a sufficient amount of mulch - straw, hay. By this time, the voids after the spring transplant were clearly visible in the garden bed, which are filled with new bushes. Starting with the first frost and throughout the winter, strawberries suffer more from a lack of moisture than from low temperatures. Therefore, before the onset of stable cold weather, strawberries are watered abundantly, and for the winter they are covered with leaves, spruce branches, spunbond, and snow.
Planting material for each season has its own specifics:
- you won't be able to transplant a mustache in the spring, because they only grow back in summer
- in spring and summer, seedlings obtained from seeds can be planted;
- frigo strawberries (rosettes with leaf rudiments and developed root lobes, which are stored in special rooms in winter at sub-zero temperatures and a certain humidity) are not planted in autumn.
Preparing a strawberry bush for transplanting
There are two types of strawberries for transplanting:
- With an open root system (ACS) - this is a frigo strawberry, the horns obtained by dividing the bush, often the roots are bare when inaccurately digging in the socket. Bare roots are recommended to be disinfected and treated with growth stimulants before planting. The survival rate of seedlings with ACS is not one hundred percent, but with proper care, losses are reduced to a minimum. If planting is postponed for 3-5 days, the seedlings are stored in a cool, dark place; the roots are wrapped in a damp cloth, wrapped in cellophane or dipped in water.Of the 30 bushes planted this spring, 7 have disappeared due to drought (one and a half rain from the beginning of March to this day, June 20). With a shortage of mulching materials, even regular watering did not save, but the remaining 27 bushes are alive and well to this day, I think this is a good result.
- Seedlings grown in cups, cassettes, bags or sockets successfully dug out with a solid lump of earth have a closed root system (ZKS). Survival rate strawberries with ZKS are absolute, they do not need additional processing and stimulation.
Dividing the bush
When strawberry horns are used for transplanting, the first step is to choose a healthy, well-grown bush. Then the following actions are sequentially performed:
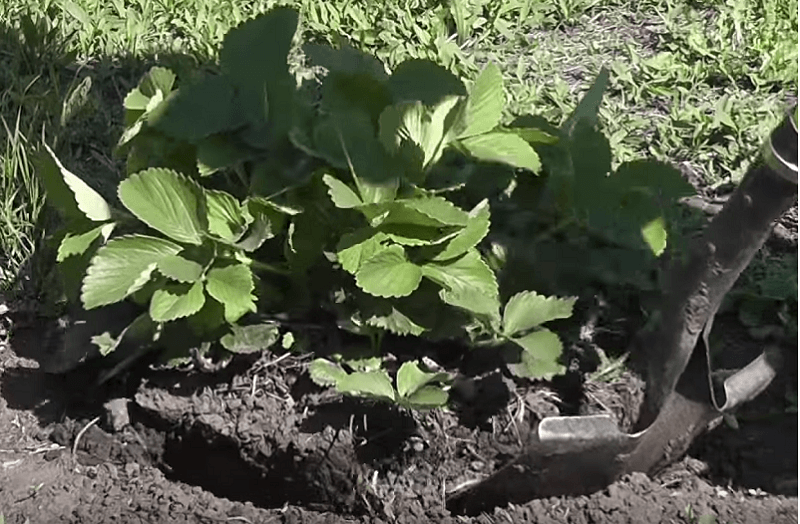
- The bush is dug in from all sides to the depth of a shovel bayonet, so as not to damage the roots, taken out with an earthen lump.
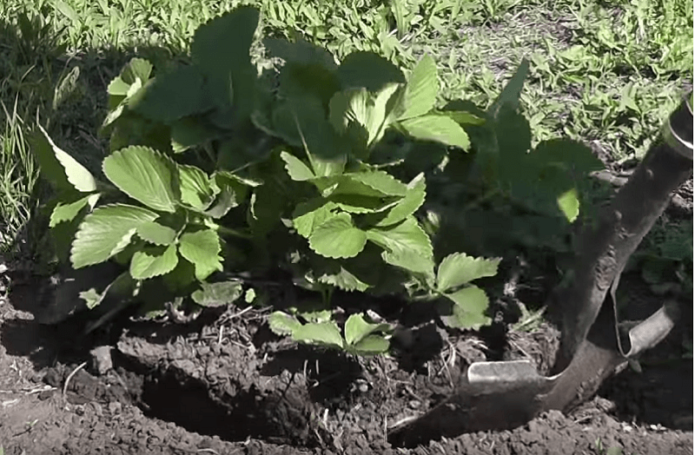
A strawberry bush is dug from all sides to the depth of a shovel bayonet
- The bottom dry leaves and twigs are cut off, the roots are freed from the ground, patting the earthy coma with their palms. The same operation can be carried out directly in the garden.
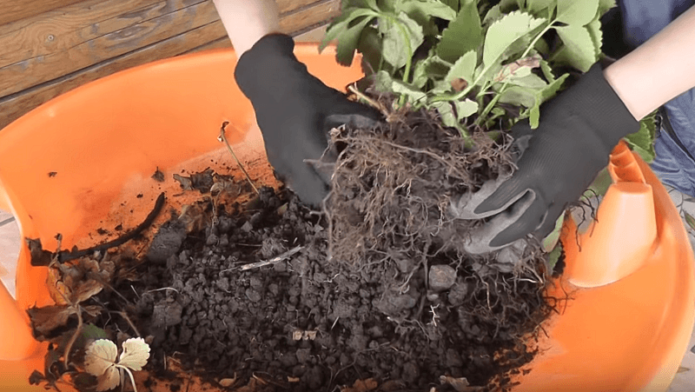
The soil from the roots of the dug bush is carefully removed so that each horn becomes visible.
- The bush is dipped in water by its roots, rinsed to remove the remains of the earth.

Water helps to completely wash away the soil from the roots
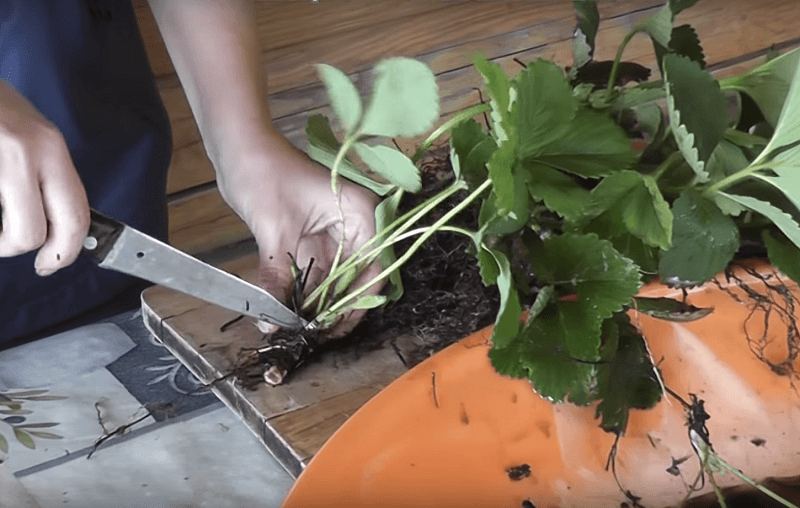
- Some horns are detached, so to speak, in the process. The rest are cut from the main root with a knife so that each horn has an apical bud and roots.

The horns are very fragile, so it is better to cut them off from the rhizome with a knife
- Since the horn is cut from the main root, fragments of old roots may remain on it (the horn). They are cut off with scissors, leaving young roots of a light color. From the ground part, a central bud and two leaves are left. The leaf plates are cut in half with scissors - in the future, this technique will reduce the evaporation of moisture and will contribute to the early survival of the plant.

Before planting, part of the leaves is removed from the seedling and the roots are shortened
- The roots are disinfected. To do this, prepare a solution of 1.5 tbsp. tablespoons of salt and 0.5 tsp of copper sulfate, dissolved in 5 liters of water. The roots are in a disinfectant solution for 15 minutes, after which they are washed with running water. Various fungicides are also used for disinfection - Fitosporin-M, Fundazol, in accordance with the instructions. A honey solution (1 teaspoon of honey per 1 liter of settled water), in which the roots are soaked for 2 hours, will become a good prophylactic against diseases.
- As an option, the roots are treated with growth stimulants - Epin, Zircon.


If the seedlings have too long roots, they stick together into an icicle, it is difficult to straighten them in the hole (a plant with bent roots grows poorly and does not bear fruit). To shorten the root lobe, the plant is taken into a fist under the apical bud, the ends of the roots that look outward are cut with shears or scissors. The shortened roots are given freedom of action and are slightly spread out. In this form, they will take the correct position in the hole, and the earth will be evenly distributed between them.

Palm width indicates optimal root length
Do not ignore the old method - before planting, dip the root lobe in a clay-manure talker. For its preparation, take 3 parts of clay and 1 part of manure, dilute with water to a state of thick sour cream. Clay sticks pretty well to any surface (have you ever tried to wash clay off shoes, hands? It takes a long time to wipe it off). Also on the roots, the mixture will hold tenaciously, prevent them from drying out and provide nutrients for the first time.
Outlet transplant
A rosette is a forming bush on a strawberry whisker, which is rooted directly in the ground or in a glass.
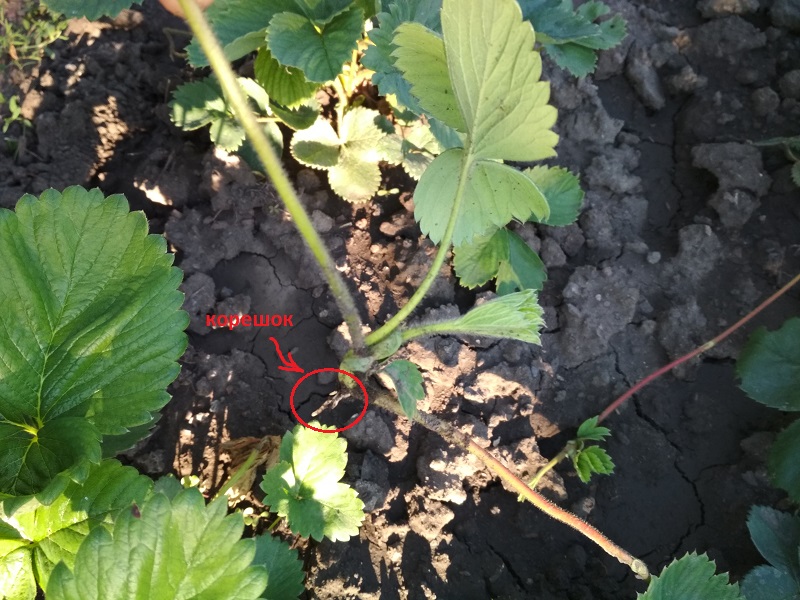
A rosette on a thin mustache looks like a decoration
- A glass filled with a mixture of earth and compost is placed under the outlet with spiked roots, half buried in the ground (this is how the earth dries out more slowly).
- The rosette is placed on the surface of the substrate in the center.
- I fix the mustache on both sides of the outlet (before and after it). I used paper clips for this, unbending them and leaving a hook on one side, which pressed the mustache to the ground. The rosette should lie on the surface of the ground, later the plant itself will catch on the roots.

The fixed mustache holds the outlet in one position and it quietly takes root
- Mini-containers are watered regularly, if it is very hot, then up to twice a day.
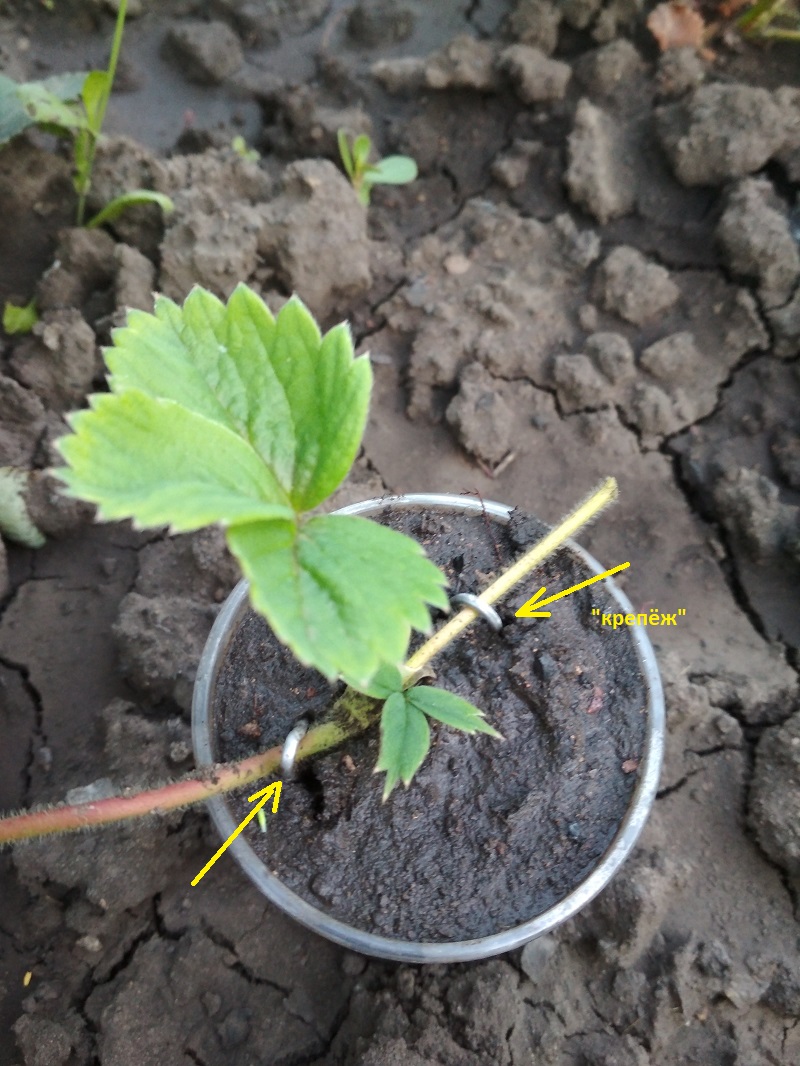
Within a month, the seedlings take root, thick long roots are clearly visible through the transparent walls. Now you can cut off small bushes from the mother plant and plant in a permanent place. This method of transplantation is absolutely non-traumatic and the survival rate is 100%.
How to plant frigo strawberries
The trick of this seedling is that you can set a fruiting date for it. Frigo strawberries yield a harvest one and a half to two months after planting in the same year. For example, a frigo planted under spunbond on a "fat" bed at the end of March will yield a harvest in May, isn't it a miracle? (Maybe super-early strawberries in supermarkets are not only "chemistry", but also frigo?). Based on this logic, there is no point in replanting frigo at the end of summer. The roots of strawberry frigo are very long, so before transplanting to a permanent place, it makes sense to trim the tips so that they fluff up and sit comfortably in the hole.
These outlandish panicles are frigo strawberries
Seed strawberry
This method is quite time consuming and requires caution - young strawberry shoots are extremely fragile and weak. But seedlings from seeds are completely healthy without any fungal and bacterial infections. Strawberries are sown (sounds unusual, doesn't it?) In late January early February. In this case, the usual varieties produce a harvest by the end of summer. Repair strawberries can be sown later, in early March, and at the same time also get berries by the end of the season. If you sow strawberries 1–2 months later, the bushes are planted in open ground in September - October and left to winter. Seedlings that did not have time to grow hibernate in pots.
Strawberry seeds are very small and tightly similar, so it is important to observe three conditions for their germination:
- Seeds germinate in the light, so the container must be supplemented.
- Place 2-3 seeds in one hole for reinsurance.
- The seeds are not buried, otherwise they may bite, but not break through the layer of earth.
How to sow strawberries
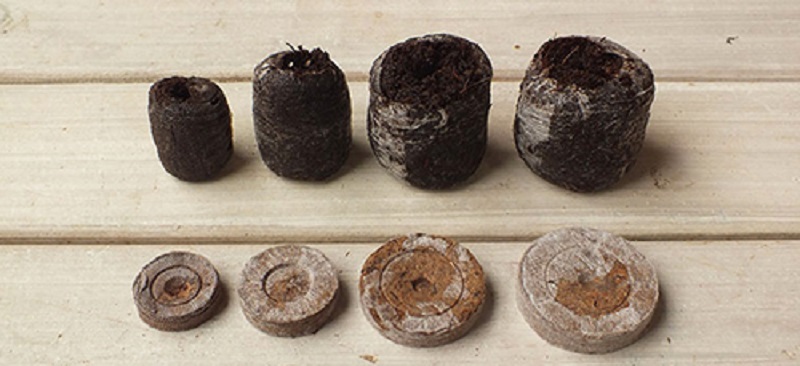
Each gardener has his own proprietary method of pre-sowing seed preparation, soil selection, planting technology. We will tell you about the most affordable and easy way, given the busyness or inexperience of many gardeners. Ready-made soil is purchased in a store, it is crumbly, homogeneous, with all the necessary trace elements and, most importantly, disinfected. For containers, peat tablets are used - an ideal container for a fragile sprout. With the help of the pill, you will successfully bypass the pick - transplanting a strawberry "teen" with a root lobe into a larger container.
A simplified sowing option looks like this:
- The seeds are hardened - they are laid out on a damp cloth, a cotton pad and placed in the refrigerator for 2 weeks, periodically moistening. Then it is heated on a battery for 12 hours.
- Seeds on a damp cloth are placed in the light before pecking.
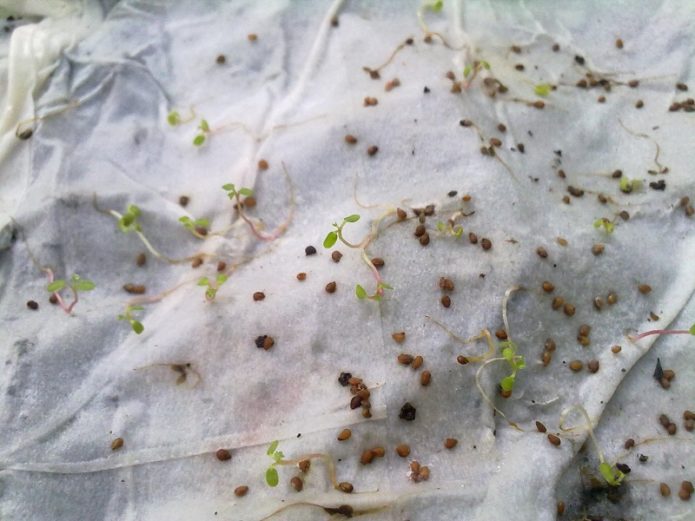
Small strawberry seeds, tender sprouts
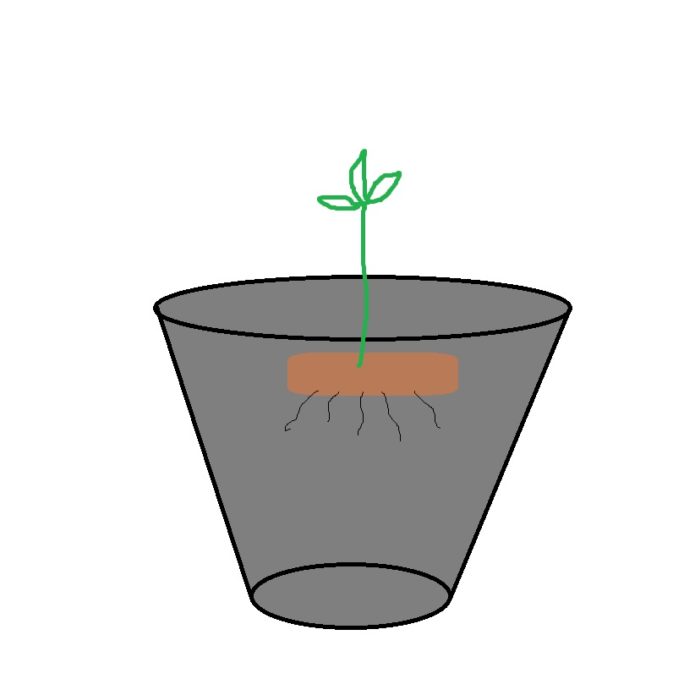
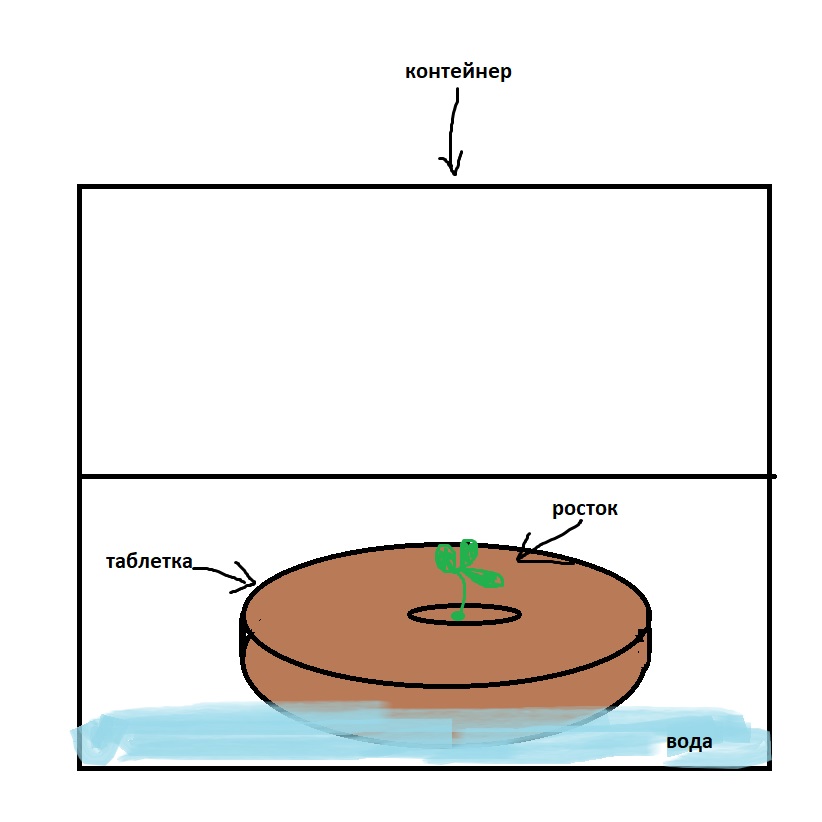
- The peat tablets are placed in a plastic container filled with warm water, where they swell. I put the seed on a dry tablet, when it absorbs water, the peat itself, as it were, envelops the seed.

Peat tablets are, in my opinion, the most convenient containers for growing strawberries from seed
- Tablets in a container are placed in the light, covered with a transparent lid, for example, from a cake. It turns out a kind of mini-greenhouse. The air temperature should not be lower than +20 ˚C.

This is what a strawberry sprout looks like in a peat tablet inside a transparent container.
- In the phase of two true leaves, the shoots dive.And you pour the prepared soil into pots with a diameter of 5–8 cm, make a depression, and put a tablet there.
- With a frequency of 1 time in 10 days, seedlings are fed with any ready-made fertilizer, which can also be bought in a specialized store.
A peat tablet is placed in a large container - the most convenient and fastest pick
- A week before planting in the ground, the seedlings are gradually hardened: the room is ventilated or containers are taken out onto the balcony. The temperature outside must be at least +10 ˚C.


Transplanting strawberries at home
If there is no vegetable garden, you can plant strawberries at home, for this, it turns out, there are many convenient places - window sills, balconies, loggias, terraces. For home use, spring planting is cultivated with seeds, rosettes, dividing the bush. The great advantage of such an inconvenient growing method is that the container can be easily hidden from bad weather, it can extend the daylight hours. And the possibilities of equipping the original beds are almost endless. Each bush requires a container 15 cm high and wide. However, there are a huge number of containers on sale specifically for growing on the balcony - ordinary and multi-tiered pots, boxes.
Preparing a new place for transplanting strawberries (strawberries)
The garden bed is prepared in 2–3 months, that is, in the fall they are preparing for the spring transplant, and in the spring - for the autumn one. Fresh organic fertilizers are contraindicated for strawberries, they provoke the occurrence of various rot. Therefore, for every 1 m2 apply 6-8 kg of rotted manure or leaf humus + superphosphate (50 g) and potassium fertilizer (20-30 g).
A new place for strawberries must mean exactly a new place. If in the spring you clear the garden of old strawberries, fertilize, then this place for young seedlings will not become new. Green crops, potatoes can be planted, but strawberries are not. Strawberries grow well after lettuce, legumes, sorrel, onions, garlic, and even after early ripening potatoes. After it, half a month before transplanting strawberries, humus, compost are introduced into the ground for digging, and watered with a solution of potassium humate.
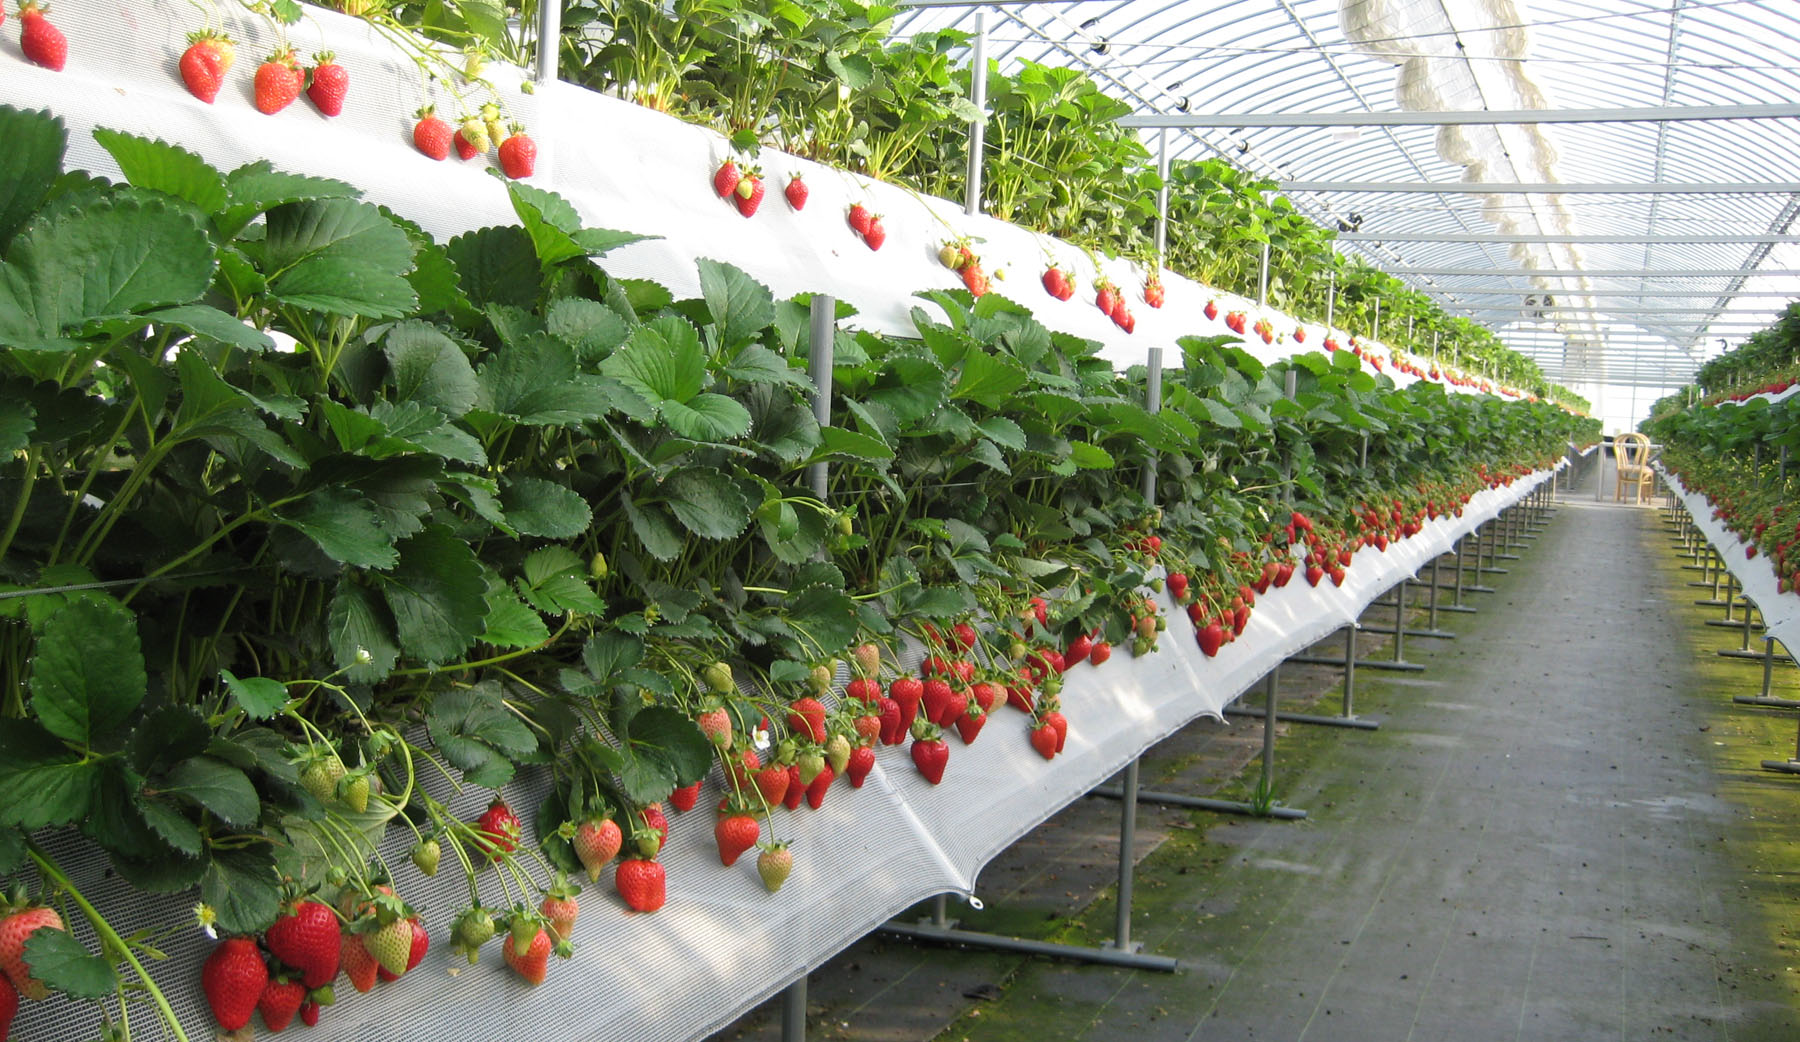
Strawberries look amazingly beautiful in beds covered with agrofibre - on a flat surface, the bushes seem to be painted, and the berries remain dry, clean and easy to pick. It is difficult to describe the device of such a bed for someone who saw them only in the picture. To me, for example, this method of landing still seems fantastically difficult. Let's trust a specialist who will show you in detail how this is done.
Video: how to lay agrofibre on a garden bed
Landing rules
The root collar of the bush should be in the same position as before transplanting - on the ground. If it is below ground level, it will float with earth, new leaves will not be able to straighten and the plant will die. Above the ground level, the root collar, and behind it the root, will dry out, weakening the plant, and in winter, especially when snowless and windy, such a bush will freeze faster than others.
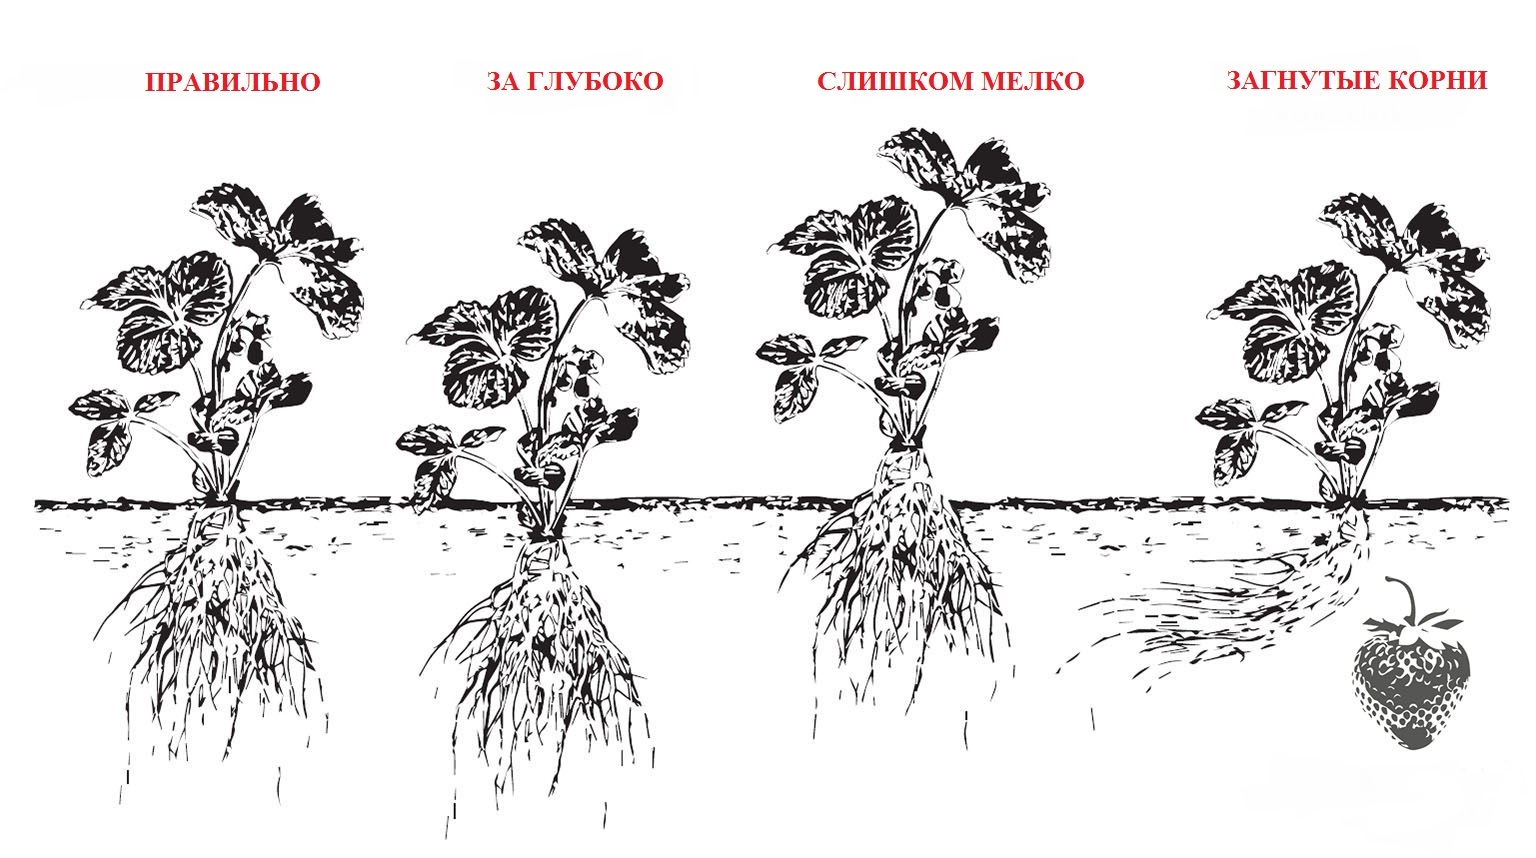
The growth of a strawberry bush depends on the correct position of the root collar above ground level.
A stick will help to plant strawberries correctly. Dig a hole, put the earth to one side, put the stick on the edge of the hole, like a bridge. This will be a reference point, a kind of level at which the heart or central bud of the seedling will be located.
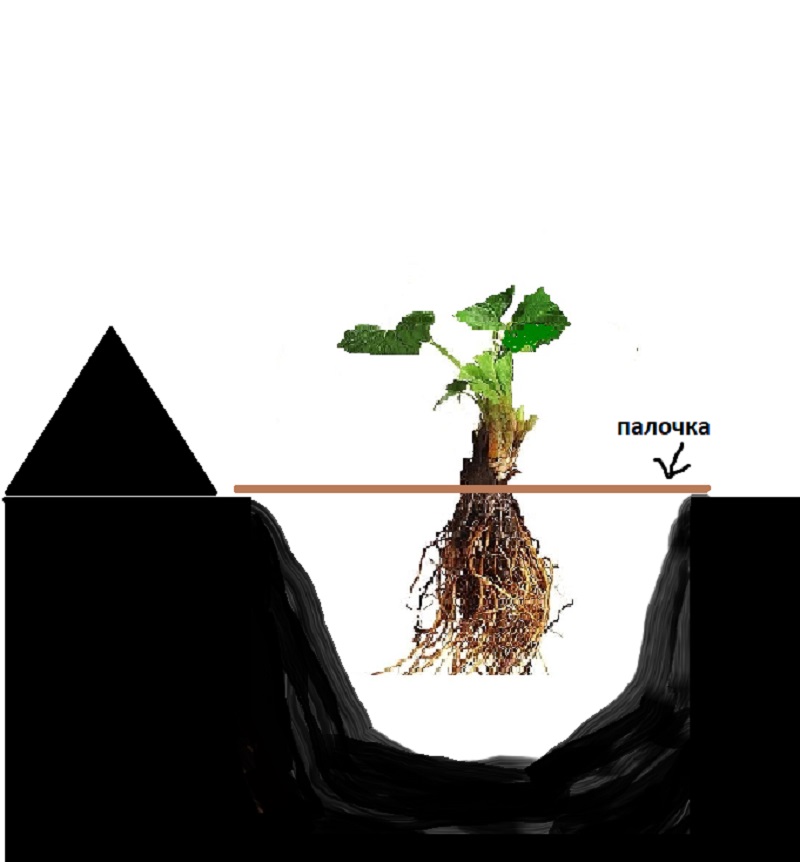
This primitive tool will help you plant your bush at the correct depth.
Planting care
During the first two weeks, the ground under the bushes should be constantly wet, but not to a swampy condition. A mulch layer over the entire surface of the bed will not only help regulate the optimal level of soil moisture, but also keep the berries clean and dry. During fruiting, in order to preserve the rich taste of berries, watering is carried out after each collection of berries, with a two-three-day break until the next batch ripens.
Throughout the growing season, the soil is loosened, especially after heavy rains.If this is not done, the earth will be compacted, its aeration will be disrupted and the plants will begin to suffocate without oxygen. A weak plant becomes vulnerable to disease.
For top dressing, nitrogen fertilizers are used in early spring, phosphorus fertilizers - during the formation of peduncles. When berries begin to set, the bushes are fed with complex fertilizers - special (Growing, Fertika) or universal (Good Power, Universal). In autumn, potash fertilizers are applied to the beds, which are responsible for the health of the plant and the future harvest.
Any part of a strawberry - a seed, a fragment of a bush, a rosette, can give a new full-fledged plant. And it depends on the transplantation period whether the harvest will be this year or next.